FR34KO
Member Since 25 Feb 2011Offline Last Active Jul 16 2022 05:52 PM
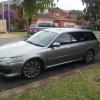
reallllly want a 07/08 fozz!
Updated 04 Mar · 3 comments

 Find content
About Me
live for snowboarding. Go camping with mates/family friends a fair bit. Love cars, obv.. 
Community Stats
- Group Members
- Active Posts 2461
- Profile Views 8949
- Member Title GRANDMA's BOY
- Age 34 years old
- Birthday June 30, 1991
-
Gender
 Male
Male
-
Location
Peakhurst, Sydney
-
Interests
SNOWBOARDING.
User Tools
Friends