Jump to content


Photo

DIY Steering Wheel, Airbag and Detonator removal


  • Please log in to reply
5 replies to this topic

#1 FOZ_XTC

FOZ_XTC

    Trusted Member

  • Members
  • PipPip
  • 158 posts

Posted 06 March 2015 - 07:37 PM

I've written up a few DIYs for other forums, i've been drooling over your subies for a while now so it's time to give some love back :lol:


so this is the removal of the steering wheel, the electronic controls, the airbag, the airbag detonator and putting it all back together again. This is for the Forester SH9, 08+ WRX and 03-09 Liberty...

it may also be the same with other models, but I do not know.

 
BEWARE: you are f@cking with your steering wheel and you’re also disconnecting an explosive charge. If you are not capable or comfortable doing this then DO NOT DO IT.
 
You will need:
 
T30 (Torx/Star) long bit
Phillips screwdriver
17mm socket
Other tools as required
 
Step 1: Airbag removal
 
   1.1 Disconnect the battery earth.
 
   1.2 Apply foot to Brake Peddle for at least 20 seconds.
 
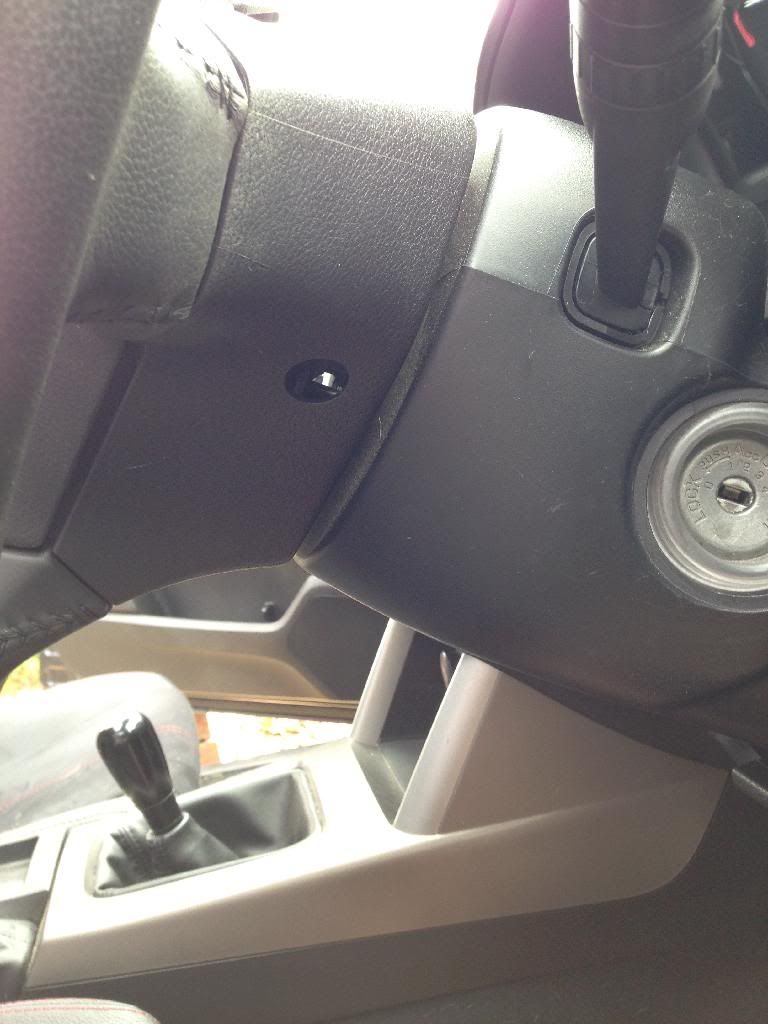
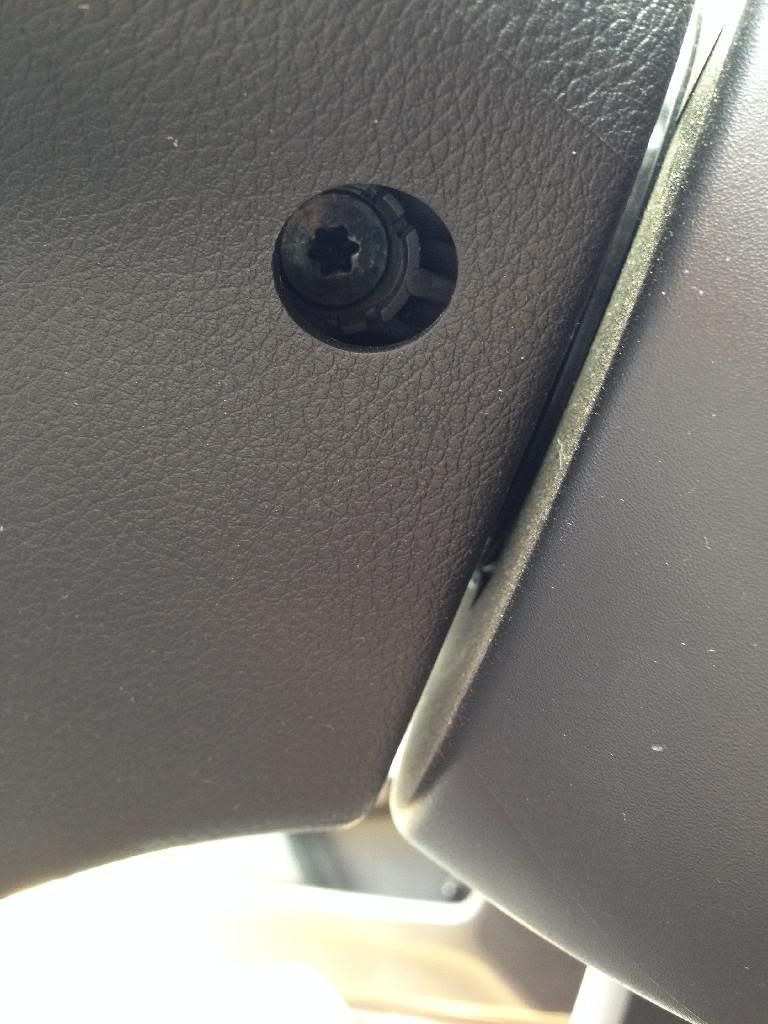
   1.3 Loosen T30 bolts from airbag cover, left and right.
 
2170CBD8-FFB8-4BCA-A149-415990F50320_zps
 
B35107DF-4DD3-4A2D-BCE8-28B1EB46430B_zps
 
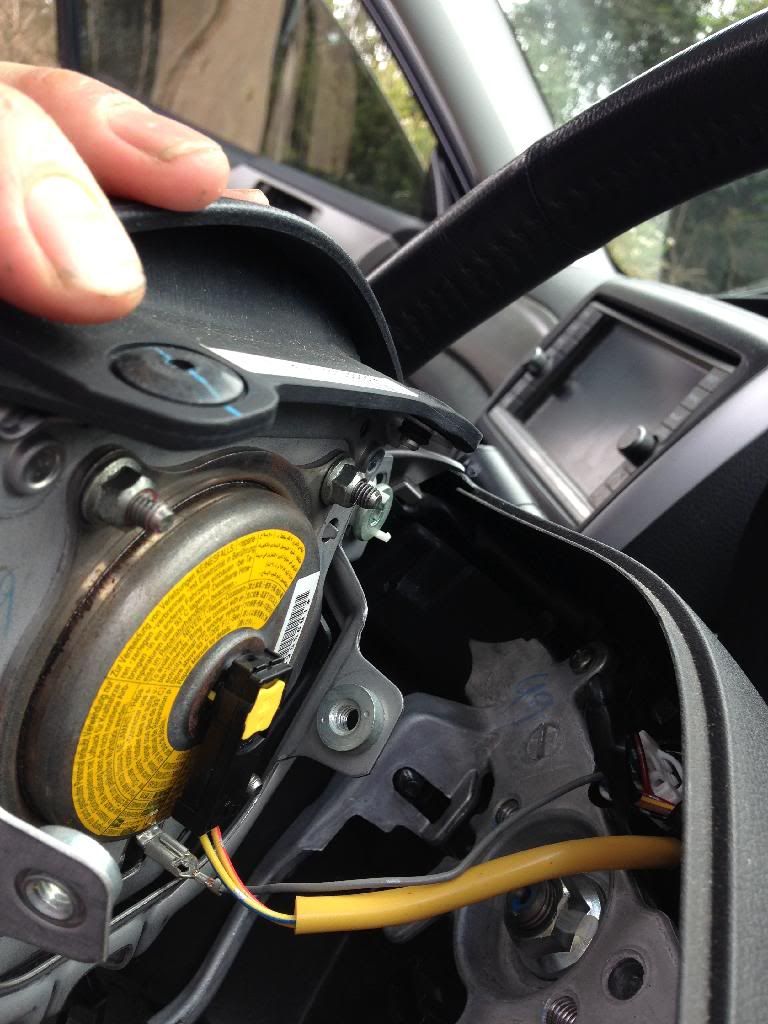
   1.4 Slowly remove the airbag, exposing the wiring harness and earth.
 
8D13D563-23C9-46AE-8D4E-4354ABF0EFF9_zps
 
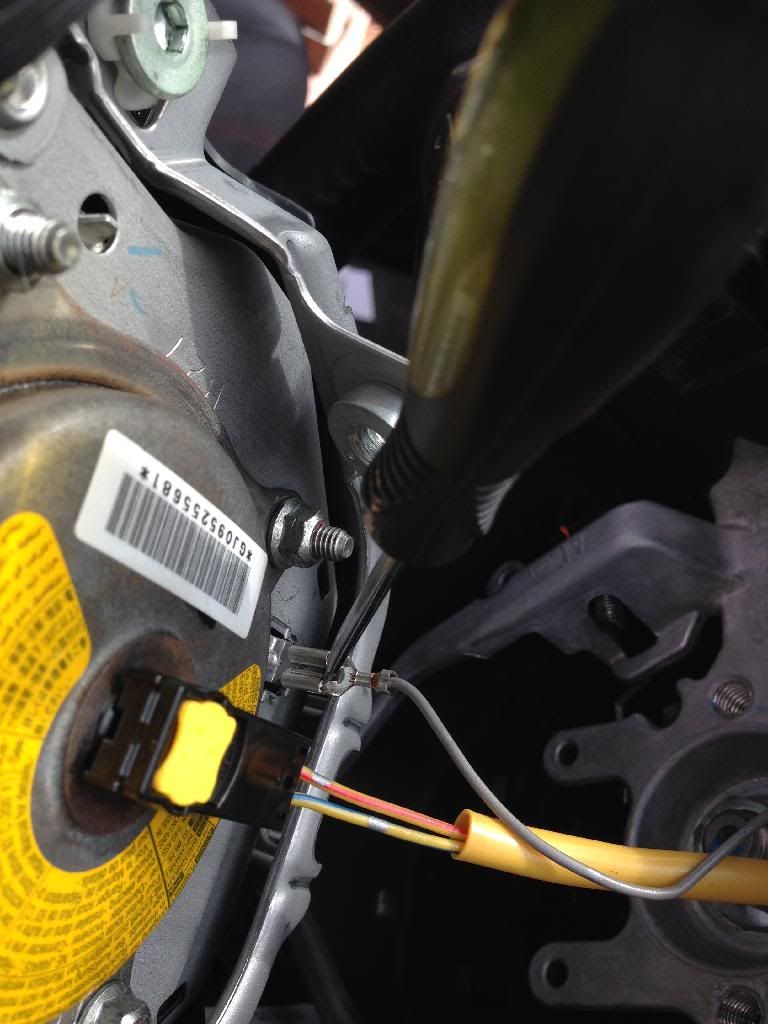
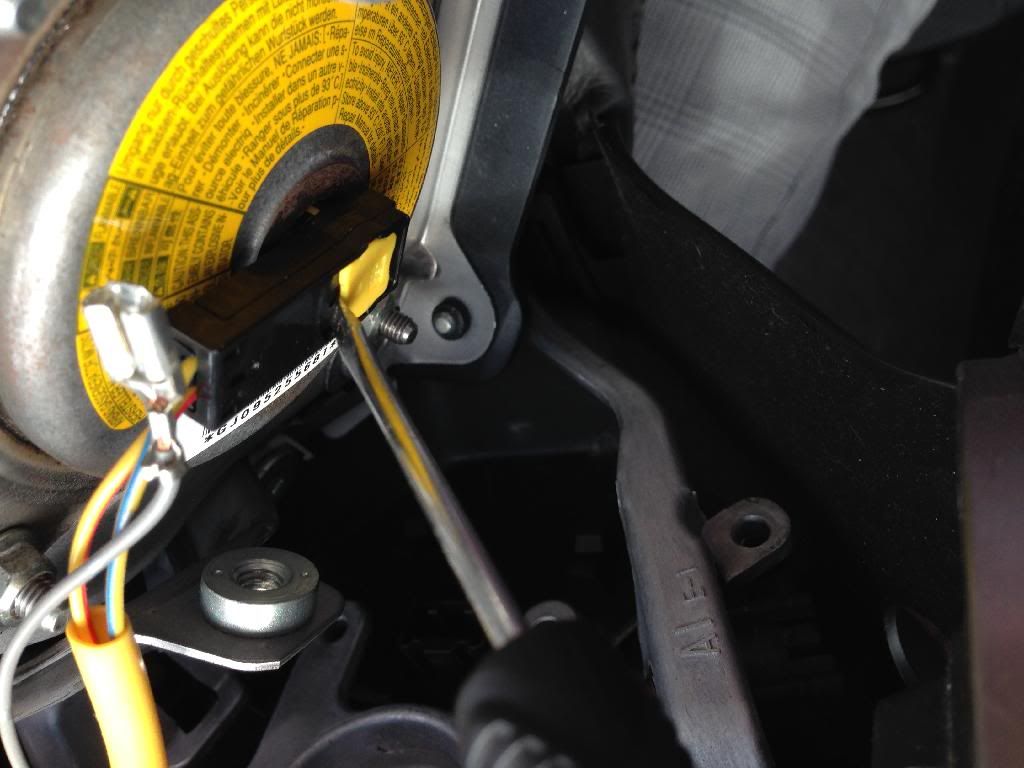
   1.5 Remove earth.
 
764865EB-7832-43AA-B453-D6F8B6AE49FE_zps
 
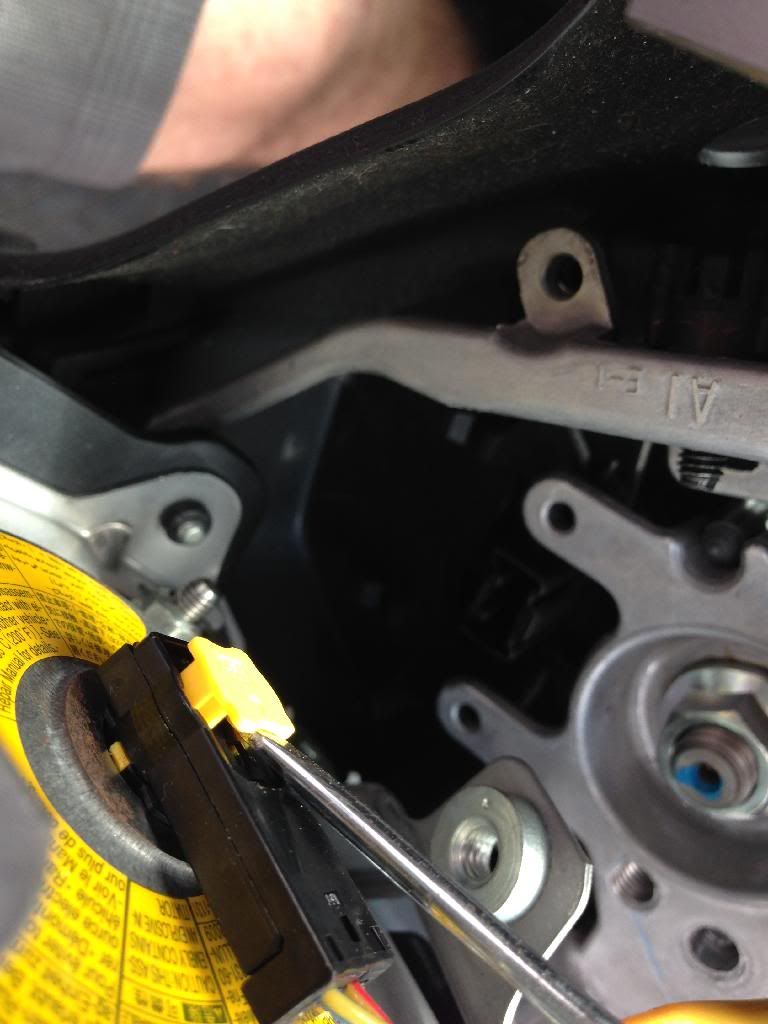
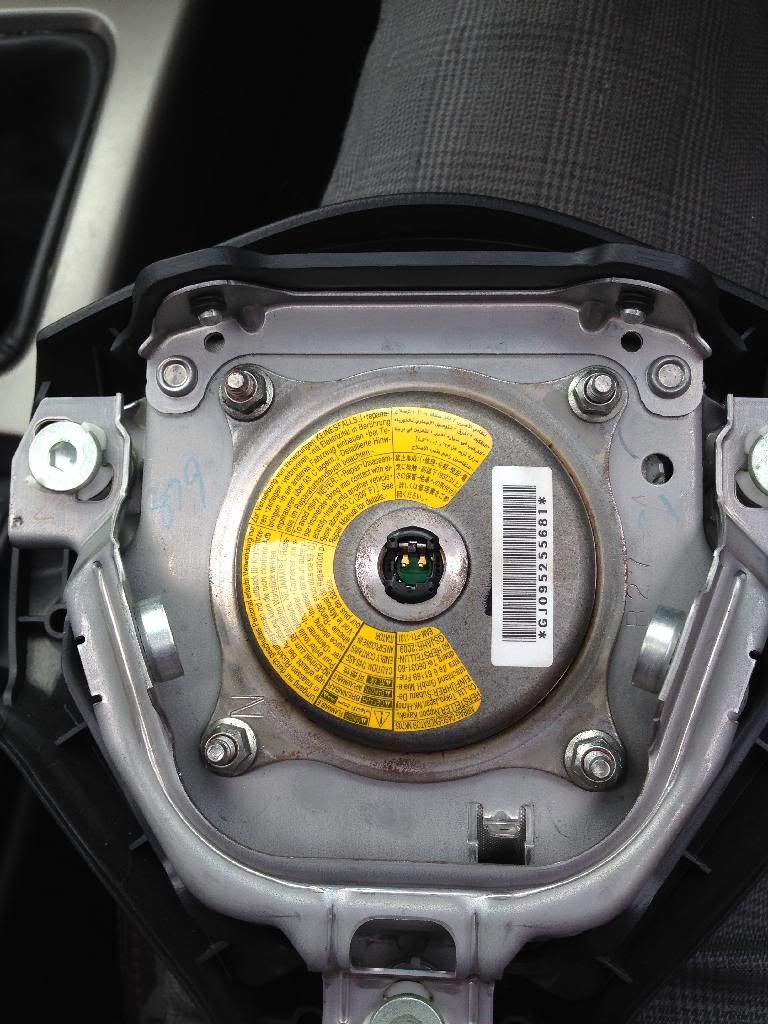
   1.6 Remove airbag harness from airbag detonator.
 
F7774E47-7575-4C64-B76A-506DE80B72DB_zps
 
C6455A2A-1AD7-4C6D-8B97-625BAE3F7C1D_zps
 
6BE0642A-8046-4324-A3EB-184DCB0F3BCE_zps
 
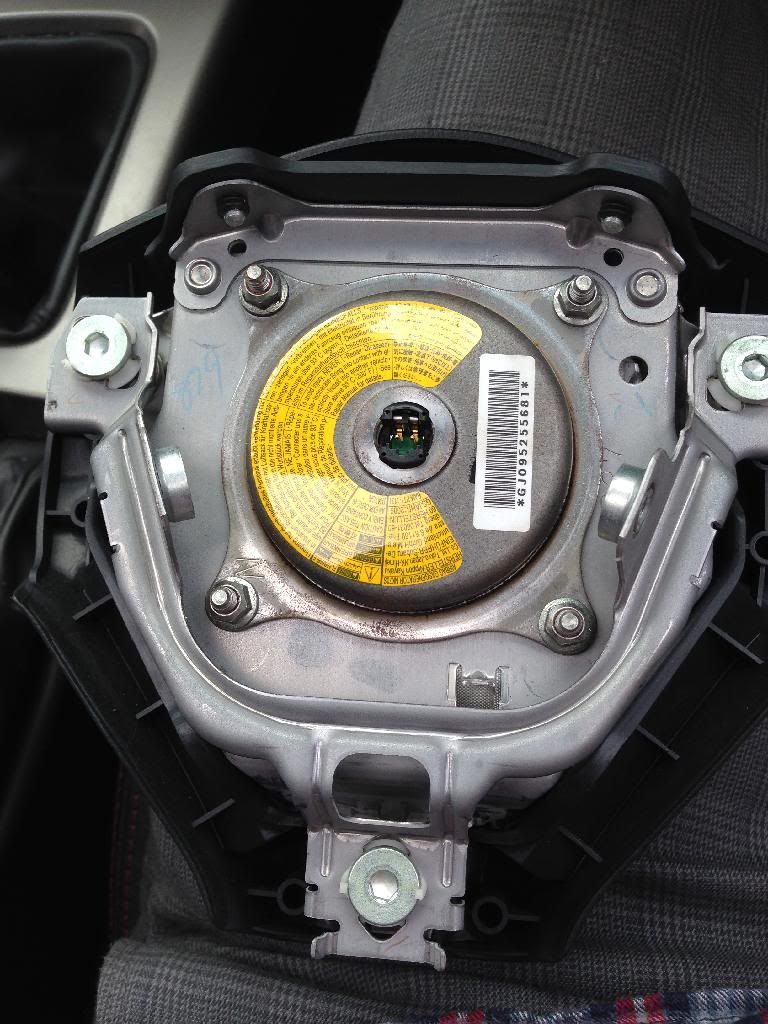
   1.7 Put airbag safely to the side with detonator facing the ground.
 
   1.8 Airbag removal complete.
 
Step 2: Steering Wheel removal
 
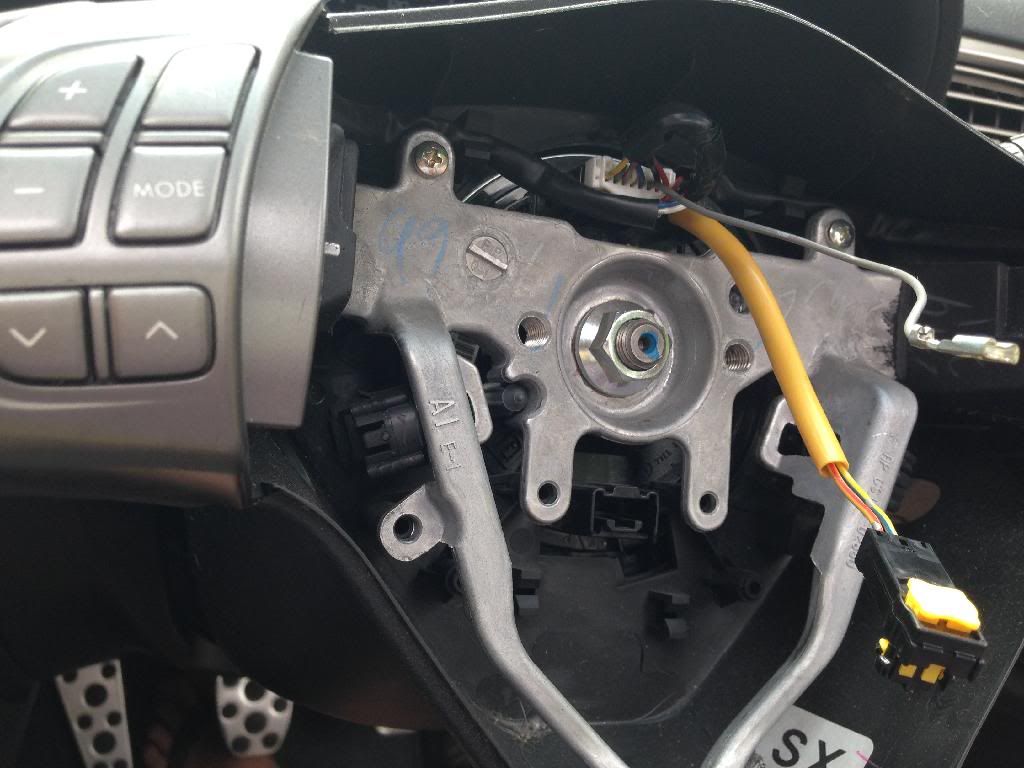
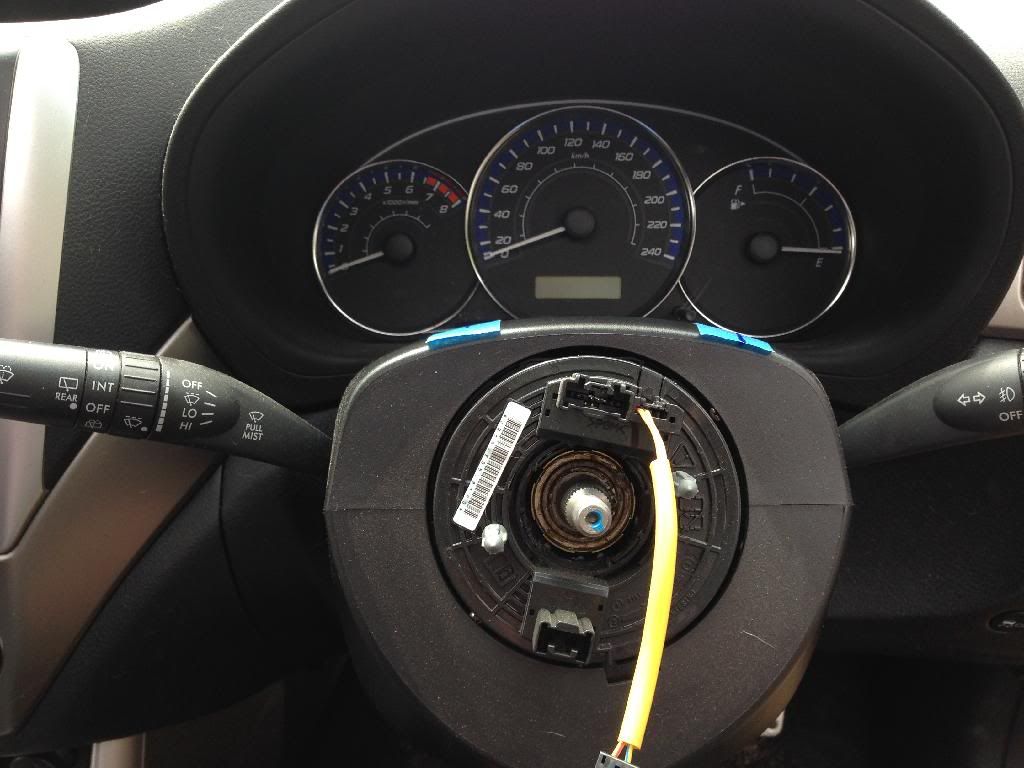
   2.1 Unplug electronic control wiring harness and remove leaving the yellow airbag harness intact.
 
EFBC123A-A44D-41BE-AA56-1B828E1051D7_zps
 
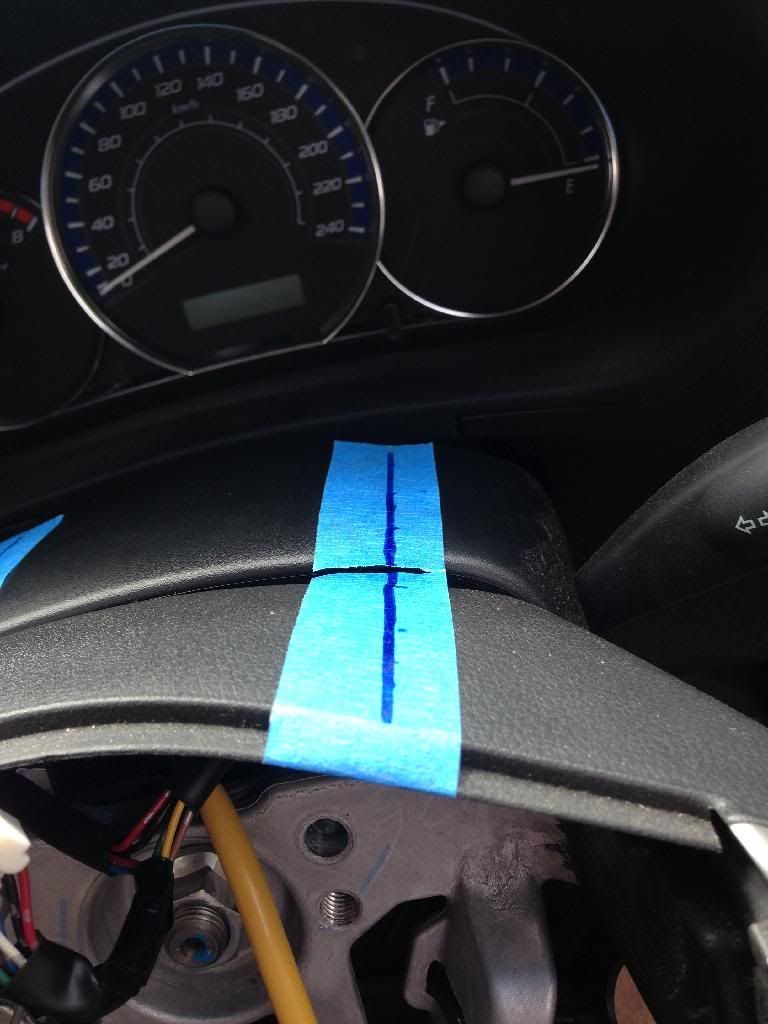
   2.2 Apply tape from the top of the steering column cover to the front of the steering wheel – I used two pieces of tape and    drew a centre line. [This is used to realign the wheel when you put it back on.]
 
DFB99941-B02D-4EE3-9E35-6D97C9B84295_zps
 
   2.3 Lock Steering and remove centre nut with 17mm socket.
 
   2.4 Pull wheel backwards to remove, [ :lol:  - I used a rubber mallet to get the fkr off] ensuring the airbag harness is not damaged - it's easy to hit yourself in the face and end up with a bloody nose :lol:
 
   2.5 Steering Wheel removal complete.
 
875A1CBE-779E-42A9-94CD-145C796717EE_zps
 
Step 3: Electronic control and rear cover removal
 
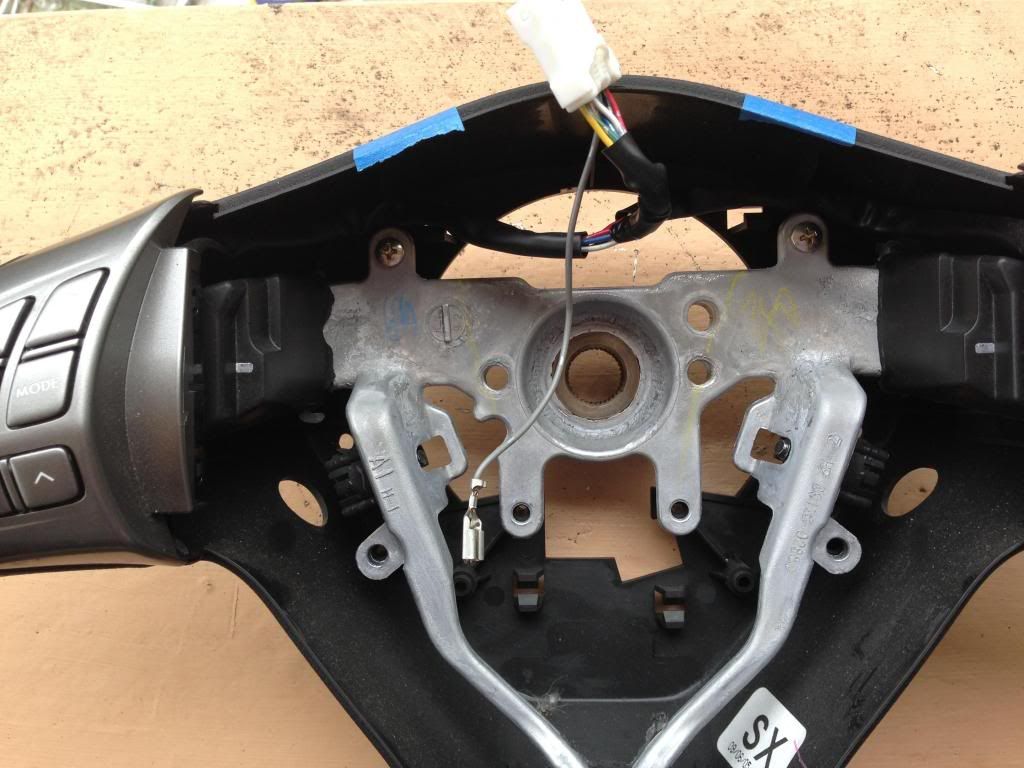
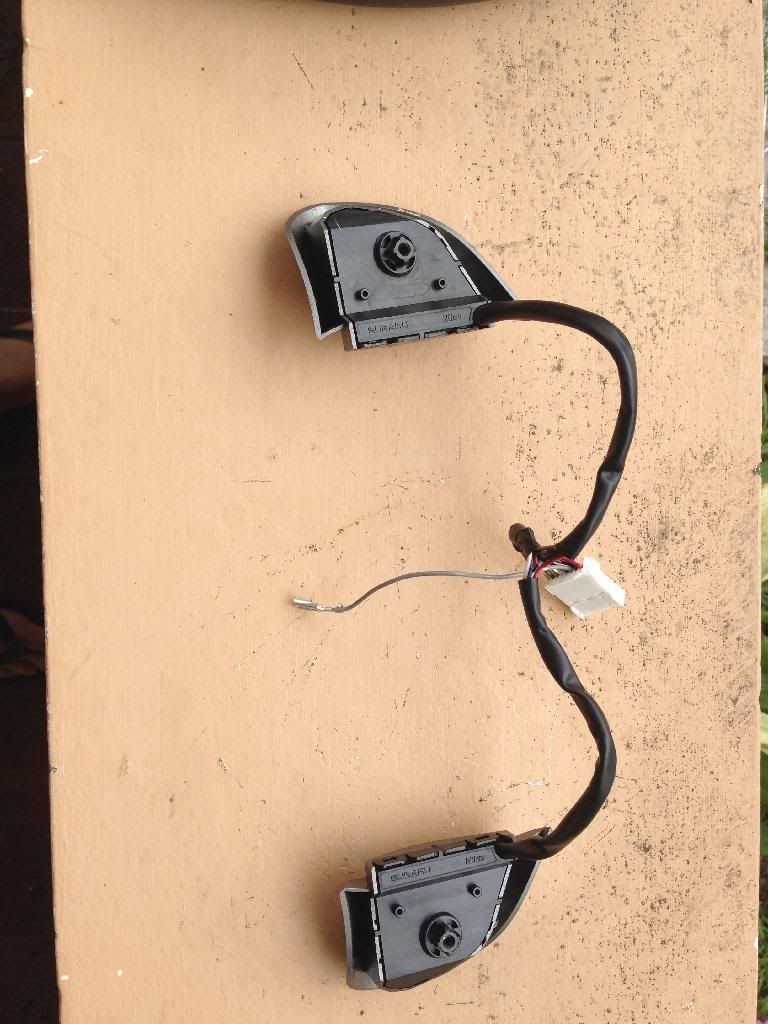
   3.1 Remove two Phillips head screws, unclip black wiring harness from rear cover and remove rear cover from wheel.
 
F4FDD9DE-E3E2-44C2-B012-55E2B5B788B6_zps
 
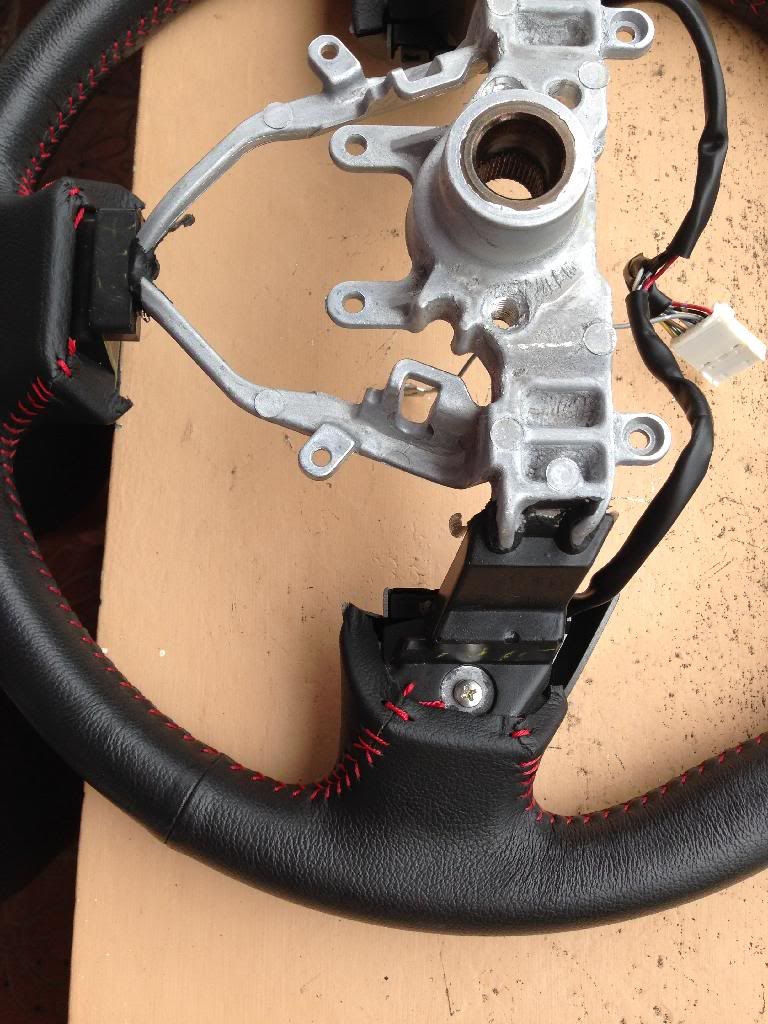
   3.2 Remove two Phillips head screws from rear of electronic controls and remove controls from wheel.
 
96E51D02-3EA7-4926-AC29-97C31CBF5456_zps
 
   3.3 Removal of rear cover and electronic controls complete.
 
1AD20D95-BF5C-401A-9D10-9B3F263FEC78_zps
 
Step 4: Detonator removal
 
Note: You do not need to do this. The only reason you might need to remove the detonator is if you are shipping the airbag via air DO NOT DO THIS – you cannot send an airbag by any means other than surface mail as it contains explosives.
 
If you are using this procedure as you are fitting an 08+ STi airbag to your non-08+ STi then you will know by now that the STi detonator has two wiring harness and your version (SH9), has just one harness. You will need to swap the detonator to have a functioning airbag. DO NOT DO THIS.
 
   4.1 Remove the four nuts from the detonator – do not touch the terminals.
 
2483AF7E-6679-40BC-B7EE-15F574C30A88_zps
 
   4.2 Handle very carefully and do not retain or store an unused detonator. If you need to dispose of a detonator – call your local waste disposal station for advice.
 
   4.3 Detonator removal complete.
 
Step 5: Putting it all back together
 
   5.1 Reverse above. 
 
Note: Detonator nuts are secured with locktight, when you re-attach the detonator use locktight on the nuts. 
Ensure that the detonator is oriented correctly in relation to the airbag.
 
When re-attaching the Wheel to the steering column shaft use locktight on the 17mm nut.
 
 
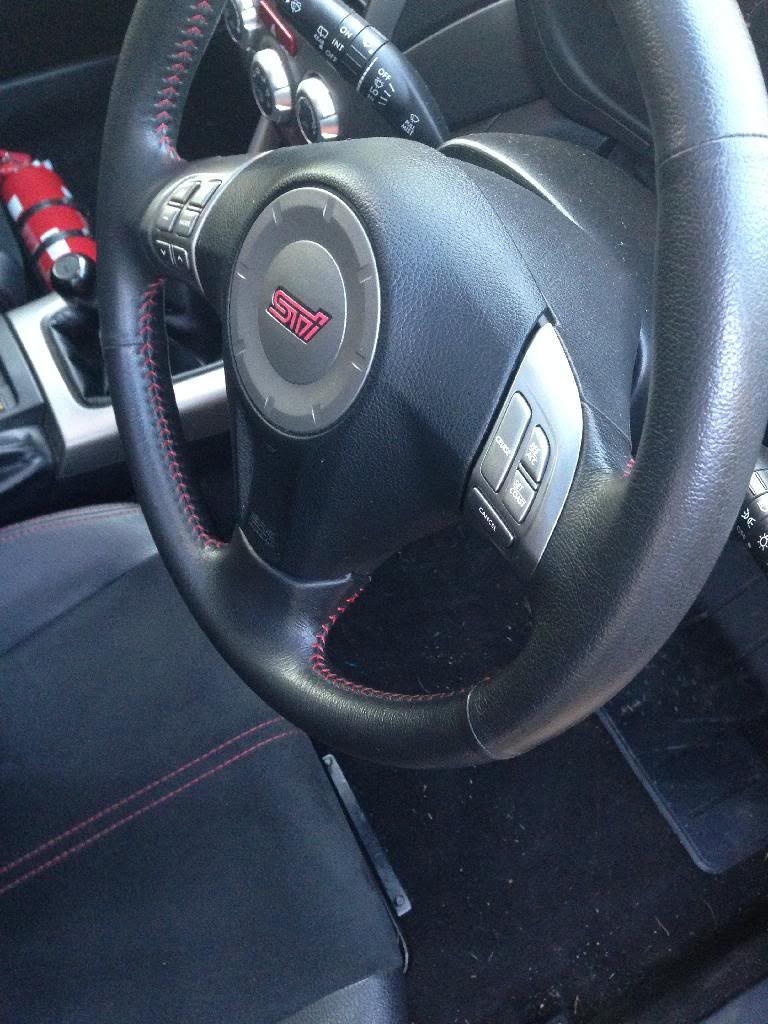
Enjoy your new wheel, whether it be a DAMD, Prova, STi, or GT-Spec ;)
 
7ABBA26B-2AB4-44A6-8AE5-D0FEB1BB83FC_zps


#2 Liberty

Liberty

    Regular Member

  • Members
  • PipPipPip
  • 23,869 posts
  • Gender:Male
  • Location:Sydney
  • Interests:tl;dr

Posted 06 March 2015 - 08:09 PM

Nice write up mate. To help with the Liberty Gen IV model as you mentioned, they ran from 2003-2009. ;)

Wanting to buy/looking for: single genuine STi rim, genuine STi front lip, Corazon or Zero/Sports grille and another OEM grille

Can you hook a brother up? Please contact me now. I have cash ready.

~

3fxl2Ca.jpg

~

2006 Liberty MY06 3.0R SpecB wagon


#3 Samwise

Samwise

    Official official of the official.

  • Members
  • PipPipPip
  • 8,434 posts
  • Gender:Male
  • Location:Undecided
  • Interests:Taste so good, make you wanna slap yo' mama.

Posted 06 March 2015 - 08:16 PM

With removing the steering wheel, all I do is crack the nut and undo it a couple of turns. Then you yank the steering wheel towards you. This pulls it off easy and stops it from smacking you in the face. :P


I like to think of it as borrowing someone's car and driving it better than them.


#4 WillC

WillC

    Scrappy Coco the 2nd! Disc0 Disc0

  • Members
  • PipPipPip
  • 1,112 posts
  • Gender:Male
  • Location:Edensor Park
  • Interests:Suby, HOONda, Chasing magical unicorns, turbos. Fruit loops
    Most things with a pulse. Most things that tick and have electric.

Posted 07 March 2015 - 12:17 AM

👍 this is gold


Toy's Garry

Address : 8/88 Seville Street
Fairfield East NSW 2161
PH : (02) 9755 9882


#5 Matt

Matt

    "THERMAL MANAGEMENT SPECIALIST"

  • Members
  • PipPipPip
  • 4,380 posts
  • Gender:Male
  • Location:Lake Maquarie NSW
  • Interests:Things, music, stuff & whatchamacallits

Posted 07 March 2015 - 05:22 PM

With removing the steering wheel, all I do is crack the nut and undo it a couple of turns. Then you yank the steering wheel towards you. This pulls it off easy and stops it from smacking you in the face. :P


Was going to say this exactly :)

If its a bit tight you can get a cheap removal tool from sca...mine was impossible to pull free..but the tool did it easily

#6 bigBADbenny

bigBADbenny

    New Member

  • Members
  • Pip
  • 89 posts
  • Gender:Male
  • Location:Hollywood, Melbourne
  • Interests:Family Photography Cars Bicycling

Posted 08 March 2015 - 10:26 PM

Hammer the rim gently at 9 and 3 o'clock with your fists to loosen it against the nut.

Do not use a mallet or brute force plzzz.

Still looking for a black STi airbag 😍
MY07 GT-B 6MT OBP WAG


0 user(s) are reading this topic

0 members, 0 guests, 0 anonymous users