Jump to content


Photo

Kyle's 2002 Liberty RX 2.5


  • Please log in to reply
23 replies to this topic

#1 kyle.horton16

kyle.horton16

    New Member

  • Members
  • Pip
  • 36 posts
  • Gender:Male
  • Location:Melbourne
  • Interests:Suby, Skylines, Silvias and skids I guess.

Posted 29 December 2016 - 07:49 PM

Introduction:


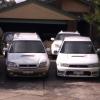
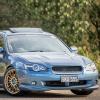
So after joining the forum yesterday and receiving a warm welcome, I've decided to make a build thread that will, like everyone else's, follow the progress of my Liberty. I'll start with some base information and then go into detail as the post goes on.


buildhead1.jpg


buildhead2.jpg


Basic specifications:


Engine: EJ251 (2.5 Boxer-4 non-turbo)

Transmission: 5-Speed Manual

Year and Trim: MY2002, RX
Horsepower/Kilowatts: 154HP/115kW@5600rpm (Stock, car is modified)
Torque: 223Nm/164Ib-ft@3600rpm (Stock, car is modified)
Drive-type: AWD
Price (When new): $38,785 AUD
Price (Now): $4,600 AUD
Colour: 01G Premium Silver Metallic (Silver)


Background information:


So I bought this car back in June 2015 as my first car for around $4,600 AUD. The car was listed under a dealer, however this didn’t phase me as it has taken quite some time to find the right car that I liked. I actually got the car for a little cheaper than the price originally advertised also, so that was an added extra. Another interesting factor is that this car was listed as a “GX” model. However, after working on the engine some time after purchase, I realized it was actually an “RX” model, therefore being worth a little more. The car has an EJ251 in it, however it doesn’t have a turbo, so sad. Rules and regulations here in Australia prevent me from driving certain turbo cars until I am fully licensed, not just probationary.


What I have done since purchase back in 2015:


I have been documenting all the things that I have done with the car since I bought it back in June of 2015, including taking photos each time to show the progress. Here is what I've been up to.


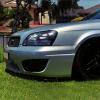
Update #1 - Re-painting the calipers and under-guards.


When I bought the car, it came with horrifically ugly red calipers. So the day I rolled it into the driveway, I got out the sand paper and rattle-cans, and began the respray.


calipers2.jpg


 I also decided to fix up the flaky/peeling guards with some bumper black.


guards1.jpg


guards2.jpg


I also decided to fix the center caps in which my dad sandblasted at work to get the previous plasti-dip crap off.


calipers3.jpg


calipers1.jpg


I was extremely happy with how this quick-fix turned out. Also, I know the before/after pictures of the guards show two different ends of the car but you get the idea haha.


Update #2 - Fixing a major oil leak.


I'm sure we've all experienced this here. I'm talking about the classic Subaru head-gasket failure. When I bought the car, this issue was never something I knew about, however after discovering a puddle under my car, a few months later, I quickly learnt. Now I could have taken it to a mechanic and pay him some amount of money to repair it for me, but that's not why I bough this car. I bought it not only as my first car, but also as something I could learn with. So dad decided to help me fix the issue, sourcing parts and then fitting them.


oilfix1.jpg


As we pulled everything off, we made sure to label each wire/hose with some tape so it was easy to put back on later.


oilfix2.jpg


We actually gutted the engine right down to the block and took the opportunity to clean everything. This included the piston heads also.


oilfix3.jpg


Once everything was clean, we started to put everything back together. I decided to simply replace all the gaskets instead of just the heads, so I bought ones for the exhaust manifold as well.


oilfix4.jpg


Also, we bought a new timing kit because the old one was kaput. I'm not sure what else we did but this was the base of it, after all, this was almost a year ago. If your wondering what new gaskets I used, I can't remember. I could try to find the packaging as I think I still have it, but rest assure, they are good quality ones... I did my research.


Update #3 - Replacing the radiator.


Just a week after doing all the engine work, my radiator began to leak. So I sourced a brand new one and began replacing that. I didn't get any photos of the actual installation, however I took the chance while it was out to clean the bottom plates as they were COVERED in crap.


radiatorfix2.jpg


radiatorfix3.jpg


I had plenty of left-over caliper paint so I decided to spray the brackets.


radiatorfix4.jpg


Once put back, it looked so much better. A shame really as it was only ever going to be covered up.


radiatorfix1.jpg


It's amazing to see some of the grime and dirt that a 14 year-old car can have just sitting there. Was a very satisfying experience being able to remove it all. 


Update #4 - Fixing the floppy wipers.


So this is the most recent update, as it was only a few weeks back now that I did this. After driving down the freeway at 80 in the wet, the wipers started flying off the sides of the pillars! Once I was stopped, I realised it was because they were VERY loose. I tired tightening the bolts, but this didn't work. So I began pulling the trim off and checking the motor and so on.


wiperfix1.jpg


wiperfix2.jpg


Turns out, the bushings were completely ruined. Years of service on this Suby just destroyed them. I called Subaru and asked how much a replacement would be, and of course they tried to make me buy the whole linkage assembly for $170. So I went down to Jolly's (a local wreckers), and found another sad Liberty and took them for $20, assembly and all.


wiperfix3.jpg


As I took out the old one and switched over the motor, I again, took the opportunity to clean the 14 years=worth of grime that was lying under the trim and panels.


wiperfix4.jpg


wiperfix5.jpg


I only cleaned the panels and briefly went over the new linkage arms and so on as I didn't want to pull it all apart and risk ruining the bushings. Plus, time was limited in this case.


ezgif_com_58f21f84ac.gif


Here's a gif of them all tightened up, because why not aye?


Other small updates in between:


So in between all these bigger updates, I fixed various other small parts such as the battery holder, tray and battery itself.


otherstuff2.jpg


otherstuff1.jpg


I also fixed some intake piping that was botched together.


Conclusion:


My plans:


So all caught up now. My updates from here on will be in the form of reply posts further down the thread so make sure to look out for them. I simply want the car to look good, feel good and sound good. To do this, I plan to fix most of the bodywork as there are plenty of dents, door dings and various scuffs, as well as some faded paint. I also need to do some mechanical work that I will talk about in an update post here in this thread.


Thank you for stopping by and I look forward to sharing more progress as the days and months roll on.


- Kyle


Notorious for being low, hated for being so.


#2 Beckers

Beckers

    OMAR Cubt

  • Members
  • PipPipPip
  • 3,058 posts
  • Gender:Male
  • Location:South of the border, Blackburn
  • Interests:Docking and eating dry meat, Living lyf in the TT VOD

Posted 29 December 2016 - 10:40 PM

Nice build thread Kyle.

You made it on your 2nd day on the forum, makes me look a bit slack ???

Quite a few of us in the middle to outer eastern suburbs.

We usually have a Wed night meet in East Burwood, you are most welcome to attend.


#3 Arfreedom

Arfreedom

    Trusted Member

  • Members
  • PipPip
  • 152 posts
  • Gender:Male

Posted 30 December 2016 - 04:38 AM

Nice ride Kyle. Looking forward to seeing more


Sent from my iPad using Tapatalk

#4 motoboy76

motoboy76

    Regular Member

  • Members
  • PipPipPip
  • 689 posts
  • Gender:Male
  • Location:Newy.....
  • Interests:Subaru's, Dirt and road bikes......

Posted 30 December 2016 - 08:54 AM

Nice work on the build thread mate, very nice....

#5 Barbbachello

Barbbachello

    Touring Bruce

  • SubyClub Area Rep
  • PipPipPip
  • 6,456 posts
  • Gender:Male
  • Location:Mehico
  • Interests:Docking

Posted 30 December 2016 - 12:00 PM

Nice build thread Kyle.

You made it on your 2nd day on the forum, makes me look a bit slack ???

Quite a few of us in the middle to outer eastern suburbs.

We usually have a Wed night meet in East Burwood, you are most welcome to attend.

He'll probably do a conversion before you too kek

As Beckers said feel free to come along to a meet one week.


tIeW8DE.png


#6 kyle.horton16

kyle.horton16

    New Member

  • Members
  • Pip
  • 36 posts
  • Gender:Male
  • Location:Melbourne
  • Interests:Suby, Skylines, Silvias and skids I guess.

Posted 30 December 2016 - 04:24 PM

Nice build thread Kyle.

You made it on your 2nd day on the forum, makes me look a bit slack ???

Quite a few of us in the middle to outer eastern suburbs.

We usually have a Wed night meet in East Burwood, you are most welcome to attend.

Thanks a heap guys. I'm looking for more meets to come to, so I'll definitely look into turning up one night.


Notorious for being low, hated for being so.


#7 church

church

    Trusted Member

  • Members
  • PipPip
  • 113 posts

Posted 30 December 2016 - 04:26 PM

Turbo plans in the future? Great to see Gen 3s not enough on this forum ;)


#8 El_Freddo

El_Freddo

    Rock'n the old Skool

  • Members
  • PipPipPip
  • 2,245 posts
  • Gender:Male
  • Location:Bridgewater/Central Vic/semi-retired nomad
  • Interests:Subarus, 4wd'n Subarus, travelling Subarus, Tinkering... I could go on!

Posted 30 December 2016 - 04:54 PM

Nice mate.

What future mods will you be looking forward to after you're off your P's?

Cheers

Bennie
"The lounge room is not a workshop..."
https://www.imageshack.us/i/po1BKrxbj
1BKrxb.jpg
El Freddo's Pics    -    El_Freddo's youtube

#9 kyle.horton16

kyle.horton16

    New Member

  • Members
  • Pip
  • 36 posts
  • Gender:Male
  • Location:Melbourne
  • Interests:Suby, Skylines, Silvias and skids I guess.

Posted 30 December 2016 - 07:44 PM

Turbo plans in the future? Great to see Gen 3s not enough on this forum ;)


Hopefully haha, wouldn't mind a massive snail hanging off the engine.


Nice mate.

What future mods will you be looking forward to after you're off your P's?

Cheers

Bennie

 
Hopefully a turbo, but that might just come with another car altogether. But once insurance allows it, there's a very different project car coming along. 

Notorious for being low, hated for being so.


#10 CRUISN

CRUISN

    Doin it my way.

  • Members
  • PipPipPip
  • 6,970 posts
  • Gender:Male
  • Location:Melbourne
  • Interests:Family, Surfing, Cars.

Posted 31 December 2016 - 01:38 PM

That's an excellently executed build thread. Well done.

I can appreciate someone who cleans every part and area whilst working on the car. We're very like minded.

LOL at the DIN rail the previous owner used for a battery hold down!

OEM+


#11 applegeek897

applegeek897

    Trusted Member

  • Members
  • PipPip
  • 231 posts
  • Gender:Male
  • Location:Sydney
  • Interests:Cars, Technology and Photography

Posted 31 December 2016 - 02:52 PM

Epic thread man, so well done. Looks like the car is in really good hands!


Daily: '00 Daihatsu Cuore "Kelly" - Build Thread -
Project / Weekender: '05 Subaru Liberty 3.0R-B Wagon - Build Thread -
Motorcycle: '14 Triumph Street Triple 660 - Build Thread -

#12 Jimbo

Jimbo

    Livin' the Legacy

  • Members
  • PipPipPip
  • 2,771 posts
  • Gender:Male
  • Location:B'town

Posted 31 December 2016 - 06:04 PM

Along with Mark's sentiments, excellent write up and putting together of the thread!

It's awesome to see the passion in a young driver such as yourself. Too many want to just stick stupid tow hooks and crappy wheels on them.

The brakes look excellent and I'm very suprised to see Bilstiens under there aswell. Nice little bonus that came with the car, I assume.


'04 Liberty GT Premium "The Sprog Chariot"


#13 kyle.horton16

kyle.horton16

    New Member

  • Members
  • Pip
  • 36 posts
  • Gender:Male
  • Location:Melbourne
  • Interests:Suby, Skylines, Silvias and skids I guess.

Posted 02 January 2017 - 12:12 PM

Thanks for the kind words guys. New updates coming very soon!


Notorious for being low, hated for being so.


#14 kyle.horton16

kyle.horton16

    New Member

  • Members
  • Pip
  • 36 posts
  • Gender:Male
  • Location:Melbourne
  • Interests:Suby, Skylines, Silvias and skids I guess.

Posted 02 August 2017 - 09:39 PM

Time for a decent update I reckon:


Been a fair while since I've posted any progress on my Lib so here we go. Lots of little things have been done and it's staring to look pretty neat.


Update #5 - Respraying the front bumper and grill.


Decided it was time to fix a decent crack in the lower part of the front bumper, however also gave the grill a fresh look while at it.


image_1.jpg


image_2.jpg


Started the the usual wet and dry sand, layer after layer. Added some body filler to help fix the crack and fill all the rock chips caused by 150,000kms on the road.


image_4.jpg


image_3.jpg


Sprayed some undercoat and primer, sanded back again for smooth finish. Also decided to clean the moisture from the fog lights as they were out. Gave em' a good polish to make them look mint.


image_5.jpg


image_10.jpg


Gave the underside of the front chassis a good quick spray to clean it up, small detail but helps the end result I guess.


image_6.jpg


image_9.jpg


Also sprayed the fog light surrounds in bumper black to clean them up a bit, came out alright. Proceeded to spray the bumper. Made sure I got the right paint, code was 01G, however got the paint shop to match it to the fuel cap cover as it may have faded somewhat over the years. Turned out to be a perfect match.


image_7.jpg


image_8.jpg


Another thing I decided to do was add some mesh to the bottom cut outs of the bumper. Just bought some mesh sheet from Autobarn for like $20 and then cut it to shape, bent it and then glued it down.


image_11.jpg


image_12.jpg


Really happy with how the mesh came out looking, small mod that you won't see on many other cars I'm sure. Grill was also sanded and painted properly in bumper black (I know it's hard to spot the difference in the photo).


image_13.jpg


image_14.jpg


image_15.jpg


Overall very happy with the end result. Looks brand new and yeah it's hard to see in the photos but it fixed the crack up perfectly.


Update #6 - Respraying the window trim.


After looking at the trim of the windows every time I get in a drive the car, I couldn't stand the faded, cracked plastic look so decided to rough it up and respray it properly to hopefully look good for a while.


image_1.jpg


image_2.jpg


This was what it looked like before hand. I know it's hard to see however you get the idea. Faded in all sorts of shades of grays, blacks and so on.


image_3.jpg


image_4.jpg


Using Scotch Brite, I roughed up the surfaces, being VERY careful not to sand my damn paintwork. I then masked it all up properly and began to spray using a can of bumper black.


image_5.jpg


image_6.jpg


Let it dry out and then removed the masking tape and newspaper. Came out like a treat. I also decided to paint the mirror surrounds which was an effort in itself. Long story short, I had to pull the door cards off, completely un-wire everything in them and the electric mirrors. Then proceeded to remove the trim from the mirror, only to have to drill out a completely rounded bolt that someone else has had a hack at due to them being covered in lock-tight for whatever damn reason. Had to drive around without door cards for a few days full JDM style but got it finished eventually to match the rest of the resprayed trim.


Update #7 - Polishing the muffler.


Barely an update this but I was sick of the dirty muffler so I cracked out the metal polish and sat under the car for a good hour or so scrubbing the hell out of it, resulting in a crispy mirror finish.


image_1.jpg


image_2.jpg


Conclusion:


Happy with my small updates, lots of other small things have been done such as fixing a squeaky fan-belt by tightening it (must have not done that properly when I replaced the head gaskets and all that stuff).


I plan to hopefully soon respray the rear bumper, side skirts and spoiler. I also am going to purchase a front splitter lip as I've been wanting one for ages. Just purchased a momo steering wheel from an Imprezza in which I will install very soon. Apart from that, the car is getting close to being perfect!


Cheers guys :)


- Kyle


Notorious for being low, hated for being so.


#15 Liberty

Liberty

    Regular Member

  • Members
  • PipPipPip
  • 23,869 posts
  • Gender:Male
  • Location:Sydney
  • Interests:tl;dr

Posted 02 August 2017 - 11:21 PM

Mad update mate, well done. I'm sure all the work and time was definitely worth it.


Wanting to buy/looking for: single genuine STi rim, genuine STi front lip, Corazon or Zero/Sports grille and another OEM grille

Can you hook a brother up? Please contact me now. I have cash ready.

~

3fxl2Ca.jpg

~

2006 Liberty MY06 3.0R SpecB wagon


#16 CRUISN

CRUISN

    Doin it my way.

  • Members
  • PipPipPip
  • 6,970 posts
  • Gender:Male
  • Location:Melbourne
  • Interests:Family, Surfing, Cars.

Posted 03 August 2017 - 03:01 AM

Nice. 


You can buy plastic honeycomb mesh very similar to the oem grill style. Better than the alloy black mesh IMO.


OEM+


#17 Barbbachello

Barbbachello

    Touring Bruce

  • SubyClub Area Rep
  • PipPipPip
  • 6,456 posts
  • Gender:Male
  • Location:Mehico
  • Interests:Docking

Posted 03 August 2017 - 10:03 AM

Noice.  Come and respray my front bar for me :P


tIeW8DE.png


#18 applegeek897

applegeek897

    Trusted Member

  • Members
  • PipPip
  • 231 posts
  • Gender:Male
  • Location:Sydney
  • Interests:Cars, Technology and Photography

Posted 03 August 2017 - 10:07 AM

Wow man epic stuff, so well presented as always. I really like the idea of redoing all the black trim, mine really needs doing too. What paint did you end up using for it?


Daily: '00 Daihatsu Cuore "Kelly" - Build Thread -
Project / Weekender: '05 Subaru Liberty 3.0R-B Wagon - Build Thread -
Motorcycle: '14 Triumph Street Triple 660 - Build Thread -

#19 Niko

Niko

    Member's Member

  • Members
  • PipPipPip
  • 7,511 posts
  • Gender:Male
  • Location:Sydney City

Posted 03 August 2017 - 11:46 AM

I really liked how Kong had the centre part of his front bar painted black, maybe something to look at in future. 


Meanwhile that all looks great.


#20 kyle.horton16

kyle.horton16

    New Member

  • Members
  • Pip
  • 36 posts
  • Gender:Male
  • Location:Melbourne
  • Interests:Suby, Skylines, Silvias and skids I guess.

Posted 04 August 2017 - 07:42 PM

Mad update mate, well done. I'm sure all the work and time was definitely worth it.


Thanks man it definitely was worth it! 


Nice. 


You can buy plastic honeycomb mesh very similar to the oem grill style. Better than the alloy black mesh IMO.


I've though about doing that. Might give it a go on an old grill if I see one at the wreckers.


Wow man epic stuff, so well presented as always. I really like the idea of redoing all the black trim, mine really needs doing too. What paint did you end up using for it?


Thanks man means a lot, and I aint to sure what the paint is called as it was just my local paint shops custom mix however it matches the original colour perfectly.


Notorious for being low, hated for being so.


0 user(s) are reading this topic

0 members, 0 guests, 0 anonymous users