Jump to content


Photo

Pauls 93 RST wagon


  • Please log in to reply
52 replies to this topic

#1 implanted4

implanted4

    New Member

  • Members
  • Pip
  • 79 posts

Posted 02 December 2011 - 10:41 AM

Figured id throw together a build thread. This actually predates me owning the car somewhat, as it belonged to a good friend of mine who brought it to me to fix several issues he had with it. Most of this was to do with ecu wiring, and I had to strip two harnesses and repin several ecu plugs and replace the wires which had been thoroughly butchered by unknowns..
Posted Image
Posted Image
Posted Image
Posted Image
Posted Image
Posted Image
Posted Image
Posted Image
Posted Image
Posted Image
Posted Image
Posted Image
Posted Image

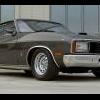
Initially, I received the car off a flatbed, from a well know Canberra tune house who had destroyed 2 pistons on the dyno. The engine had been imported and modified with the 05 heads removed, and my98 heads fitted to suit the rs manifold etc.
Posted Image
Posted Image
The car had 2 different ecu’s, a possumlink, and the haltech, both of which had been badly tuned and the car ran like poo.
Posted Image
Posted Image

I did the basics and found the cam pulleys had an issue and the pickups for the cam andgle sensor were intermittent, so replaced the cam pulleys with early RS liberty metal items.
Still didn’t fix the problem, so did some more investigation. Further fault finding I discovered it had broken ring lands on two pistons. A compression check showed 35 psi on cyl 1, 50 psi on cyl 3, 150 on cyl 2 and 140 on cyl 4.
I started pulling things apart and also found this.. not a lot of flow going on :P
Posted Image
Posted Image
Pull don’t of the engine revealed this
Posted Image
Posted Image
Other things I discovered is that the heads had been ported, had a set of unknown spec cam regrinds, that I later found out were from the possum bourne parts bin. Ive measured them at 10 mm lift but don’t know the duration. Expect they are about 255 or so degrees, nothing huge. Look carefully, youll spot the reprofile where the new metal is added.
Posted Image
Posted Image
While id decided to rebuild the engine, I also decided the my05 push clutch gearbox had to go. I got a my02 wrx case, and reshelled the internals (Thanks Doug)
Posted Image
Posted Image
Posted Image
Posted Image
Posted Image
Posted Image
Posted Image
Posted Image
Posted Image
The push clutch is su weak that it was slipping badly, and was replaced with s std pull type friction with an exedy pressure plate.
Posted Image
Posted Image
Initially turbo was a vf34 with a p20 housing, but I decided it wouldn’t be enough for my plans. It was sold.
Posted Image
So I went out and bought the following for the build:
Mahle 2618 forged pistons
Manley H beam forged rods
ACL race series bearings
OEM gaskets – aa610 1.6mm thick
Gates racing timing belt kit
PE 780cc injectors
Tech edge wideband controller and meter
Kando TD06 sl2 20g 8cm
And carious other bits, then proceeded to start my build under my house. Had some assistance from a friend with machining and general guidance as id not done an engine before. Went very smoothly..
Posted Image
Posted Image
Posted Image
Posted Image
Posted Image
Posted Image
Process for the engine build was as follows:
• Strip the engine completely
• Send block for hone / size to new pistons
• Send crank to be linished / sized to rods and bearings
• Received bits back. Proceed to clean block in large tub with kerosene/degreaser and boiling water. Did a wash/rinse cycle 7 times until I could not get any metal particles from bores using high powered neodymium magnet wrapped in caltico cloth soacked in wd40
• Dummy assembled engine checking clearances
• Set piston ring gaps (chose initially .023/.019 thou)
• Assemble short engine to factory torque specs and rod cap bolts to arp recommended spec
• Clean heads up then refit to engine (heads had done less than 3000 klms since rebuild so did not pull down)
• Fit timing gear, belt and do initial checks
• Fit parallel fuel rail mod / carl davey injector kit
• Reassemble intake and all ancillieries
• Fit to car
• Set initial run in tune up
• Run in 

Posted Image
Posted Image
Posted Image
Posted Image
Posted Image
Posted Image
Posted Image
Posted Image
Posted Image
Posted Image
Posted Image
Posted Image
Posted Image
Posted Image
Posted Image
Posted Image
Posted Image
Posted Image
Posted Image
Posted Image

From there, things went swimmingly for 20k klms with this engine, until a head stud fail meant a head lift/gasket fail and a few more decisions, but that’s later. I had tuned myself, and had some issues with a fuel pump fail and massive detonation, but the engine went well, eventually tuned by spiro at Auto tech Sydney. It had massive restrictions somewhere and was flat lining at 204kw from 4000 rpm, and wouldn’t make any more power. We discussed this and it was decided the std my05 headers were not helping, plus my coils were average (Bosch hec716 coils id fitted earlier) so I decided to do a late model coil conversion and fit headers.
Old coils
Posted Image
headers
Posted Image
Posted Image
Posted Image
Posted Image
Posted Image
Posted Image
New coisl
Ok. These coils (FK040) are from GDB era subes, and some H6 motors. Not sure exactly which car they come from, but they are a coil over plug coil with built in ignitors.
This means the oem ignitor must be bypassed. Here is some tech info for those who wish to do it
I cut the coil wiring off a set of RS 2 bolt coils and used that to solder to my new coils.
these coils have the following pinouts:
P3 > +12V . white with black stripe - common to all 4 coils - wire to the positive 12V of your factory coil wiring (Red for RS coils)
P2 > GND > Black with red stripe - common to all 4 coils - crimp a large ring terminal and connect to the coil bolt
P1 > SIG > Black (yellow on 2 coils) - differed on 2 of the 4 coils - wire to the signal wire of the factory coil wiring. (Yellow for RS coils)
P1 being the clip end of the connector.
heres an odd one..
Theres a thread on RSLC where travers put some info up re the factory wiring diagram being wrong, its mentioned that wires are crossed over marked as wrong in the factory manual. Now my car appears to be the same as that wrong info.
the ground is pin 5 on the 5 pin, and the cylinders are in order, looking at the 4 pin plug from where the wires feed into it >>>>> 4-2-3-1

Posted Image
Posted Image
Posted Image
Posted Image
Cant reinforceenough the benefit of good tools
Posted Image
Posted Image
Posted Image
Posted Image
Posted Image

Next thing this car had was a gearbox fail. Munched third gear one evening, so decided a six speed was the fix. Got a 6 speed from mick from his rally car and threw it together in a day. Love the box, hate the open front diff. will rectify that next year (2012) but the 6 speed is the best mod ever for a sube. Don’t bother with 5 speeds, get one of these, it transforms the car. Don’t have any pics of it to display here, they are on my home pc, will dig up later.

As mentioned before, the engine had a fail at approx. 20k klms. A head stud nut fatigued and let the head lift (I was running 25 psi) so I pulled the motor back out and found some odd things going on. It appeared that the block had warped. Measuring piston to deck height had the pistons out from front to rear. Every type of check was done and I was convinced it was the block. We got another block and were going to send it away for machining when I decided to check the rods.
Who would think that brand new rods would be faulty, but when checking them against manleys specs, they were found to be out. One was within tolerance, and two were longer than the allowable tolerance.

This was odd because im sure they were right the first tme I assembled this engine, but essentially, it meant id only checked one cylinder, and that I had made a rookie mistake. What this also meant was that my compression ratio was lower than it was meant to be, such that I had approx. 8.2:1 in the front cyls and 7.95:1 or so in the rear cyls. Amazing the motor ran as well as it did but explains why it was a bitch to tune clod start and economy.

So a decision was made to rebuild the engine but since the block needed decking, the heads shaving, I also decided to run the head gasket thickness that would get me closest to 9;1 CR. So I sourced a set of eagle rods second hand from mick, checked them for true and had them closed and honed.
Bought new bearings, cleaned the pistons up, bought new rings, and had the heads and block machined.

I also bought new stem seals, and stripped and cleaned the heads, installed new stem seals and gave the valves a lap.

I bought .042” Cometic MLS gaskets to give the very minimum piston to head clearance to achieve the quench I wanted, and piston to deck height came in at .03mm so total CR comes in at 8.97:1 which is spot on where I wanted it. Quench is approx. .9mm and there are no valve to piston clearance issues even with 10mm lift.

Chose to reduce ring gaps and ran .018” on the top and .016” on the second ring.

Reassembled again, with the usual cleaning and dummy assembly process, everything measured up perfect so I reassembled and then retuned . Amazingly, I achieved the best ever fuel economy figures I have gotted from this engine in the run in phase, and its been improving ever since. Currently have ~6k klms up but been off the road for last 2 months due to being silly and getting booked speeding in a 560000 klm Hyundai

Heads and gaskets showing failure
Posted Image
Posted Image
Posted Image
Posted Image
Posted Image
Deck measurements showing rod length issue
Posted Image
Posted Image
Other general rebuild pics
Posted Image
Posted Image
Posted Image
Posted Image
Posted Image
Posted Image
Posted Image
Posted Image
Posted Image
Posted Image
Posted Image
Posted Image
Posted Image
Posted Image
Posted Image
Posted Image

Other than that, ive done mods to suspension, sound system etc, but nothing really worth showing off. Ill be putting a new rear bar on during xmas, ill then details her and take some new pics to share.
Heres a couple of my timing map and general tune..

Posted Image

As I sort my shit out, ill endeavour to post useful mod tips and pics showing step by step. Should be fun
Oh, heres what I did to my last liberty :P
Posted Image
Posted Image
Posted Image
Posted Image
Posted Image
Posted Image

Heres my VW eos
Posted Image
Posted Image


wtf?

here we go again.

whinge whinge whinge

Respect your elder members. They've endured many a time stupid questions like yours. They irritate us.


#2 Adam

Adam

    Snack down!

  • Members
  • PipPipPip
  • 46,970 posts
  • Gender:Male
  • Location:Bargo
  • Interests:Not knowing things about stuff

Posted 02 December 2011 - 10:49 AM

JESUS! Got enough pics? Will def need an hour or more to read this!

Welcome!

Posted Image


#3 implanted4

implanted4

    New Member

  • Members
  • Pip
  • 79 posts

Posted 02 December 2011 - 10:54 AM

Sorry about that :P ill edit the title to reflect


wtf?

here we go again.

whinge whinge whinge

Respect your elder members. They've endured many a time stupid questions like yours. They irritate us.


#4 Adam

Adam

    Snack down!

  • Members
  • PipPipPip
  • 46,970 posts
  • Gender:Male
  • Location:Bargo
  • Interests:Not knowing things about stuff

Posted 02 December 2011 - 10:56 AM

Haha all good, love a thread full of pics!

Posted Image


#5 Marv

Marv

    Rapist

  • Members
  • PipPipPip
  • 1,607 posts
  • Gender:Male
  • Location:Central Coast - NSW

Posted 02 December 2011 - 11:09 AM

Good to see this info here Paul. You should do a diy/faq on assembling engines. Id love to read it as ive got a couple to do now.

Ps: im trying hard not to build the EJ25D i am getting off Mark. The appeal of an open deck 2.5 with forged pistons is strong... But im not convinced itll be that much better than the ej207 i have in the garage already assembled
Pork Hunt Motorsport

Posted Image

#6 implanted4

implanted4

    New Member

  • Members
  • Pip
  • 79 posts

Posted 02 December 2011 - 11:29 AM

Iain, micks open deck NA block 2.5 is doing pretty bloody well with just forged rods and pistons. its doing 317kw @ 28 psi. just lifted a head, so we are going to throw a set of ARP L19 head studsa at it and that should fix it, so long as its not bore shift thats the issue.

for 250kw, open deck is fine, and if you have forged rods, 8000 rpm is piss easy with sti shim under bucket heads..

DO IT.. youll not regret it


wtf?

here we go again.

whinge whinge whinge

Respect your elder members. They've endured many a time stupid questions like yours. They irritate us.


#7 RX25SE

RX25SE

    ...............Car nerd................ now a H6 pilot

  • Members
  • PipPipPip
  • 12,751 posts
  • Gender:Male
  • Location:Melbourne eastern 'burbs
  • Interests:Cars with chrome bumpers!

Posted 02 December 2011 - 11:31 AM

Epic read and nice work.

(hand lapping valves? You old school like me?)


Am I seeing things, or did I spy a pair of Clevland rocker covers and a timing cover? :)

If I told you I was a compulsive liar, would you believe me?


#8 implanted4

implanted4

    New Member

  • Members
  • Pip
  • 79 posts

Posted 02 December 2011 - 11:43 AM

Epic read and nice work.

(hand lapping valves? You old school like me?)


Am I seeing things, or did I spy a pair of Clevland rocker covers and a timing cover? :)


indeed you did. i was at my (ex) friends workshop, he is crew chief for ivan scaramucas drag car and builds old school v8 motors. got some of his build pics somewhere if you interested.. his baby clevelands make 450hp, serious ones 850 or so with single 4150 holley. We arent friends any more though due to a break down in communications. (he lied to me, had my motor for 2 months and did nothing with it but told me otherwise, and then didnt return some money id paid for work that never got done.. long story)

old school.. yeh. i grew up with holdens.. here was my last one

Posted Image
Posted Image


wtf?

here we go again.

whinge whinge whinge

Respect your elder members. They've endured many a time stupid questions like yours. They irritate us.


#9 Marv

Marv

    Rapist

  • Members
  • PipPipPip
  • 1,607 posts
  • Gender:Male
  • Location:Central Coast - NSW

Posted 02 December 2011 - 12:19 PM

Iain, micks open deck NA block 2.5 is doing pretty bloody well with just forged rods and pistons. its doing 317kw @ 28 psi. just lifted a head, so we are going to throw a set of ARP L19 head studsa at it and that should fix it, so long as its not bore shift thats the issue.

for 250kw, open deck is fine, and if you have forged rods, 8000 rpm is piss easy with sti shim under bucket heads..

DO IT.. youll not regret it


While a tarmac-shredding RS wags would be nice, money is also super-tight ATM for me. I suppose I could always jam some 98 WRX heads on the EJ207 I have here and sell it as a going concern to fund the 2.5 build... I'll be using 98 GT-B heads (almost as good as V3 STi) with my build, and running it on a stock computer/VF23/stock headers/380cc injectors to start with. I'd definitely look at upgrading my intercooler core, headers, going to +600cc injectors, a billet wheeled turbo and Haltech if I went 2.5 - everyone I see has to do a lot of work improving the efficiency of their charge air path when they go 2.5, though an extra 25% capacity (and air) will need that improvement.

How expensive was it to "forge" your bottom-end? Rods, pistons, etc (PM if you like). What headers did you use and how much? I'd also like to know more about the degreaser/kero/water mix you washed the block down with, please Paul. Got a set ratio, or just a bit of each to the depth required? I was serious about that bottom-end assembly FAQ, too - I love to find out how different people do it differently. NOBODY assembles an englne the same way.
Pork Hunt Motorsport

Posted Image

#10 aekOne

aekOne

    Boss Pelican

  • Administrators
  • PipPipPip
  • 10,349 posts
  • Gender:Male
  • Location:Brisbane - Sunshine State
  • Interests:Regulating

Posted 02 December 2011 - 12:27 PM

welcome to Suby Club paul! I think i need to sit down tonight and read through your whole thread as it's a bit hard on the sly at work lol

: My Liberty :


signature_1_35.jpg


#11 RX25SE

RX25SE

    ...............Car nerd................ now a H6 pilot

  • Members
  • PipPipPip
  • 12,751 posts
  • Gender:Male
  • Location:Melbourne eastern 'burbs
  • Interests:Cars with chrome bumpers!

Posted 02 December 2011 - 12:53 PM


old school.. yeh. i grew up with holdens.. here was my last one


Mandarin Red (or Slamanca, pics look different colours) '73 HQ GTS?

If I told you I was a compulsive liar, would you believe me?


#12 Grant

Grant

    Regular Member

  • Members
  • PipPipPip
  • 1,063 posts
  • Gender:Male
  • Location:Newcastle

Posted 02 December 2011 - 05:55 PM

Fantastic read Paul!!! You definitely know your shit :)

#13 Alex

Alex

    NO AIDS

  • Members
  • PipPipPip
  • 8,230 posts
  • Gender:Male

Posted 02 December 2011 - 06:19 PM

oh hai Paul!

:)


Nice build thread!

#14 Evil_VZ-T

Evil_VZ-T

    Regular Member

  • Members
  • PipPipPip
  • 1,014 posts
  • Gender:Male
  • Location:ACT

Posted 02 December 2011 - 09:50 PM

Hi Dude!!

Sweet pics as usual. I wish i took pics of doing my bottom end. I started once the short motor was assembled :(

I still havnt been for a spin in yours yet..
MY02 Liberty B4

#15 implanted4

implanted4

    New Member

  • Members
  • Pip
  • 79 posts

Posted 03 December 2011 - 09:23 AM


While a tarmac-shredding RS wags would be nice, money is also super-tight ATM for me. I suppose I could always jam some 98 WRX heads on the EJ207 I have here and sell it as a going concern to fund the 2.5 build... I'll be using 98 GT-B heads (almost as good as V3 STi) with my build, and running it on a stock computer/VF23/stock headers/380cc injectors to start with. I'd definitely look at upgrading my intercooler core, headers, going to +600cc injectors, a billet wheeled turbo and Haltech if I went 2.5 - everyone I see has to do a lot of work improving the efficiency of their charge air path when they go 2.5, though an extra 25% capacity (and air) will need that improvement.

How expensive was it to "forge" your bottom-end? Rods, pistons, etc (PM if you like). What headers did you use and how much? I'd also like to know more about the degreaser/kero/water mix you washed the block down with, please Paul. Got a set ratio, or just a bit of each to the depth required? I was serious about that bottom-end assembly FAQ, too - I love to find out how different people do it differently. NOBODY assembles an englne the same way.


ok..

to forge the bottom end, you can get package deals from ebay for ~$700 for eagle/cp which is what mick did with his motor. mine cost a bit more, i paid $1290 but i went through an engine builder who went through a large distributor. id buy from ebay if i did again, in the US.

the headers are just GT-Spec, mick got em for me, ill ask where from, i believe they are just ebay ones too.

water kero/degreaser..
the tub is a 40 lt, i half fill with boiling water straight out of the hot water system, then pour a litre of degreaser in (just used cheap biodegradable stuff from supercheap) and about a litre of kerosene. No particular mix ratio. i also didnt show in the pics but i used soap filled steel scourers and a toilet brush for scrubbing the block, and clean every part of the block i can get to. Once the watewr has changed colour and theres crud floating on top, i empty the tub, refill with boiling water, and soak the block again, then remove and let dry. Be careful, the block gets farking hot, and drys super fast, use compressed air to make sure the oil galleries are clean after every wash. The reasoning behind doing it multiple times is really just being thorough and meticulous. not many engine builders so this, but Brett instilled it into me as a MUST DO. i guess when running in the benefits are immediately shown with not as much machine charf/cylinder metal being washed into the sump by oil....

ok, ill put together a faq of sorts but im weary of doing this again because A; got shot to shit on RSLC by FIGJAM's and B; id hate someone to think it was gospel, and things not work out for the individual reading it, but by and large, its common sense.. you know the drill, measure 3 times, cut once...

improving breathing is definately going to pay dividends, and despite what donnon on rexnet states, engine efficiency gains are always welcome. if it doesnt show up on a dyno sheet, it may be evident iun the way the engine drives off boost. if it doesnt cost you anything bar a few machine tool bits, then why not have a crack. Id not try to remove metal from heads, just clean em up, but if you can deshroud the valves, theres definate horsepower to be found there. Removing the majority of casting dasg is worthwhile, and things like knife edging the divider is good too..


Mandarin Red (or Slamanca, pics look different colours) '73 HQ GTS?


yeh oldschool camera with film, aged pictures.. it was mandarin red, 8Q69 GTS 4 door... loved that old gal :)


wtf?

here we go again.

whinge whinge whinge

Respect your elder members. They've endured many a time stupid questions like yours. They irritate us.


#16 Adam

Adam

    Snack down!

  • Members
  • PipPipPip
  • 46,970 posts
  • Gender:Male
  • Location:Bargo
  • Interests:Not knowing things about stuff

Posted 03 December 2011 - 12:29 PM

ok, ill put together a faq of sorts but im weary of doing this again because A; got shot to shit on RSLC by FIGJAM's


Not many of them on here. You should be safe. Love to read some tech :)

Posted Image


#17 Hypnotic

Hypnotic

    Everything you see is an hallucination

  • Members
  • PipPipPip
  • 23,835 posts
  • Gender:Not Telling
  • Location:In the alley way
  • Interests:long walks behind abandoned buildings.

Posted 04 December 2011 - 06:06 AM

Hey and welcome.

This is a great write up and a great read, thanks for posting.

Ash

As soon as she hands it to you, slowly take of your pants, then, while staring her straight in the eyes rub it against the tip of you penis, while continuing your painfully intense gaze whisper to her;
 
"My eye is watering, this might be a bit hot"

I should just convert to single, right?
 
Horsepower Factory

Revzone Auto Tuning Centre

#18 Marv

Marv

    Rapist

  • Members
  • PipPipPip
  • 1,607 posts
  • Gender:Male
  • Location:Central Coast - NSW

Posted 05 December 2011 - 07:34 AM

to forge the bottom end, you can get package deals from ebay for ~$700 for eagle/cp which is what mick did with his motor. mine cost a bit more, i paid $1290 but i went through an engine builder who went through a large distributor. id buy from ebay if i did again, in the US.

the headers are just GT-Spec, mick got em for me, ill ask where from, i believe they are just ebay ones too.

water kero/degreaser..
the tub is a 40 lt, i half fill with boiling water straight out of the hot water system, then pour a litre of degreaser in (just used cheap biodegradable stuff from supercheap) and about a litre of kerosene. No particular mix ratio. i also didnt show in the pics but i used soap filled steel scourers and a toilet brush for scrubbing the block, and clean every part of the block i can get to. Once the watewr has changed colour and theres crud floating on top, i empty the tub, refill with boiling water, and soak the block again, then remove and let dry. Be careful, the block gets farking hot, and drys super fast, use compressed air to make sure the oil galleries are clean after every wash. The reasoning behind doing it multiple times is really just being thorough and meticulous. not many engine builders so this, but Brett instilled it into me as a MUST DO. i guess when running in the benefits are immediately shown with not as much machine charf/cylinder metal being washed into the sump by oil....


Thanks bloke. I think I'm going to put this 2.0L together and K.I.S.S anyway ;)

ok, ill put together a faq of sorts but im weary of doing this again because A; got shot to shit on RSLC by FIGJAM's and B; id hate someone to think it was gospel, and things not work out for the individual reading it, but by and large, its common sense.. you know the drill, measure 3 times, cut once...

improving breathing is definately going to pay dividends, and despite what donnon on rexnet states, engine efficiency gains are always welcome. if it doesnt show up on a dyno sheet, it may be evident iun the way the engine drives off boost. if it doesnt cost you anything bar a few machine tool bits, then why not have a crack. Id not try to remove metal from heads, just clean em up, but if you can deshroud the valves, theres definate horsepower to be found there. Removing the majority of casting dasg is worthwhile, and things like knife edging the divider is good too..


I'm the only FIGJAM on here, mate :P :D Part of the reason I like reading engine building threads is the small nuances between builds: different sealants, different torquing patterns or that cleaning info... it's all good. Like Al's sig says on RSLC - its what you learn after you know everything that counts.

Thanks for all this info, Paul :)
Pork Hunt Motorsport

Posted Image

#19 implanted4

implanted4

    New Member

  • Members
  • Pip
  • 79 posts

Posted 05 December 2011 - 07:39 AM

cool.. sealant.. i used threebond motorcycle case sealant.. got 2 tubes on ebay cheap. ill start a write up today. ill likely have the spelli-ban on my case as im no writer... :P


wtf?

here we go again.

whinge whinge whinge

Respect your elder members. They've endured many a time stupid questions like yours. They irritate us.


#20 Marv

Marv

    Rapist

  • Members
  • PipPipPip
  • 1,607 posts
  • Gender:Male
  • Location:Central Coast - NSW

Posted 05 December 2011 - 09:03 AM

feel free to email it to me, Paul. I can go over it in my lunch time. Beats talking about dirt bikes :P
Pork Hunt Motorsport

Posted Image


0 user(s) are reading this topic

0 members, 0 guests, 0 anonymous users