Jump to content


Photo

LIberty BE5 Revision D and E JDM HeadLight Conversion


  • Please log in to reply
7 replies to this topic

#1 WillC

WillC

    Scrappy Coco the 2nd! Disc0 Disc0

  • Members
  • PipPipPip
  • 1,112 posts
  • Gender:Male
  • Location:Edensor Park
  • Interests:Suby, HOONda, Chasing magical unicorns, turbos. Fruit loops
    Most things with a pulse. Most things that tick and have electric.

Posted 02 March 2014 - 03:09 AM

I was having problems with my standard headlights clouding up and wanted a refresher. If you are like me and have damaged your headlights then this might be for you.


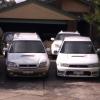
Our standard headlights usually go for 400 a light. I searched online and found that JDM lights from RSK B4's look the same. Decided to get one and fit it into my B4. They are not a direct bolt on so you will need tools to do this. 


Soldering Iron.


Attached File  20140301_173337.jpg   184.9KB   15 downloads


Wire strippers


Attached File  20140301_173815.jpg   88.13KB   14 downloads


A pin


Attached File  20140301_180402.jpg   167.37KB   14 downloads


Size 10 socket


And a philips head screwdriver.


#2 WillC

WillC

    Scrappy Coco the 2nd! Disc0 Disc0

  • Members
  • PipPipPip
  • 1,112 posts
  • Gender:Male
  • Location:Edensor Park
  • Interests:Suby, HOONda, Chasing magical unicorns, turbos. Fruit loops
    Most things with a pulse. Most things that tick and have electric.

Posted 02 March 2014 - 03:34 AM

First remove your headlight with all 3 connectors, Highbeam/lowbeam, parkers and blinkers.


Then using the size 10 socket remove the 3 bolts holding the light on.


Proceed with removing the light, you will need to be careful not to break the white clips holding the light on.


The parkers and side blinkers have the same housing so we don't need to worry about those.


The high/low beam connector is different.  JDM is 4 pin ADM is 3 pin.


Remove the holding clip and remove the pins from the ADM connector using your pin.


You should end up with something like this.


Attached File  20140301_173234.jpg   271.72KB   13 downloads


Plug the pins into the JDM harness


Attached File  20140301_173153.jpg   107.37KB   13 downloads


Since the the JDM harness has 4 connectors you will neeed to splice the cable using your wire stripper. Solder the two positive connectors together using this wiring diagram. Attached File  headlight.pdf   28.98KB   18 downloads


Temporarily plug the light in and fit it into the chasis again and test.

Attached File  20140301_180212.jpg   93.26KB   13 downloads


#3 WillC

WillC

    Scrappy Coco the 2nd! Disc0 Disc0

  • Members
  • PipPipPip
  • 1,112 posts
  • Gender:Male
  • Location:Edensor Park
  • Interests:Suby, HOONda, Chasing magical unicorns, turbos. Fruit loops
    Most things with a pulse. Most things that tick and have electric.

Posted 02 March 2014 - 03:36 AM

Repeat for the other light and you're done.


Attached File  20140301_180503.jpg   91.98KB   14 downloadsAttached File  20140301_181052.jpg   117KB   13 downloads


Toy's Garry

Address : 8/88 Seville Street
Fairfield East NSW 2161
PH : (02) 9755 9882


#4 Dav_fre

Dav_fre

    Trusted Member

  • Members
  • PipPip
  • 209 posts

Posted 02 March 2014 - 10:27 AM

Now we just need someone to jump in with a step by step on the HID Levelling Switch install.


#5 Beckers

Beckers

    OMAR Cubt

  • Members
  • PipPipPip
  • 3,059 posts
  • Gender:Male
  • Location:South of the border, Blackburn
  • Interests:Docking and eating dry meat, Living lyf in the TT VOD

Posted 02 March 2014 - 10:41 AM

Hell yeah,


I need that shit too.


#6 WillC

WillC

    Scrappy Coco the 2nd! Disc0 Disc0

  • Members
  • PipPipPip
  • 1,112 posts
  • Gender:Male
  • Location:Edensor Park
  • Interests:Suby, HOONda, Chasing magical unicorns, turbos. Fruit loops
    Most things with a pulse. Most things that tick and have electric.

Posted 02 March 2014 - 12:01 PM

my install switch is on the way. I toqol a look at the schematic. It is Diy able and ill write ip the pinouts when im done


Toy's Garry

Address : 8/88 Seville Street
Fairfield East NSW 2161
PH : (02) 9755 9882


#7 Beckers

Beckers

    OMAR Cubt

  • Members
  • PipPipPip
  • 3,059 posts
  • Gender:Male
  • Location:South of the border, Blackburn
  • Interests:Docking and eating dry meat, Living lyf in the TT VOD

Posted 02 March 2014 - 01:10 PM

Thanks mate,


I had a look at the schematic from the service manual also, I was just not 100% sure the best way to make it.


#8 allpaw4

allpaw4

    Chief Sparky

  • Members
  • PipPipPip
  • 2,133 posts
  • Gender:Male
  • Location:Ararat
  • Interests:Cars, Stereos, Electrical

Posted 02 March 2014 - 06:52 PM

Once im back on night shift, I'll write up a diy on the levelling gear. I had to make up my own plug to go into the cabin switch. Other than that, the loom is simple to make. I've got a highlighted copy of the wiring diagrams that you need to make, and also where you need to get your power for it from (the proper circuit etc. )

MY00 Red RX, a nice daily that was sold off once the B4 became reliable...
MY02 Blue B4, aka 'The Project' - v8 JDM STi engine package and assorted other 'goodies' - Sold, then bought back for parts. Stripped and crushed.
MY03 Blue RX, the newer old daily, pretty well more B4 than RX now... In the process of being converted to the track toy... Watch this space!
MY02 Silver Wagon, H6 conversion, full blue/black leather and almost full black interior to go with it.
MY03 White/Silver H6 Outback, donor car for silver waghoon.
MY97 Silver RX, acquired to become track car, but plans changed. To be stripped and scrapped in time.


0 user(s) are reading this topic

0 members, 0 guests, 0 anonymous users