Jump to content


Photo

DIY - Gen3 NA Direct Air Intake


  • Please log in to reply
42 replies to this topic

#1 SUBARU

SUBARU

    Massive Member

  • Members
  • PipPipPip
  • 2,542 posts
  • Gender:Male
  • Location:Melbourne.

Posted 18 March 2009 - 02:07 PM

Hi all,

Some of you may have already seen my thread in other forums for some mods I've done for my air intake pipe, but have decided to add a DIY as there have been a few questions as to what parts I used, how long it took e.t.c.

This DIY will tell you how to remove the OEM air intake pipe and Resonators and replace them with a direct air feed pipe which connects to the OEM air intake and the OEM filter box.

My install was initially done on the cheap - all up it cost just over $30 and all parts came from Bunnings. However, you can have parts specially fabricated, or use intercooler piping which is available at most auto stores. It all depends on your hip pocket or how professional a job you need it to be. In any case, whether it be a cheap home DIY or a professionally fabricated job, you will be achieving the similar results.

The parts you are removing can be removed all in one red hot go, but before you do that you would be wise to measure up and get the parts required. There is not much point in ripping the old system out and then driving around to look for parts.

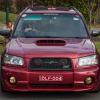
As marked in Yellow rings below, this is where the OEM piping gets removed from the front air intake vent and from the intake on the air filter box. I measured the pipe joins as beings 65mm in diameter, so I went on a hunt to find flexi-pipe to match.

Original setup with visual reference points
Posted Image

I didn't really bother measuring the length of the piping properly at this stage - I knew I needed at least 1 meter, just to make sure I had enough to account for any stuff ups e.t.c. We'll go into proper measurements later.

So after that, I knew I needed the follow:

65mm x 1mtr plus flexi pipe ~ $18
2 x connectors for the front air intake and the rear air filter box ~ $2.50 and only needed to buy one.
2 x 70mm oring clamps ~$2.50 each
1x 40mm x 4m PVC waterproof tape ~ $4

STEP 1: Parts and Fabrication of new pipe

The flexi pipe itself is called NETA POLY DRAIN - Sub Soil Drainage Pipe. The one I got was slotted - i.e. it has drainage holes all through it. You can get un-slotted pipes, but they were all 50mm and I wanted 65mm seeing as though that is the same diameter as the intake pipes on the air filter and front air intake.
It measures 65mm x 10m! They only had it in a 10m role and it cost me about $18.

The blue fittings on either end are from the same manufacturer as the flexi pipe. One of them comes with the role of flexi pipe and the other I had to buy separately for $2.30.
The blue bits fit straight on, although the one that goes onto the air filter box goes on the opposite way from the front one and requires a bit of pushing to get it on, you should be able to wiggle it all the way up and over the little notch on the top of the air filter intake.

The pipe, you'll have 10m of the stuff, so there is a bit of room for you to play around. I just roughly measured it a little bit longer than the stock pipe and cut it with a Stanley Knife - it was a sinch to cut through.

Once I had measured the right length, I then wrapped the flexi pipe in 40mm waterproof PVC tape to make an airtight seal on the pipe. I wasn't sure how this would turn out, but it worked really well and didn't look too dodgy/homemade.

STEP 2: Removal of OEM Pipe and Resonators

Removal of the OEM setup is a sinch.

As marked on the image above, the two red arrows indicate where you will find the two bolts that hold the resonators and piping to the engine bay. There is a support bolt near the front right shocker strut and one down below that supports the ABS control module and the resonators from the old system.
Just undo those bots and replace them afterwards.

The rest of the system should pop off pretty easily! Once it's off, make sure that it's all still assembled and store it in a safe place, just in case you want to restore to the factory setup.

OEM setup removed
Posted Image


STEP 3: Installing the new pipe

Work the two blue connector end pieces onto your flexi pipe and place the two o-ring tighteners/clamps over the top.
Stick the blue end pieces onto the intake pipes front and then rear and tightened the clamps...

There you have it! Job done!

New pipe connected to front air intake joint
Posted Image

New pipe connected to air filter joint
Posted Image

I hope the picture references are OK as a guide. Let me know if you would like any more detailed pics or any further assistance.

If you have even an ounce of DIY skill, you'll find this one a breeze. All up it took about 1 hour to remove, fabricate and install.

After having it installed for a week, I have noticed a dew differences in the cars driving character. It's a bit more willing to rev and take off in the lower RPM range and also it seems to have increased fuel economy a bit. Most importantly, the car sounds tougher now that those restrictive resonators are gone.

One thing to check frequently with this setup is your air filter - just to make sure that there are no big lumps of cr@p clogging up the system.

OEM replaced with new piping
Posted Image


UPDATE - New pipework upgraded from previous setup as per below:

The below pipes are a clear upgrade from the cheaper option above. This setup provides a much more airtight setup and provides a noticable difference.
The pipe is 70mm intercooler tube and the joiners are 45 degree silicon. All purchased from Supercheap Auto. They were very accomodating in allowing me to test fit these on site before purchasing.

Posted Image

Posted Image

#2 Xon

Xon

    Regular Member

  • Members
  • PipPipPip
  • 1,535 posts
  • Gender:Male

Posted 19 March 2009 - 07:05 AM

New piping looks much better. Does this count as an entry to the DIY comp considering it's ooollldddd? :D

I would have gone to the kitchen, collected a brown bag, dropped my dacks, pinched off a loaf in said bag, done up dacks, stickytaped bag, placed bag in envelope, and mailed it right to your face for being such a tool.


It's ok, sometimes when we herp, we also derp.


#3 SUBARU

SUBARU

    Massive Member

  • Members
  • PipPipPip
  • 2,542 posts
  • Gender:Male
  • Location:Melbourne.

Posted 19 March 2009 - 10:04 AM

New piping looks much better.
Does this count as an entry to the DIY comp considering it's ooollldddd? :D


New piping is now ooollldddd.

It might be old on other sites, but it's brand spanking new over here!

#4 chainber

chainber

    New Member

  • Members
  • Pip
  • 38 posts

Posted 08 September 2010 - 09:50 PM

hi
u guys know if this fits 03 lib rx??? (Subaru 05-07 06 Legacy GT Cold Air Intake Kit + Filter)
http://cgi.ebay.com/...sQ5fAccessories

any is it worth it to install it? and benefits?

#5 Delete This Account

Delete This Account

    Regular Member

  • Members
  • PipPipPip
  • 18,635 posts
  • Gender:Male
  • Location:Earth

Posted 09 September 2010 - 08:29 AM

hi
u guys know if this fits 03 lib rx??? (Subaru 05-07 06 Legacy GT Cold Air Intake Kit + Filter)
http://cgi.ebay.com/...sQ5fAccessories

any is it worth it to install it? and benefits?


No it wont, as the hole for the Air flow meter is in completely the wrong place.

Getting a pod filter will add some noise to the engine bay, that's about it.

Do a home made one like above^ it will be a lot cheaper as just as effective.

#6 bobbyjimmy

bobbyjimmy

    Regular Member

  • Members
  • PipPipPip
  • 1,287 posts
  • Gender:Male
  • Location:Canberra

Posted 09 September 2010 - 03:17 PM

Gen 3 N/A's don't have an airflow metre.

2002 Outback - it's gone...


#7 Delete This Account

Delete This Account

    Regular Member

  • Members
  • PipPipPip
  • 18,635 posts
  • Gender:Male
  • Location:Earth

Posted 09 September 2010 - 03:20 PM

Well there you go!

#8 chainber

chainber

    New Member

  • Members
  • Pip
  • 38 posts

Posted 09 September 2010 - 06:26 PM

ok home job it is, thanks i was thinking taking the whole filter out thats all.

#9 SAV84C

SAV84C

    Regular Member

  • Members
  • PipPipPip
  • 3,480 posts
  • Gender:Male
  • Location:Sydney

Posted 14 September 2010 - 07:08 PM

Sorry if i'm taking over, heres a few pics of mine...

I used pvc piping n elbows n 1 intercooler elbow that sits in the guard opening..

Posted Image

Posted Image


Posted Image

#10 chainber

chainber

    New Member

  • Members
  • Pip
  • 38 posts

Posted 20 October 2010 - 02:12 PM

Hi there, just wondering can any1 help me how i can fit the silicon hose into the pipe.
As atm i.cant fit the 2.5' hose to the 2.5' pipe. Any help is greatly appreciated.

Thanks
J

#11 buzzda

buzzda

    Regular Member

  • Members
  • PipPipPip
  • 3,370 posts
  • Gender:Male

Posted 20 October 2010 - 02:13 PM

Warm it up a bit? in some hot water maybe (not too hot)? or a hairdryer? could also try bit of detergent on the pipe (like you used too with bike handle grips)

#12 Morgan

Morgan

    ...jus waitin' 4 a m8

  • Members
  • PipPipPip
  • 25,485 posts
  • Gender:Male
  • Location:Central Coast
  • Interests:Taking a poo

Posted 20 October 2010 - 02:51 PM

LUUUBE it

IM47Gcv.jpg


#13 chainber

chainber

    New Member

  • Members
  • Pip
  • 38 posts

Posted 20 October 2010 - 09:56 PM

I tried lub n warming up but it didnt work. Just wondering how pm did wif his
In the pic above. His one look likr 3.5 pipe and fit to yhe 2' hose.

#14 Guest_JB_Sube09_*

Guest_JB_Sube09_*
  • Guests

Posted 20 October 2010 - 10:16 PM

Hi there, just wondering can any1 help me how i can fit the silicon hose into the pipe.
As atm i.cant fit the 2.5' hose to the 2.5' pipe. Any help is greatly appreciated.

Thanks
J

Are you trying to fit the silicon joiner into the pipe? I thought the joiner went on the outside??

#15 chainber

chainber

    New Member

  • Members
  • Pip
  • 38 posts

Posted 21 October 2010 - 12:03 AM

Yeah the hose goes on the outside but look how thick pm's pipe is im da pic. Tats why i want
To ask how he did it.
Is it bc his hose is very flexible coz mine dont streach much.

#16 buzzda

buzzda

    Regular Member

  • Members
  • PipPipPip
  • 3,370 posts
  • Gender:Male

Posted 21 October 2010 - 07:48 AM

Either your not trying hard enough or your a skirt, go have a couple of weetbix and try again.

#17 Delete This Account

Delete This Account

    Regular Member

  • Members
  • PipPipPip
  • 18,635 posts
  • Gender:Male
  • Location:Earth

Posted 21 October 2010 - 07:51 AM

Like Jesse said, get a silicon joiner and two hose clamps from Super cheap auto.

#18 buzzda

buzzda

    Regular Member

  • Members
  • PipPipPip
  • 3,370 posts
  • Gender:Male

Posted 21 October 2010 - 07:55 AM

He's got a silicone joiner, he can't get it onto the pipe :scratch_one-s_head:

#19 Delete This Account

Delete This Account

    Regular Member

  • Members
  • PipPipPip
  • 18,635 posts
  • Gender:Male
  • Location:Earth

Posted 21 October 2010 - 07:56 AM

He's got a silicone joiner, he can't get it onto the pipe :scratch_one-s_head:


How? hahaha


Wrong size joiner?

#20 buzzda

buzzda

    Regular Member

  • Members
  • PipPipPip
  • 3,370 posts
  • Gender:Male

Posted 21 October 2010 - 07:58 AM

I have no idea, apparently there both 2.5.


0 user(s) are reading this topic

0 members, 0 guests, 0 anonymous users