The model car thread!


 Jimbo
30 Jun 2015
Jimbo
30 Jun 2015
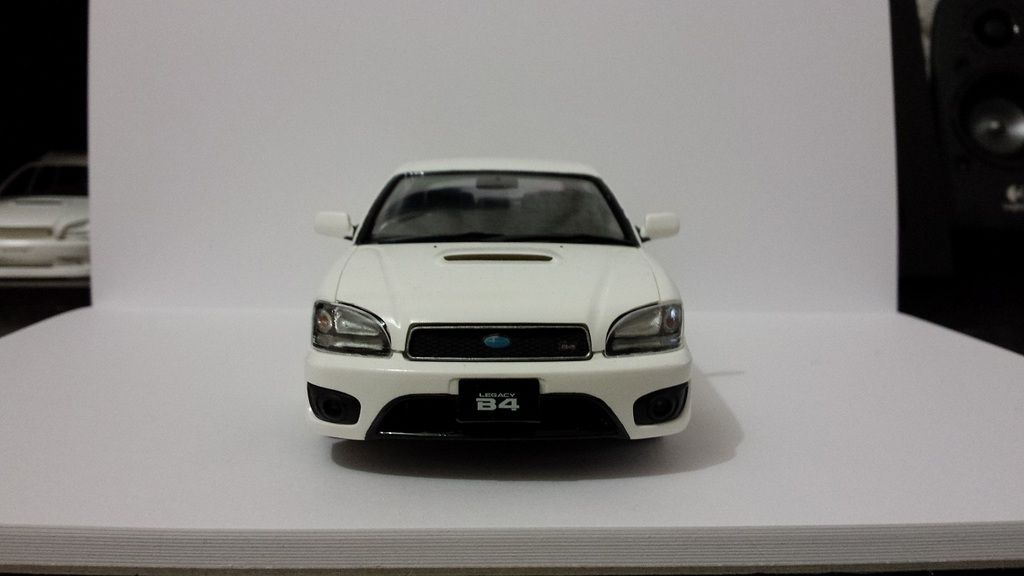
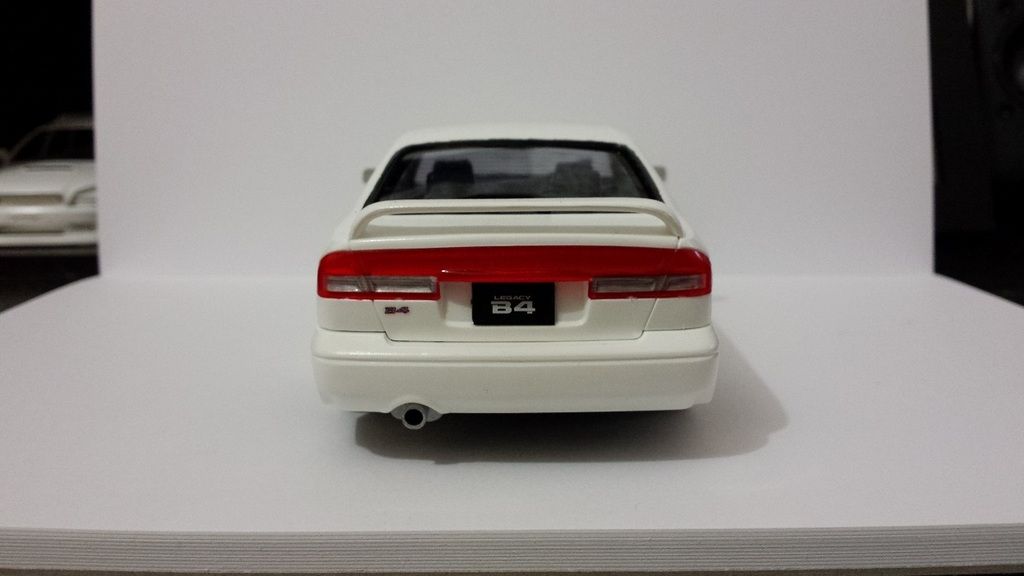
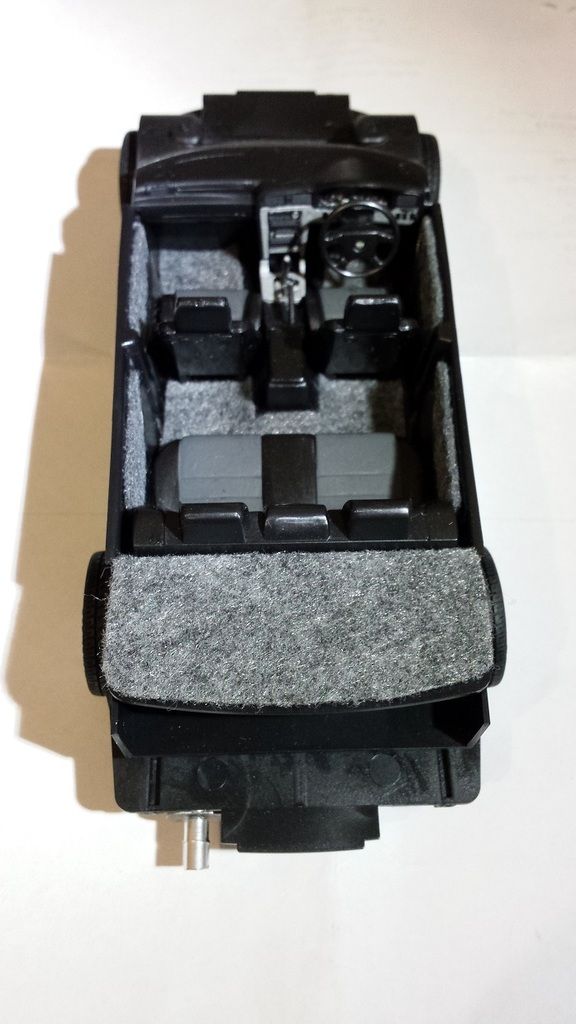
Another one down! Excuse the crappy photos, this room has really bad lighting.
The rear garnish is a bit lighter this time than I would have liked. I used a Tamiya clear red spray (First time using) instead of hand painting it with Tamiya clear red liquid paint. Should have put more coats down or darkened the body behind it. My RS30 rear garnish is perfect in opacity, lesson learnt. I didn't glue it in real tight so I may whip it off and add more coats.
B4 RSK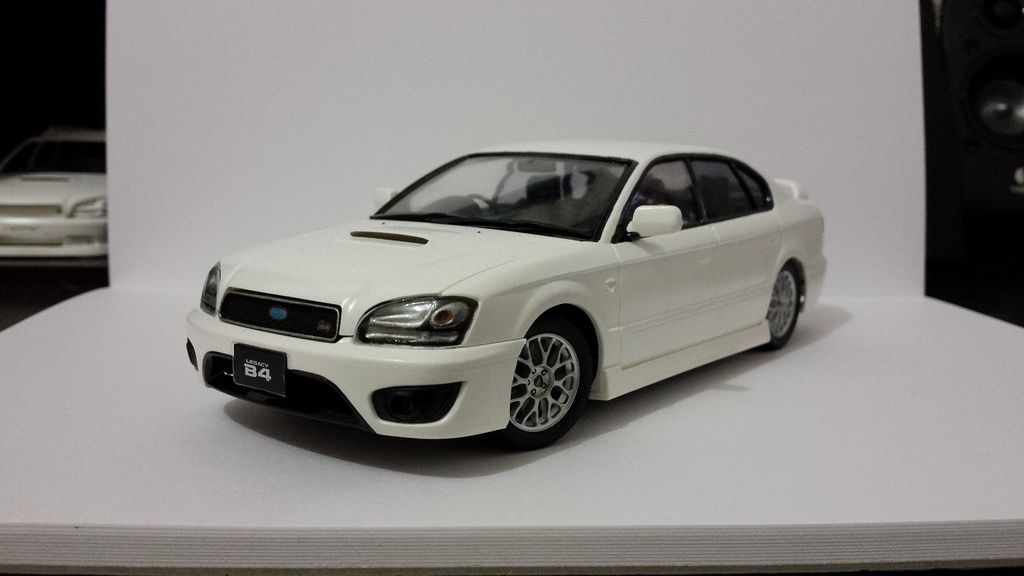

 Seane
18 Jul 2015
Seane
18 Jul 2015

Getting my geek on here...
For most of my childhood I spent my pocket money on making plastic scale models. At last count I had 165 of them, filling drawers, shelves, cupboards, you name it... then I got married... and now there are only 12 left. This one of them. I haven't made a model kit since 1997 now.
I made this one about 20 years ago as obviously a Mad Max themed car. I was making it when I met my now wife so that might explain why she still tolerates it being around.

The base kit is Monogram's 1:24 scale '66 Malibu SM which I chose simply because it only cost $20.00 and it came with a few different wheels and accessories to make about 3 different versions in the one kit. It gave me a variety of parts to mix and match. The flame thrower is made from a leftover missile from a De Havilland Sea Venom (Matchbox kit) and some drop tanks from an A4 Skyhawk, with the front lights from a M113 APC acting as the gauges. Lines were made by melting and stretching some of the sprue. Bar work is more of the kit's sprue, while the extra fuel tank is the snorkel from a 1:25 Leopard MBT. Assorted other plastic bits were made out of an old margarine container. The chain's are from some old costume jewellery necklaces. The window mesh is bits of old fly-screen. Bullet holes with a heated pin and then counter sunk a bit with the tip of my scalpel knife
Not that you can see it here but inside there's a stack of junk such as a 44 gallon fuel drum and a bedroll made up of a folded tissue, dipped in PVC glue and then painted and tied with left over rigging cable from Revel's USS Constitution (you can see that ship in the 'man-cave' picture in my gallery here). Plus I threw in some other junk from my leftover's box from old kits (always keep the parts you don't use... they come in handy for stuff like this)
Cutting the chunk out of the roof was probably the most traumatic bit of the kit process as if I'd gotten that wrong it would have stuffed everything else up, but thankfully the cut looked good. Bending the inner bar work for the roll cage wasn't that easy either. Apart from that it all went easily. I painted it matt black and then before the paint was fully dry (about 80% dry) gave it a wash with turpentine which caused the paint to crack and craze a bit. Metal bit were painted silver then given a texture with a very dry brush dabbing on a red brown. Then I gave the entire model a couple of coats of diluted golden-brown wash for the dust effect building it up on the sides etc
And so now it's been sitting on my shelf through 3 house moves for the past 20 years, but with the new Mad Max movie I thought I'd show it off.
Advice/Tips On Modelling of Cars
You can use the touch up spray cans of real car paint that you buy in supacheap autos etc to paint your model car. The paint will eventually degrade the plastic but it takes years and years. You can slow the process by using a non-mineral based primer first
Spray the body and assorted necessary bits before you do anything else. Just like a real car is built! That way you don't have to mask anything off.
Use a decent sized cardboard box tipped it's side with the uppermost side cut out as a spray booth. That way any little bits that may shift with the force of the spray don't go flying. You can also secure them with a small dob of bluetac. Use an old wire coat hanger bent into a U shape as a support frame for the body shell and you can hold this wire and turn the body shell around in your hand to get all the bits nice and evenly. Make sure to spray the undersides and insides as well. You'll be surprised what parts end up being visible in the end.
Just like a real spray job DONT STOP until the entire coat is done all over!! Work fast and thin, the small scale of the car will be affected by too thick a spray and this stuff dries almost instantly.
When you come to glue things touching the paint you will need to scrape the paint off with the edge of a knife along the join spots otherwise the glue won't bond properly with the plastic. The paint is too hard.
You can give the paint a coat of clear spray (you can buy proper stuff at hobby shops) and then buff with a rag. Beware of heat buildup or you can warp the plastic if it gets too warm. Clear/neutral boot polish also works but test you brand on some scrap painted plastic from the kit first.
Ignore the instructions and ALWAYS put the "glass" in as late as possible. Even last if you can. Make sure you hands are absolutely clean and use the bare minimum of glue. Just a dot in each corner is enough frankly. You can also buy a glue called "Krystal klear" from hobby shops that dry transparent and don't fog the clear plastic. This stuff is also good for headlights and tailights.
Paint tailights on the INSIDE of the clear plastic then use the smallest dob of glue to attach them. This keeps them looking shiny on the outside and glass like but also gives the colours.
When attaching the body to the chassis base you often don't need to glue it at all. They often clip on well enough as it is. Leave it like this and you can take it off and access the interior whenever it needs a dust or a freshen up with the colour. This isn't for every car, but more often than not.
Make radio antennae by softening a piece of the spruce over a candle, then stretching it thin very fast. This is how I made the fuel lines for the flamethrower on the car above btw. Then cut to length and glue on!
Keep your fingers very clean of glue as even the smallest spot will stuff up the paint job, and inevitably by then you'll be too far along to fix it properly. I even used to keep the body shell away on a separate desk until I needed it to be doubly sure!
cheers
Sean
 Liberty
19 Jul 2015
Liberty
19 Jul 2015
That looks amazing man, and what takes it to the next level is your creativity in going custom with it.
I really want to get into model-building after seeing that actually.
 gen3v8
19 Jul 2015
gen3v8
19 Jul 2015
Some of my model cars, bit different, all tether cars
The first one is a 1970 Cox gt40 as it was purchased. It has a .049cu/I glow engine.
Second one is body purchased from Kmart, that measured up ok for fitment. It is also a .049 with ball bearing rear axle.
The last two are hand made, gears flywheels, cylinder heads and ball bearing axles. They have Norvel engines fitted to aluminium extrusion and bolted onto the chassis. Squarish model has a .049 cu/i engine and the other a .061 cu/I (1cc).
These two are over fast 100km/h+ and dangerous to run, But fun.
Attached Files
-
 DSC03794.JPG 149.71KB
9 downloads
DSC03794.JPG 149.71KB
9 downloads
-
DSC03795.JPG 152.15KB
8 downloads
-
DSC03796.JPG 152.24KB
8 downloads
-
DSC03797.JPG 143.36KB
8 downloads
-
DSC03798.JPG 141.16KB
8 downloads
-
DSC03799.JPG 151.96KB
8 downloads


Liberty
27 Dec 2015
I know it's not a DIY model (or Subaru models as a matter of fact) but Catch of the Day has these on sale in case someone was interested.
 jonesyGT
01 Jan 2016
jonesyGT
01 Jan 2016
They're over the road from the train station next to the pub, not the shopping centre side.
 LPM_B4
04 Jan 2016
LPM_B4
04 Jan 2016
IMAG0829.jpg 174.57KB
6 downloads1:24 scale
Should be a bit of fun when I get around to it plenty of good hints in this thread too.


