
More top work there Joel!
Seriously, am I the only one following this on this forum?? I'm glad you're still posting in this thread!
Cheers
Bennie

584 replies to this topic
#121

El_Freddo
-

- Members
-

- 2,313 posts
Rock'n the old Skool
- Gender:Male
- Location:Bridgewater/Central Vic/semi-retired nomad
- Interests:Subarus, 4wd'n Subarus, travelling Subarus, Tinkering... I could go on!
Posted 06 May 2018 - 11:26 PM
"The lounge room is not a workshop..."
https://www.imageshack.us/i/po1BKrxbj

El Freddo's Pics - El_Freddo's youtube
https://www.imageshack.us/i/po1BKrxbj
El Freddo's Pics - El_Freddo's youtube
#122
Barbbachello
-

- SubyClub Area Rep
-
- 6,487 posts
Touring Bruce
- Gender:Male
- Location:Mehico
- Interests:Docking
Posted 07 May 2018 - 08:56 AM
Im definitely watching

#123
Sven Smergberd
-

- Members
-
- 7,511 posts
Member's Member
- Gender:Male
- Location:Sydney City
Posted 07 May 2018 - 11:06 AM
Same.
Although I also see Joel across a few forums and the 86 track cars fb page.
This build is truly one of a kind. It's worth following for the weld porn alone.
Although I also see Joel across a few forums and the 86 track cars fb page.
This build is truly one of a kind. It's worth following for the weld porn alone.
#124
JDWhiteWRX
-
- Members
-
- 591 posts
Regular Member
- Gender:Male
- Location:Royal National Park, NSW
Posted 07 May 2018 - 09:10 PM
Thanks guys.
Follow me on Insta: @brzdiy
#125
JDWhiteWRX
-
- Members
-
- 591 posts
Regular Member
- Gender:Male
- Location:Royal National Park, NSW
Posted 10 May 2018 - 06:48 PM
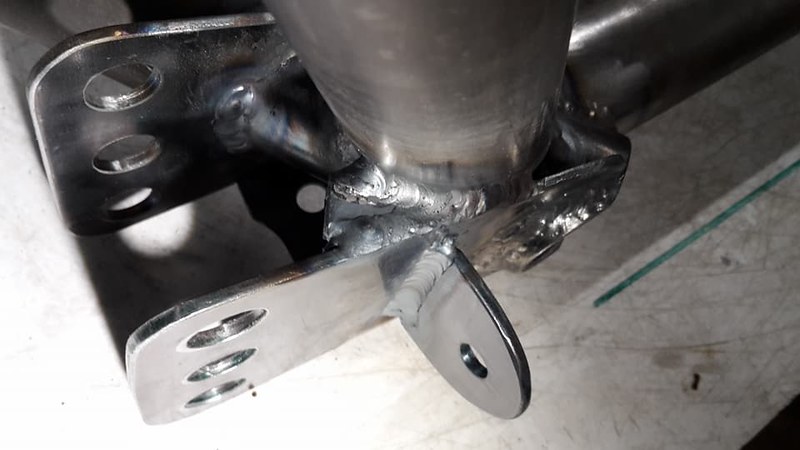
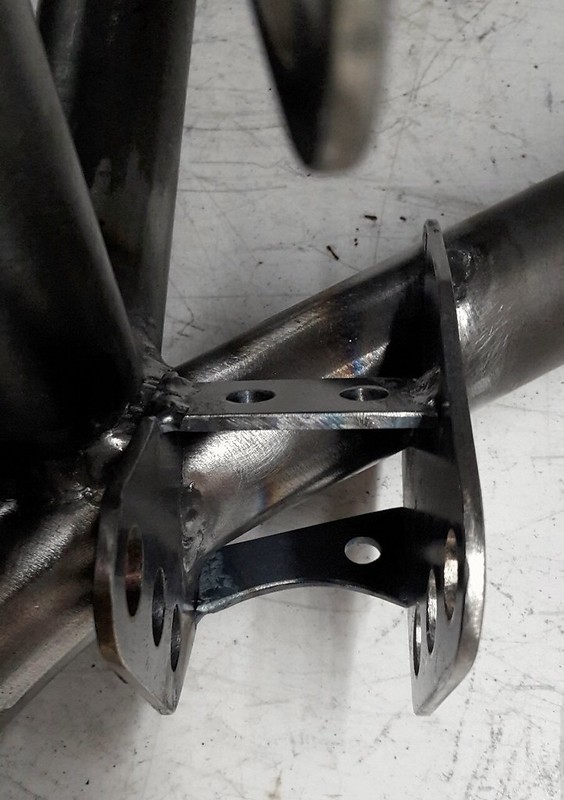
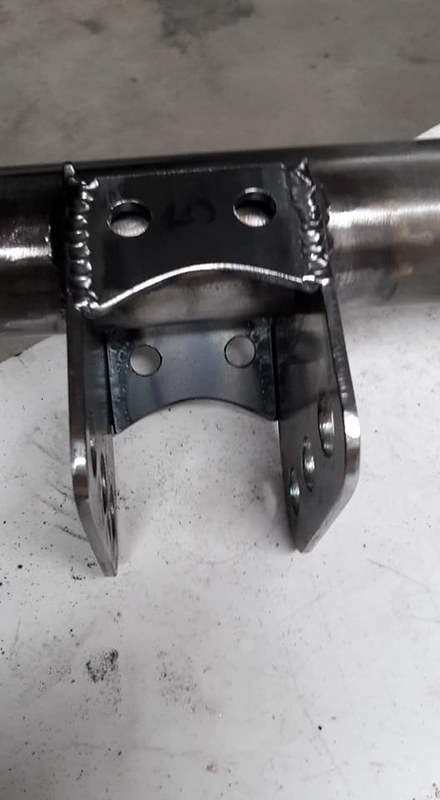
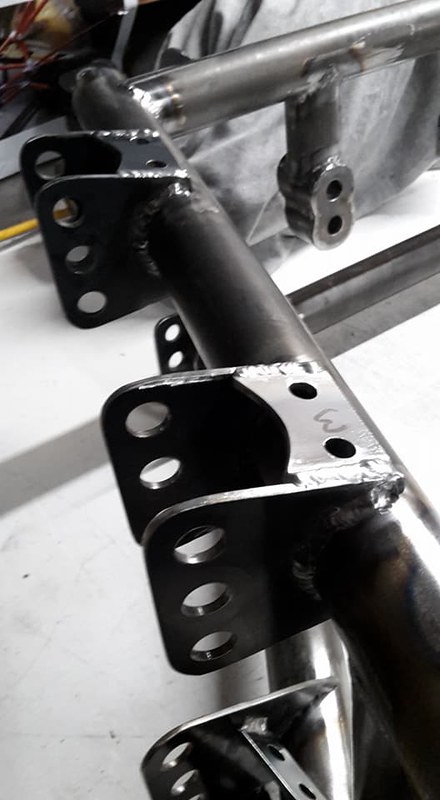
A small update today, I have added some mounting brackets for a rear wing onto the back of the suspension cradle. Much easier to add these now than when its in the car.
Those small triangular pieces were just to add a little extra bracing to the rear tab.

I will begin mounting it into the car on the weekend.
Follow me on Insta: @brzdiy
#126
JDWhiteWRX
-
- Members
-
- 591 posts
Regular Member
- Gender:Male
- Location:Royal National Park, NSW
Posted 12 May 2018 - 10:31 PM
A very long day in the garage but probably my last for a little while as I need to spend a bit more time on other things.
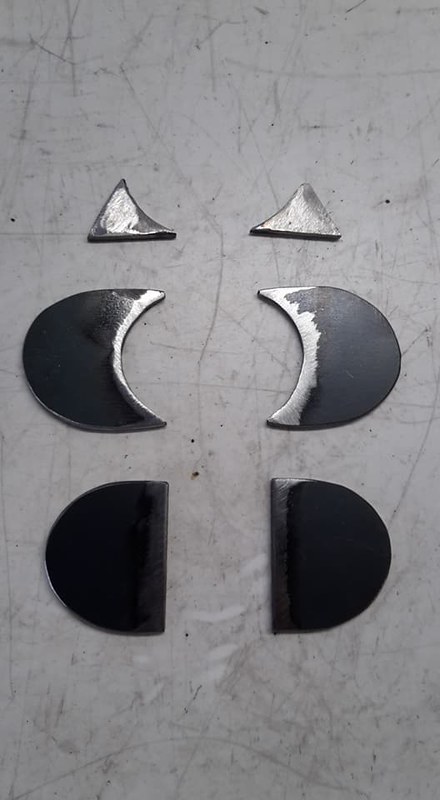
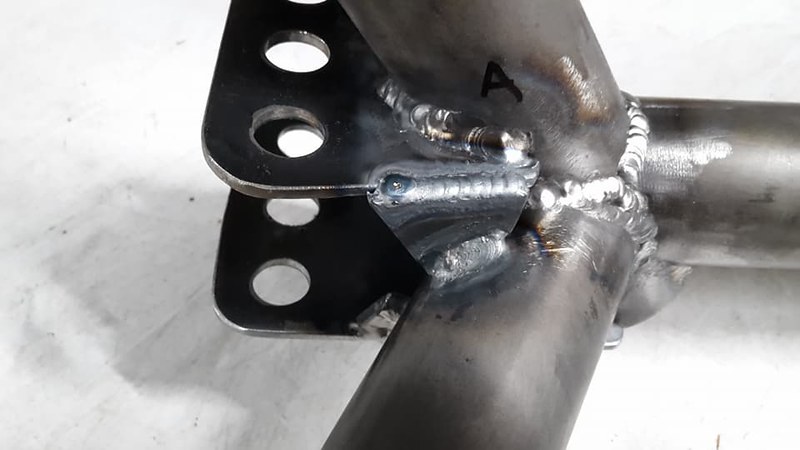
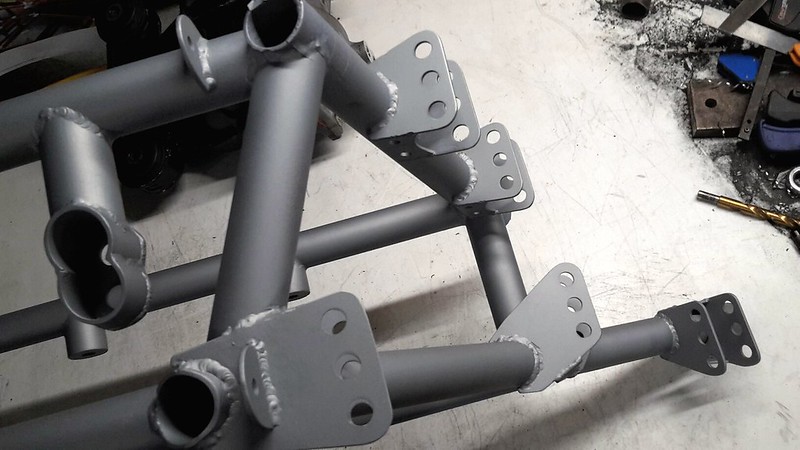
I ended up making 16 gussets to add strength to all the control arm mounting points, the extra weight of the gussets was 375 grams.
A bit of a production line.
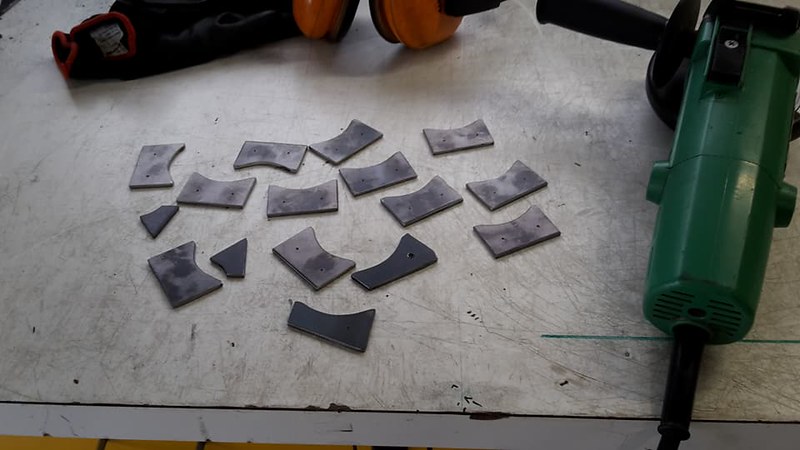
The smallest ones were just to finish off bracing the lower rear control arm mounting point.
The next size up were for the base of the toe arm mounting points.
All the rest were the same size and were added to the upper control arm and trailing arm mounting points.
I then went over all the welds with a series of wire brushes in my cordless drill. Following that it was all wiped down with wax and grease remover and the areas where I still need to weld to were masked up.
Then I painted it will cold gal to prevent any surface rust forming whilst I complete the build.
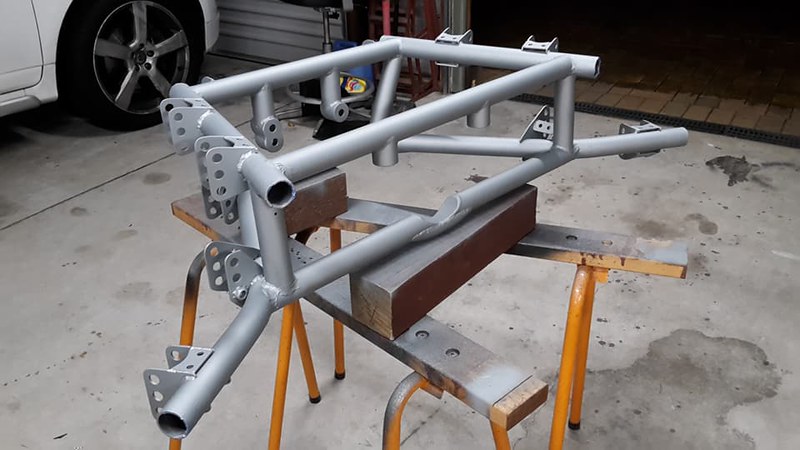
So that's it for now, it can go in the car next but as I said I'm going to take a little break first.
Follow me on Insta: @brzdiy
#127
JDWhiteWRX
-
- Members
-
- 591 posts
Regular Member
- Gender:Male
- Location:Royal National Park, NSW
Posted 13 May 2018 - 10:22 AM
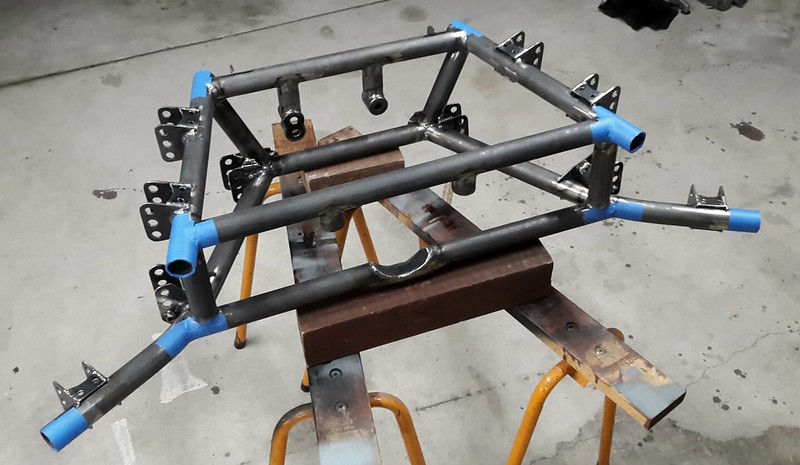
Just weighed the frame:
Stock frame 24kg (53lbs)
My frame 16kg (35lbs)
Pretty good weight saving so far.
Follow me on Insta: @brzdiy
#128
Sven Smergberd
-
- Members
-
- 7,511 posts
Member's Member
- Gender:Male
- Location:Sydney City
Posted 13 May 2018 - 02:21 PM
Wow, that is a decent loss.Just weighed the frame:
Stock frame 24kg (53lbs)
My frame 16kg (35lbs)
Pretty good weight saving so far.
I like the bracing, can't wait to see it drop in.
#129
El_Freddo
-
- Members
-
- 2,313 posts
Rock'n the old Skool
- Gender:Male
- Location:Bridgewater/Central Vic/semi-retired nomad
- Interests:Subarus, 4wd'n Subarus, travelling Subarus, Tinkering... I could go on!
Posted 17 May 2018 - 11:50 PM
Pretty decent weight saving is an understatement!
Good idea welding on the rear wing mount tabs too
I'm looking forward to the next update!
Cheers
Bennie
Good idea welding on the rear wing mount tabs too
I'm looking forward to the next update!
Cheers
Bennie
"The lounge room is not a workshop..."
https://www.imageshack.us/i/po1BKrxbj
El Freddo's Pics - El_Freddo's youtube
https://www.imageshack.us/i/po1BKrxbj
El Freddo's Pics - El_Freddo's youtube
#130
JDWhiteWRX
-
- Members
-
- 591 posts
Regular Member
- Gender:Male
- Location:Royal National Park, NSW
Posted 17 June 2018 - 06:42 PM
Hi Guys,
I have had a little break from the car but got started again today.
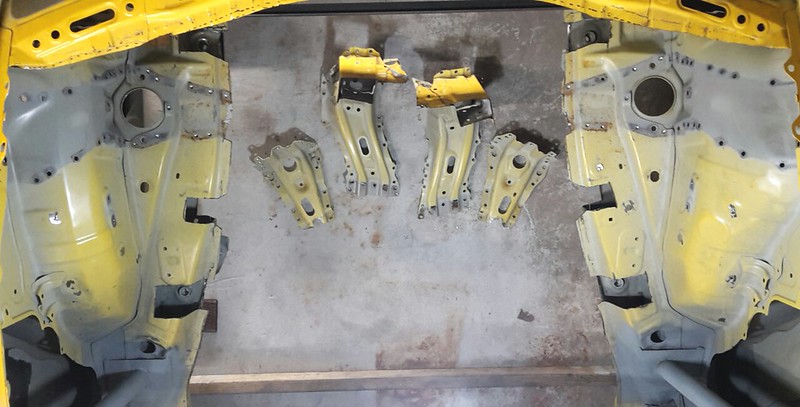
I got the diff bushings out and am in the process of making some solid mounts to replace them. Next job was getting the rear end of the car ready to install the cradle. I started by removing some of the bracing around the shock mounts as I will need access to this area to fabricate the new mounts. I also removed the bracing above that as I kept bumping my head on it.
Lots of spot welds to drill out but the operation was a success.
I will show what I did with the front diff mounts later on when they are complete, I am waiting on my friend to turn up a couple of bits of aluminium alloy on the lathe as spacers. The spacers are not straight forward as I have limited space between the upper and lower tubes and therefore had to make the heads of the nuts recessed.
Here is a little sneak peak of the next step.
Follow me on Insta: @brzdiy
#131
El_Freddo
-
- Members
-
- 2,313 posts
Rock'n the old Skool
- Gender:Male
- Location:Bridgewater/Central Vic/semi-retired nomad
- Interests:Subarus, 4wd'n Subarus, travelling Subarus, Tinkering... I could go on!
Posted 17 June 2018 - 08:10 PM
We need a like button on this forum!
Looking tops, I like the new sunroof
Cheers
Bennie
Looking tops, I like the new sunroof
Cheers
Bennie
"The lounge room is not a workshop..."
https://www.imageshack.us/i/po1BKrxbj
El Freddo's Pics - El_Freddo's youtube
https://www.imageshack.us/i/po1BKrxbj
El Freddo's Pics - El_Freddo's youtube
#132
JDWhiteWRX
-
- Members
-
- 591 posts
Regular Member
- Gender:Male
- Location:Royal National Park, NSW
Posted 24 June 2018 - 07:30 PM
Another small update:
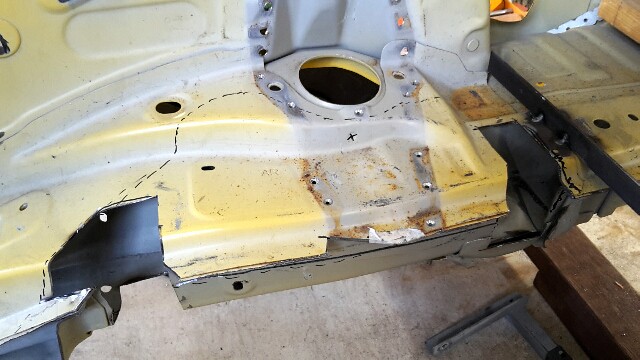
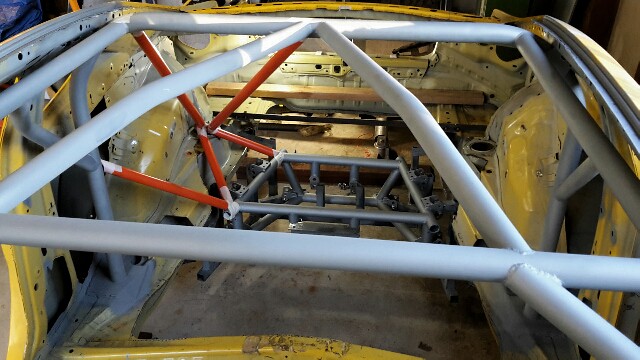
More work toward getting the subframe permanently mounted into the back of the car today.
I had to get the cradle back into the welding jig as the jig bolts to the factory mounting points placing the cradle in the correct position. I had some trouble getting it back into the jig because the extra gussets I added were preventing it from sliding down into position. So I had to cut two of the control arm locating points off the jig.
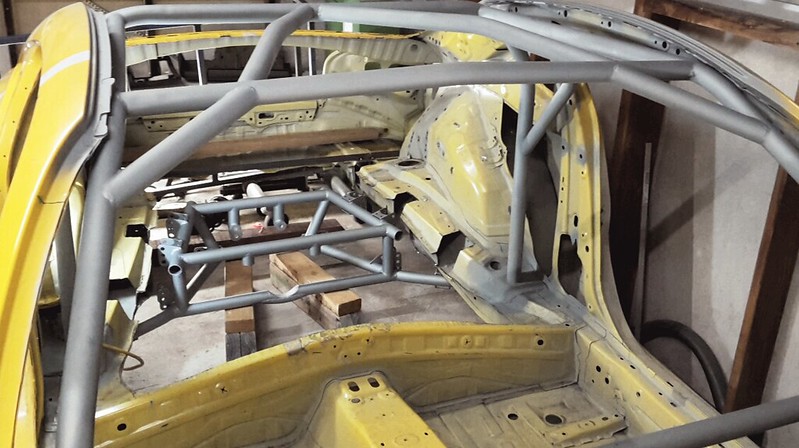
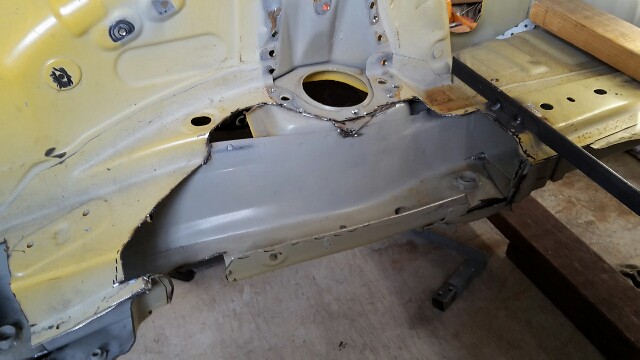
Next I had to trim some more sheet metal away to allow some space to run the tubes up to the shock mounts.
Before
After
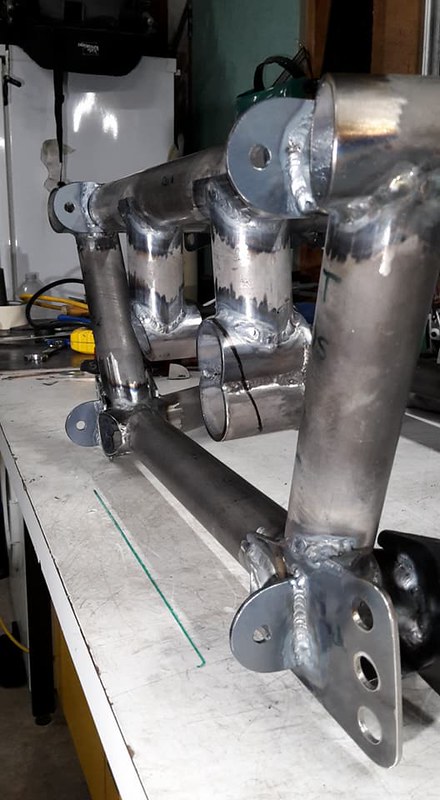
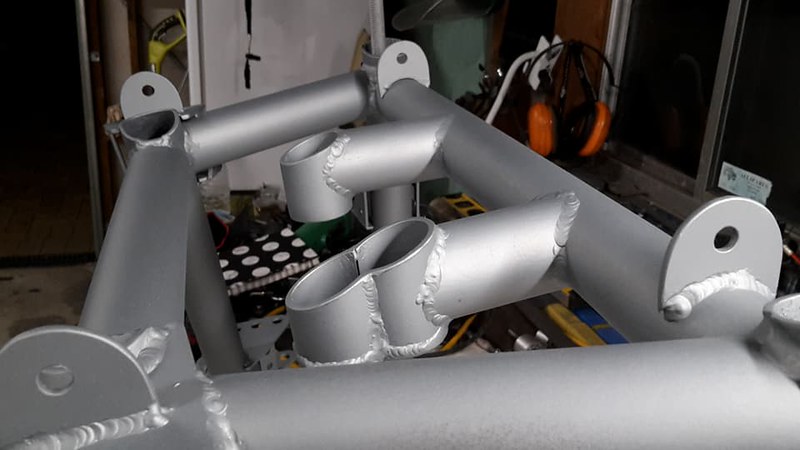
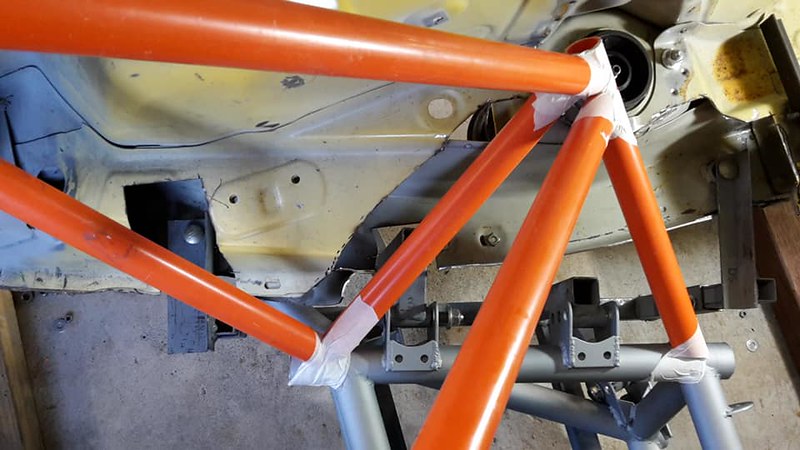
With the cradle back in the jig I then bolted it into position in the rear of the car and begun to mock up my tubes for the shock mounts. Using the electrical conduit is a good way to visualise things before cutting up the steel tube. The junction of tubes around the shock mount is complex but I think this configuration is the best possible and by placing it in front of the shock it shortens up the tube lengths and saves some weight.
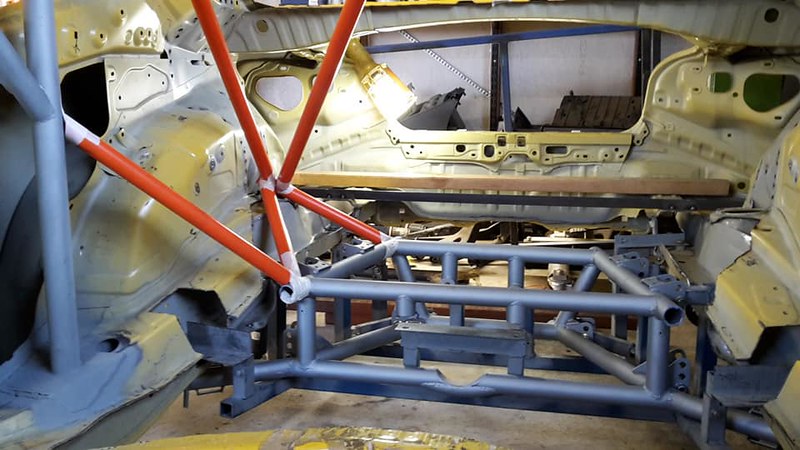
You can see here how all the connecting tubes have their load path continuing through the roll cage to existing tubes.
Follow me on Insta: @brzdiy
#133
Barbbachello
-
- SubyClub Area Rep
-
- 6,487 posts
Touring Bruce
- Gender:Male
- Location:Mehico
- Interests:Docking
Posted 25 June 2018 - 08:37 AM
nucking futs
#134
El_Freddo
-
- Members
-
- 2,313 posts
Rock'n the old Skool
- Gender:Male
- Location:Bridgewater/Central Vic/semi-retired nomad
- Interests:Subarus, 4wd'n Subarus, travelling Subarus, Tinkering... I could go on!
Posted 25 June 2018 - 09:42 PM
Yep, what Barbs said!
Will you be knocking up a frame buggy in your sleep next??
Cheers
Bennie
Will you be knocking up a frame buggy in your sleep next??
Cheers
Bennie
"The lounge room is not a workshop..."
https://www.imageshack.us/i/po1BKrxbj
El Freddo's Pics - El_Freddo's youtube
https://www.imageshack.us/i/po1BKrxbj
El Freddo's Pics - El_Freddo's youtube
#135
JDWhiteWRX
-
- Members
-
- 591 posts
Regular Member
- Gender:Male
- Location:Royal National Park, NSW
Posted 26 June 2018 - 08:30 AM
Frame buggy?
Follow me on Insta: @brzdiy
#136
El_Freddo
-
- Members
-
- 2,313 posts
Rock'n the old Skool
- Gender:Male
- Location:Bridgewater/Central Vic/semi-retired nomad
- Interests:Subarus, 4wd'n Subarus, travelling Subarus, Tinkering... I could go on!
Posted 26 June 2018 - 09:33 PM
Frame buggy?
Frame buggy/sand rail/dune buggy/desert racer buggy... One like those!
Building one of them will be child's play compared to that rear frame structure!
Cheers
Bennie
"The lounge room is not a workshop..."
https://www.imageshack.us/i/po1BKrxbj
El Freddo's Pics - El_Freddo's youtube
https://www.imageshack.us/i/po1BKrxbj
El Freddo's Pics - El_Freddo's youtube
#137
JDWhiteWRX
-
- Members
-
- 591 posts
Regular Member
- Gender:Male
- Location:Royal National Park, NSW
Posted 11 July 2018 - 09:15 PM
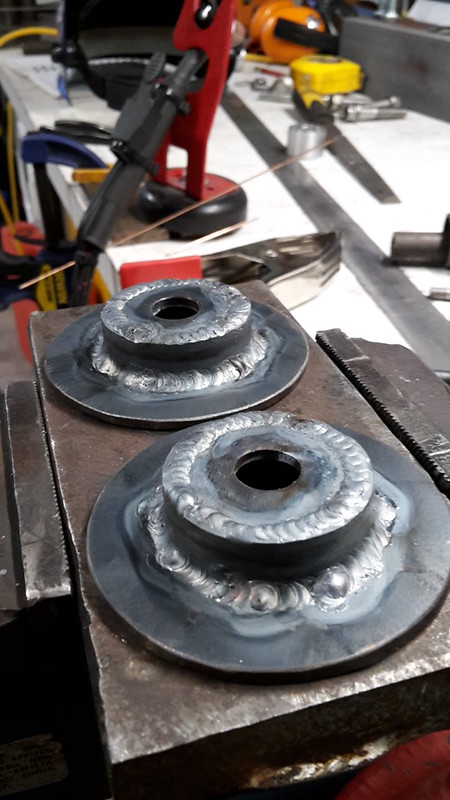
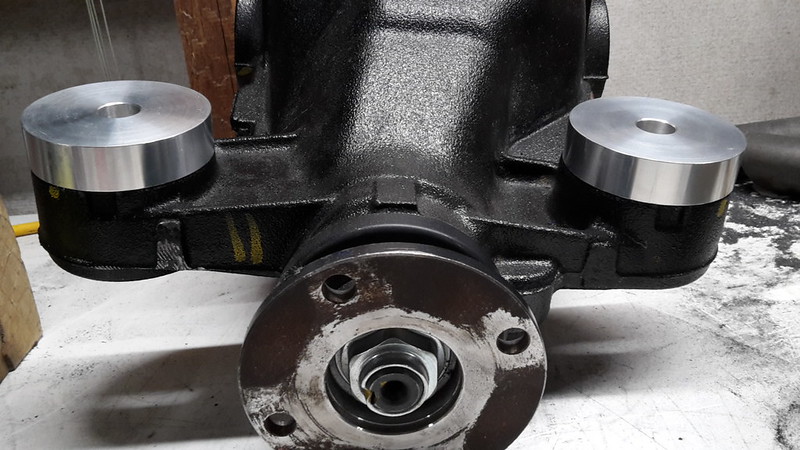
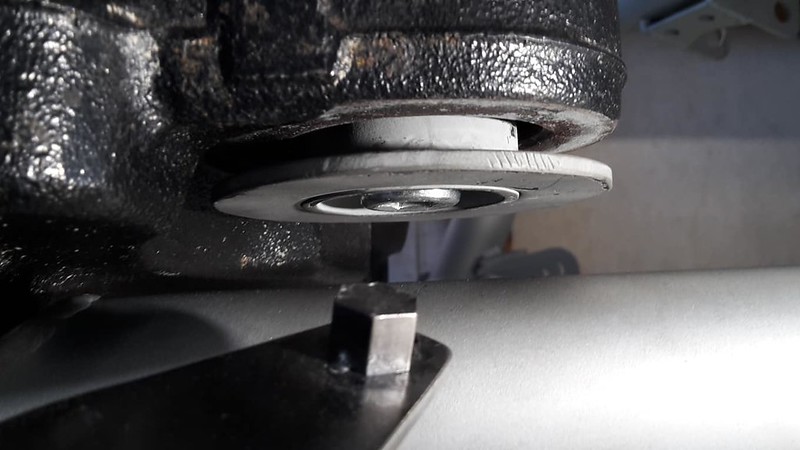
I have finished the diff mounts now so I will share some photos. They were a bit of a challenge to get right as there is minimal space between the upper and lower tubes for the snout of the diff.
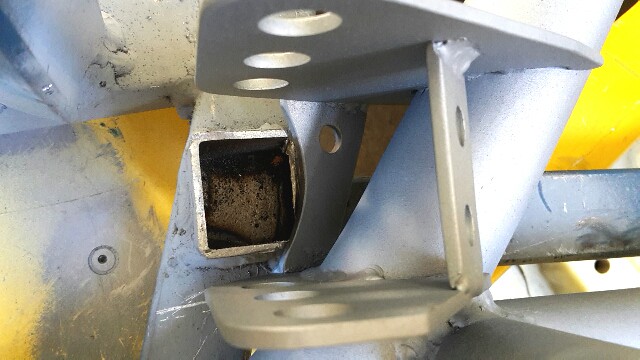
You can see here in this older photo that there is not much gap between the head of the bolt and the lower tube.
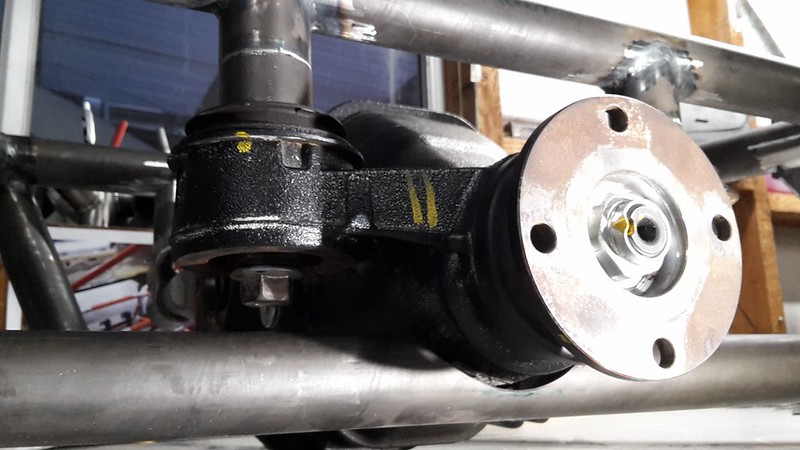
The bolt in the photo above was actually 14mm too short but simply using a longer bolt would not work as it would clash with the lower tube.
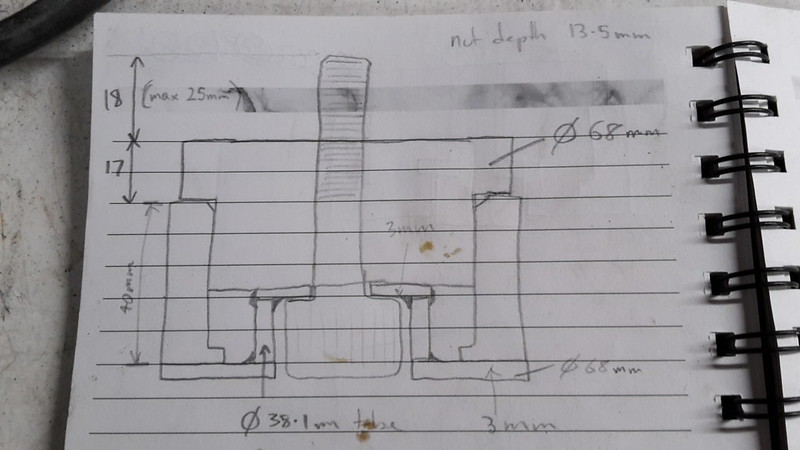
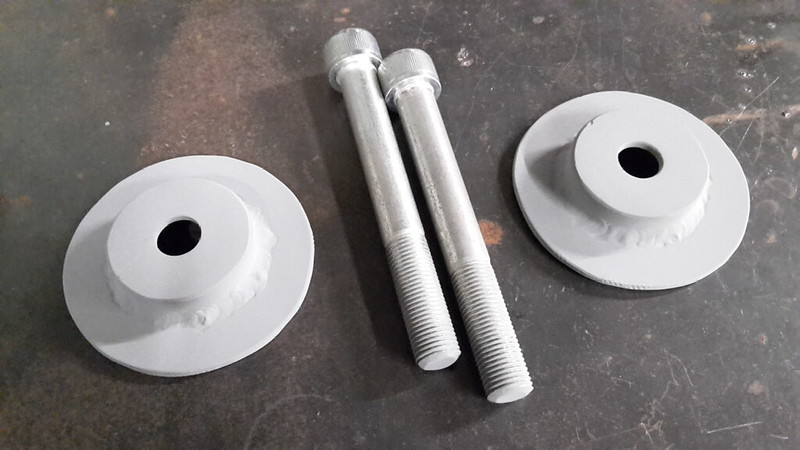
My solution was to make some recessed washers meaning I could use a similar length bolt that would push up into the recess to get the proper thread engagement in the captive nuts above.
This is my design on paper.
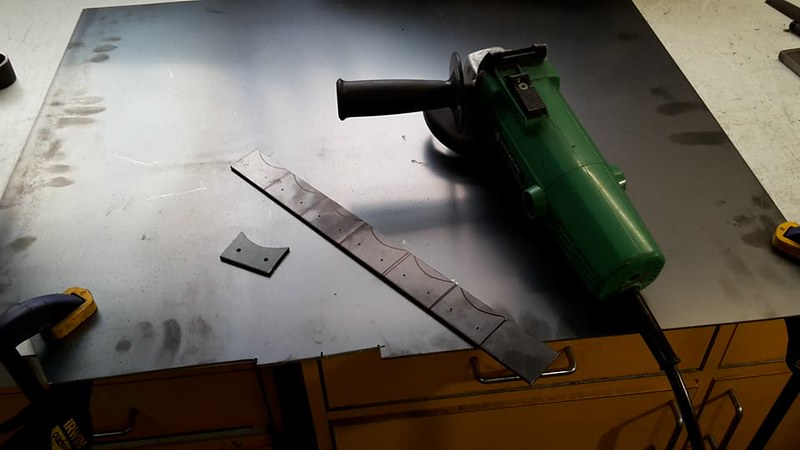
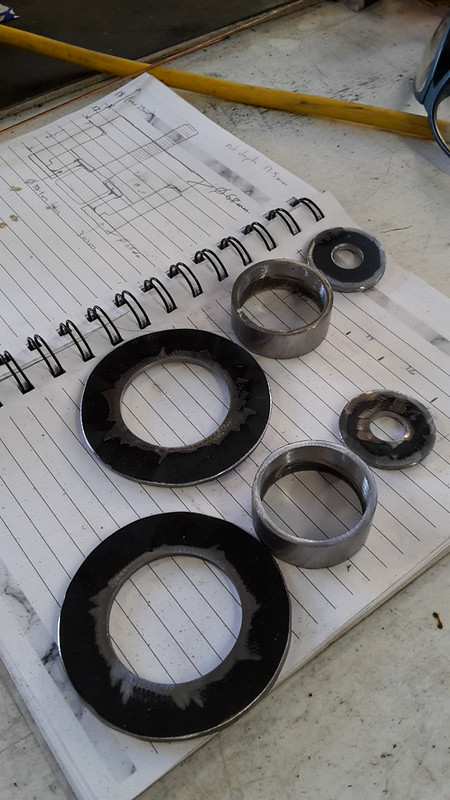
So I started making the recessed washers first, just an angle grinder, a drill, a hole saw and the TIG welder.
I haven't used the welder for a while, I've been doing a bit of snowboarding lately in my spare time.
Ground the top face flat and gave them a coat of cold gal. The bolts I bought had to be trimmed down to the exact length I required too.
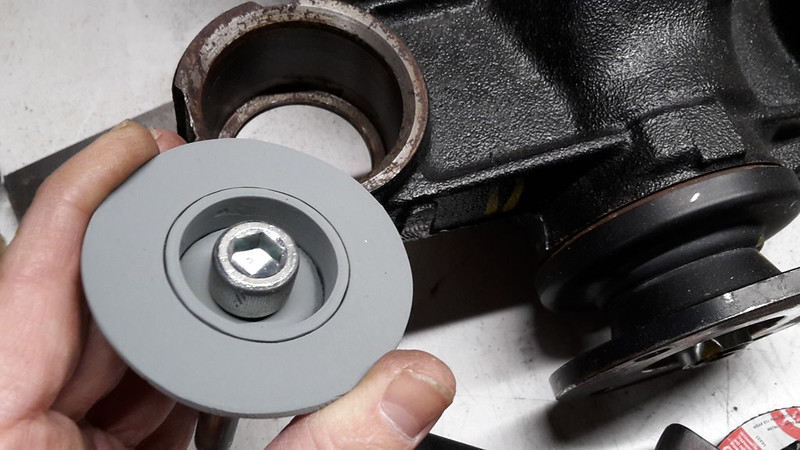
This is how the other side looks, pretty neat.
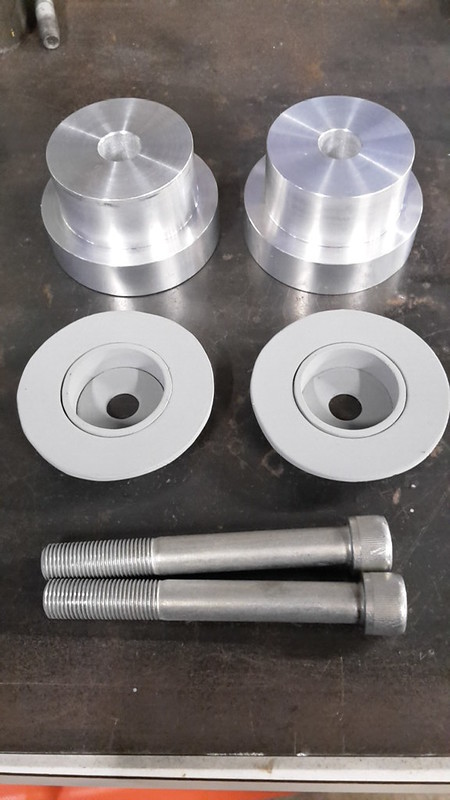
and I had to outsource the lathe work to a friend of mine, he turned up these aluminium spacers to my specs.
and this is how they sit inside the diff, perfect fitment!
This is the complete assembly with the removable spacers on top that allow me to raise the diff. I will need to purchase some shorter bolts if I ever need to do this.
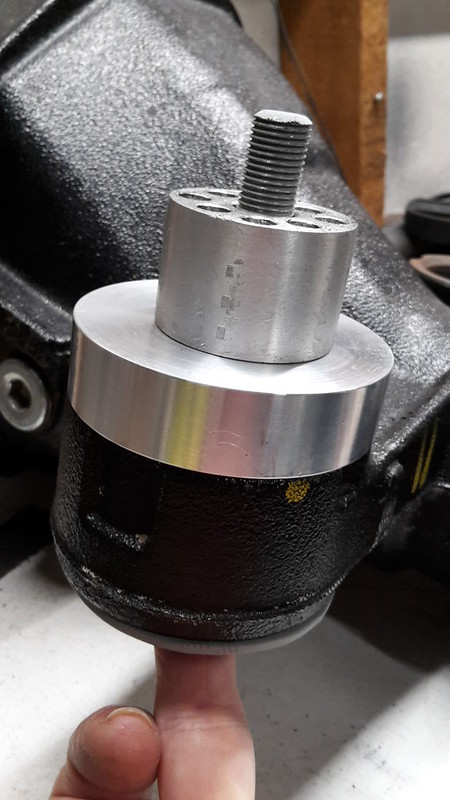
All up the solid diff mounting system was 375 grams lighter than the factory rubber bushing setup but the real advantage is the lack of movement and connected feeling you get by removing rubber bushings.
Follow me on Insta: @brzdiy
#138
JDWhiteWRX
-
- Members
-
- 591 posts
Regular Member
- Gender:Male
- Location:Royal National Park, NSW
Posted 15 July 2018 - 07:28 PM
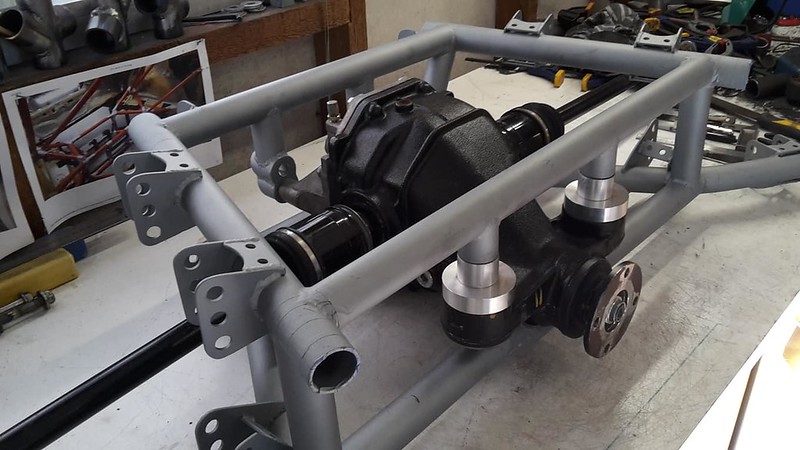
I had half a day to work on the car this weekend and got a little bit done. I wanted to test fit the diff in the cradle before welding it into the car so I pulled it back out of the car and removed it from the jig.
I'm not going to lie, getting the diff into the cradle is not a simple task due to the compact size of my design. It involves lifting it up into the center facing 90 degrees to its normal direction, at this point you must insert the front mounting bolts before spinning it around due to the small gap between tubes.
I will probably make a little attachment for my floor jack that holds the diff and allows it to spin to make things easier.
Here are a couple of photos with the diff in place.

The next problem I had was getting a hex tool onto the bolts at the front of the diff, there is not much space there. I ended up fabricating my own tool by simply cutting a small piece off my hex tool and then plug welding it onto some flat bar.
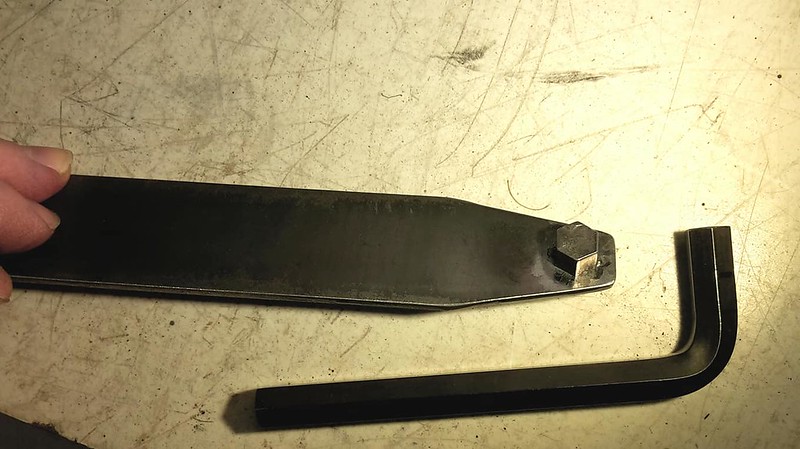
It works perfect although a ratchet function would be nice.
Once happy with the diff fitment I mounted the cradle back in the jig for the final time and then placed the whole thing back in the car. After a bit of measuring and checking of levels I bolted the jig in place ready to begin welding it to the roll cage.
Follow me on Insta: @brzdiy
#139
El_Freddo
-
- Members
-
- 2,313 posts
Rock'n the old Skool
- Gender:Male
- Location:Bridgewater/Central Vic/semi-retired nomad
- Interests:Subarus, 4wd'n Subarus, travelling Subarus, Tinkering... I could go on!
Posted 15 July 2018 - 11:58 PM
It works perfect although a ratchet function would be nice.
^ now this made me laugh after thinking you're now officially a tool maker! Get on it, I'm sure you'll have one knocked up by next weekend

More good work. The diff in the cradle looks awesome!
Cheers
Bennie
"The lounge room is not a workshop..."
https://www.imageshack.us/i/po1BKrxbj
El Freddo's Pics - El_Freddo's youtube
https://www.imageshack.us/i/po1BKrxbj
El Freddo's Pics - El_Freddo's youtube
#140
Sven Smergberd
-
- Members
-
- 7,511 posts
Member's Member
- Gender:Male
- Location:Sydney City
Posted 16 July 2018 - 08:42 AM
I am loving this.
But also secretly waiting for you to move to the front of the car, where the magic happens.
But also secretly waiting for you to move to the front of the car, where the magic happens.


0 user(s) are reading this topic
0 members, 0 guests, 0 anonymous users

