Jump to content


Photo

Joel's BRZ

#becauseracecar

  • Please log in to reply
583 replies to this topic

#81 JDWhiteWRX

JDWhiteWRX

    Regular Member

  • Members
  • PipPipPip
  • 590 posts
  • Gender:Male
  • Location:Royal National Park, NSW

Posted 18 February 2018 - 07:13 PM

Some small progress.
 
As mentioned previously, to weld the top of the roll cage which is pressed up hard against the roof I need to drop the whole thing down a little.
 
To do this I had to cut the tack welds off the front rocker boxes and floor plates at the rear. I had already pre-drilled some large holes at the rear so the cage could drop through the floor.
 
39622034024_e9a0ba36a5_c.jpg
 
The cage has dropped down a fair bit plus I can also move it back and forth a little to help get better access to some of the welds.
 
39622033784_b6cfce71cf_c.jpg
 
39622034274_a7a569c703_c.jpg
 
40288062922_6d135e38cc_c.jpg
 
Next job is to weld the tops of all the joins then bring it back up into the proper position. After that I can completely weld the rear floor plates and front rocker boxes to the shell.

Follow me on Insta: @brzdiy


#82 El_Freddo

El_Freddo

    Rock'n the old Skool

  • Members
  • PipPipPip
  • 2,245 posts
  • Gender:Male
  • Location:Bridgewater/Central Vic/semi-retired nomad
  • Interests:Subarus, 4wd'n Subarus, travelling Subarus, Tinkering... I could go on!

Posted 18 February 2018 - 08:36 PM

I wish there was a like button. Awesome pics to explain the process too ;)

Keep up the good work

Cheers

Bennie
"The lounge room is not a workshop..."
https://www.imageshack.us/i/po1BKrxbj
1BKrxb.jpg
El Freddo's Pics    -    El_Freddo's youtube

#83 Niko

Niko

    Member's Member

  • Members
  • PipPipPip
  • 7,511 posts
  • Gender:Male
  • Location:Sydney City

Posted 20 February 2018 - 08:30 PM

Awesome, loving the detail going into this. 


#84 JDWhiteWRX

JDWhiteWRX

    Regular Member

  • Members
  • PipPipPip
  • 590 posts
  • Gender:Male
  • Location:Royal National Park, NSW

Posted 25 February 2018 - 02:32 PM

Cheers guys, love the feedback.


I have finished welding the top of the roll cage now. I was having some difficulty getting flashed with bright light when doing the final welds. 
Turns out that because I was looking through gaps trying to get the last few welds that sometimes I was blocking the sensor on my auto-darkening helmet. Another rookie mistake I guess.
 
38658023310_ecb034ee5a_c.jpg
 
After I had finished I quickly ran over all the welds with a wire brush so they would be super clean for painting. I also wiped the whole thing down with some wax & grease remover.
 
40468825881_b1a46cc6af_z.jpg
 
Finally I gave the whole top part of the roll cage a coat of weld through primer so I don't have to worry about it rusting any more.
 
39572988095_d914c7c358_c.jpg
 
38658318300_a412d42db0_z.jpg
 
I ran out of argon today so I will have to go pick up a new bottle when the shops are open. Then I can get the cage back up into position and push on.

Follow me on Insta: @brzdiy


#85 JDWhiteWRX

JDWhiteWRX

    Regular Member

  • Members
  • PipPipPip
  • 590 posts
  • Gender:Male
  • Location:Royal National Park, NSW

Posted 07 March 2018 - 05:53 PM

I got a bit done on Sunday and again today. The roll cage is now permanently attached to the chassis, all the tubes are completely welded and I have primed everything to prevent surface rust.
 
25796896927_7b5268ba85_z.jpg
 
38857257750_e591080607_z.jpg
 
25796896507_07cb05c81d_z.jpg
 
40667546661_287225cc62_z.jpg
 
I will leave the door bars and main hoop diagonal off for now for easy access whilst I am building the rear suspension cradle.

Follow me on Insta: @brzdiy


#86 El_Freddo

El_Freddo

    Rock'n the old Skool

  • Members
  • PipPipPip
  • 2,245 posts
  • Gender:Male
  • Location:Bridgewater/Central Vic/semi-retired nomad
  • Interests:Subarus, 4wd'n Subarus, travelling Subarus, Tinkering... I could go on!

Posted 07 March 2018 - 06:23 PM

Awesome bit of pipe work going on there!


Cheers
 

Bennie


"The lounge room is not a workshop..."
https://www.imageshack.us/i/po1BKrxbj
1BKrxb.jpg
El Freddo's Pics    -    El_Freddo's youtube

#87 JDWhiteWRX

JDWhiteWRX

    Regular Member

  • Members
  • PipPipPip
  • 590 posts
  • Gender:Male
  • Location:Royal National Park, NSW

Posted 11 March 2018 - 06:46 PM

I spent today making some small gussets to attach the roll cage to the chassis and stiffen the overall structure.
 
Using CAD as they call it on Project Binky, the photos tell the story.
 
26870950568_748a8f638a_z.jpg
 
40699482172_14016d2c13_z.jpg
 
This is all the gussets I made, painted with weld-through primer on the back side only. There is 4 on the main hoop, 2 each side and another 2 for the lateral bars near the top corner of the windscreen.
 
26870950848_8876775826_z.jpg
 
40699481902_b1432bb51f_z.jpg
 
40699482742_d7b04bc764_z.jpg
 
I got the main hoop done but ran out of time for the other 2 gussets at the front. Basically there is a gusset on either side of the hoop.
 
40699482322_ddaf534367_z.jpg
 
25871234027_dbb8394404_z.jpg

Follow me on Insta: @brzdiy


#88 bigBADbenny

bigBADbenny

    New Member

  • Members
  • Pip
  • 89 posts
  • Gender:Male
  • Location:Hollywood, Melbourne
  • Interests:Family Photography Cars Bicycling

Posted 13 March 2018 - 07:31 AM

As a fabrication engineering student, Im blown away by your endeavour. Amazing and as usual, inspirational.

I just reread the whole shebang on ft86 and the extra pics really joined the dots for me.

May I ask what is the split between MIG and TIG welds on the cage and subframe, and how do you decide which process suits each part or location?
MY07 GT-B 6MT OBP WAG

#89 JDWhiteWRX

JDWhiteWRX

    Regular Member

  • Members
  • PipPipPip
  • 590 posts
  • Gender:Male
  • Location:Royal National Park, NSW

Posted 13 March 2018 - 07:57 PM

As a fabrication engineering student, Im blown away by your endeavour. Amazing and as usual, inspirational.

I just reread the whole shebang on ft86 and the extra pics really joined the dots for me.

May I ask what is the split between MIG and TIG welds on the cage and subframe, and how do you decide which process suits each part or location?


Thanks mate,


The short answer is TIG wherever possible, MIG for everything else.


Long answer. For the roll cage I went with TIG as I am much more precise with this process and I know I am getting full penetration and fusion in all the joins and it looks much neater. An experienced welder can also achieve that with MIG too but I don't have enough experience with MIG to weld the joins in the cage with any real confidence.

The areas I have to use MIG are where I am joining the rocker boxes and rear mounting plates to the chassis. This is 3mm thick steel joined to 1.5mm sheet metal which is more difficult than welding metals of the same thickness. The main reason for MIG here is that TIG requires 100% clean metal and it is very difficult (almost impossible) to get the sheet metal clean enough in those areas. 


Follow me on Insta: @brzdiy


#90 JDWhiteWRX

JDWhiteWRX

    Regular Member

  • Members
  • PipPipPip
  • 590 posts
  • Gender:Male
  • Location:Royal National Park, NSW

Posted 25 March 2018 - 07:21 PM

Hey guys, I finally got some work done on the car this weekend, last weekend I was sick so nothing got done.
 
I'm really happy with how things are going now, today I finished attaching those brackets I made to join the roll cage to the chassis.
 
Front of the car just above the windscreen on each side.
 
27131916418_a9a7cb2e19_c.jpg
 
Primed.
 
40293487964_d49aab7597_c.jpg
 
Then I proceeded to removing the roof skin. It was pretty easy with a spot weld removal drill bit.
 
40960714932_ed36a1c5d4_c.jpg
 
27131968478_2df69cfc7f_c.jpg
 
So the rear suspension jig has been removed from the car and is now on the bench ready for me to start fabrication of the rear cradle. I'm excited and also a little nervous to start this!
 
40960714562_fb321873f2_c.jpg

Follow me on Insta: @brzdiy


#91 El_Freddo

El_Freddo

    Rock'n the old Skool

  • Members
  • PipPipPip
  • 2,245 posts
  • Gender:Male
  • Location:Bridgewater/Central Vic/semi-retired nomad
  • Interests:Subarus, 4wd'n Subarus, travelling Subarus, Tinkering... I could go on!

Posted 26 March 2018 - 10:33 PM

Hey Joel,

Top work as always. I'm curious as to why you've removed the roof skin/panel?

Those spot weld drills are awesome!

Cheers

Bennie
"The lounge room is not a workshop..."
https://www.imageshack.us/i/po1BKrxbj
1BKrxb.jpg
El Freddo's Pics    -    El_Freddo's youtube

#92 JDWhiteWRX

JDWhiteWRX

    Regular Member

  • Members
  • PipPipPip
  • 590 posts
  • Gender:Male
  • Location:Royal National Park, NSW

Posted 27 March 2018 - 09:38 AM

Hey Joel,

Top work as always. I'm curious as to why you've removed the roof skin/panel?

Those spot weld drills are awesome!

Cheers

Bennie


Thanks mate,


2 reasons.


1. I still need to attach all the tubes from the rear suspension tubular cradle up to the top of the main hoop but I can no longer drop the cage down to weld the tops of those joints.


2. I am making a carbon roof for it anyway.


Joel.


Follow me on Insta: @brzdiy


#93 JDWhiteWRX

JDWhiteWRX

    Regular Member

  • Members
  • PipPipPip
  • 590 posts
  • Gender:Male
  • Location:Royal National Park, NSW

Posted 27 March 2018 - 07:18 PM

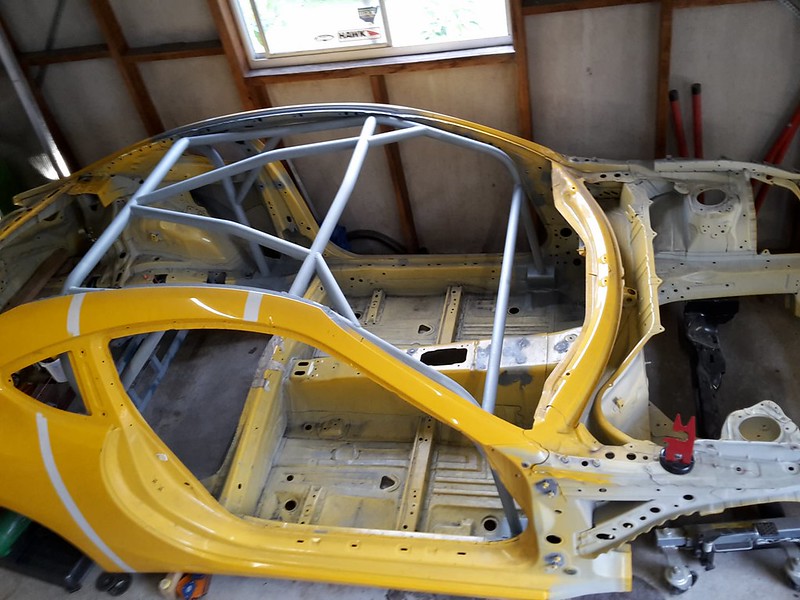
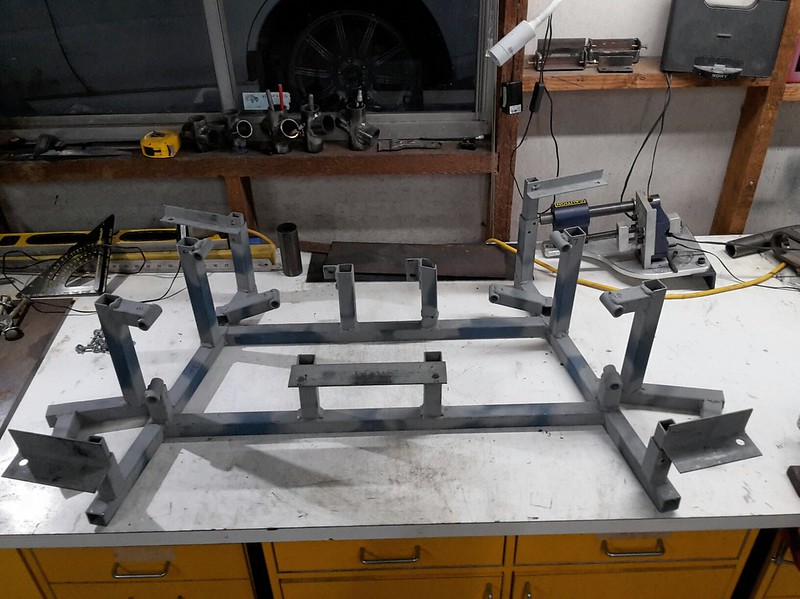
Hey guys, I took today off work to get some things done on the car. I ended up spending most of the day going through my notes on the rear suspension and ride heights, trying to remember how I was going to mount the welding jig in the car so the chassis would be lowered without screwing up the geometry.
 
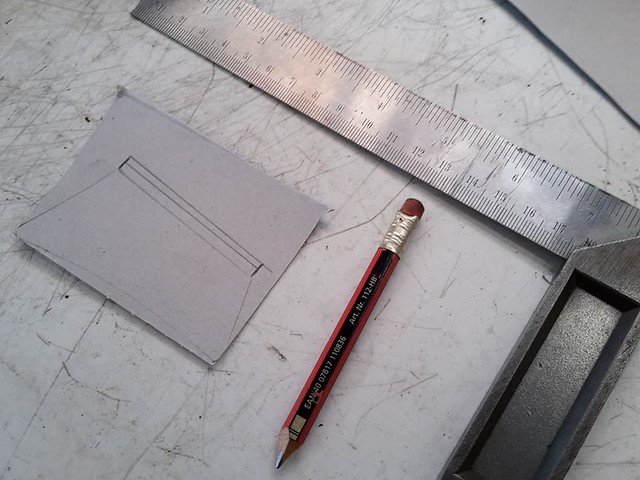
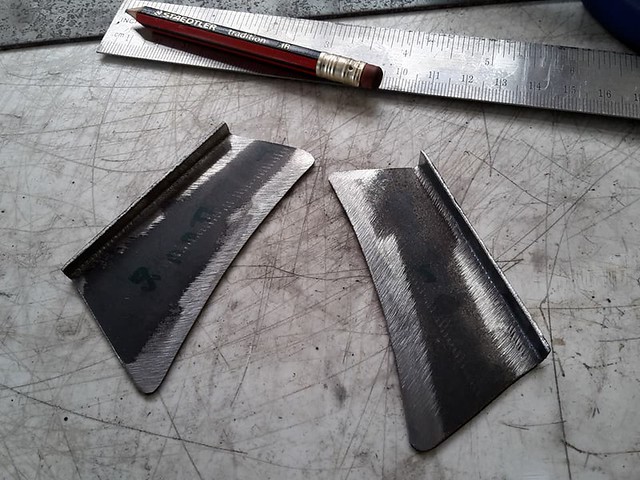
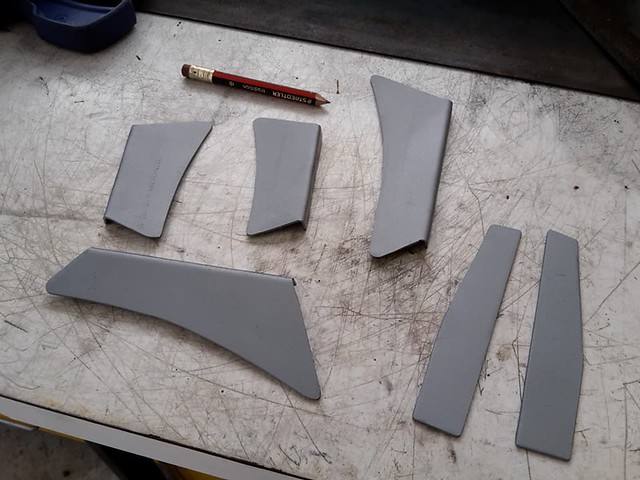
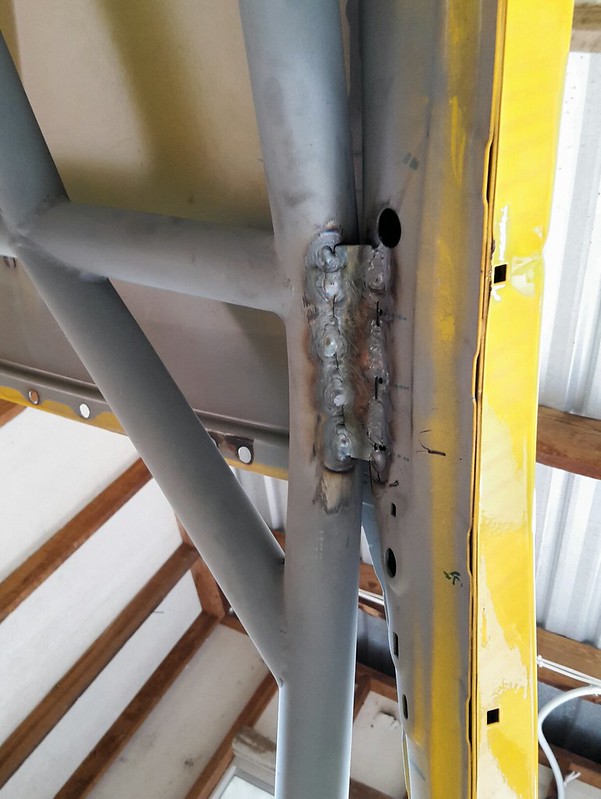
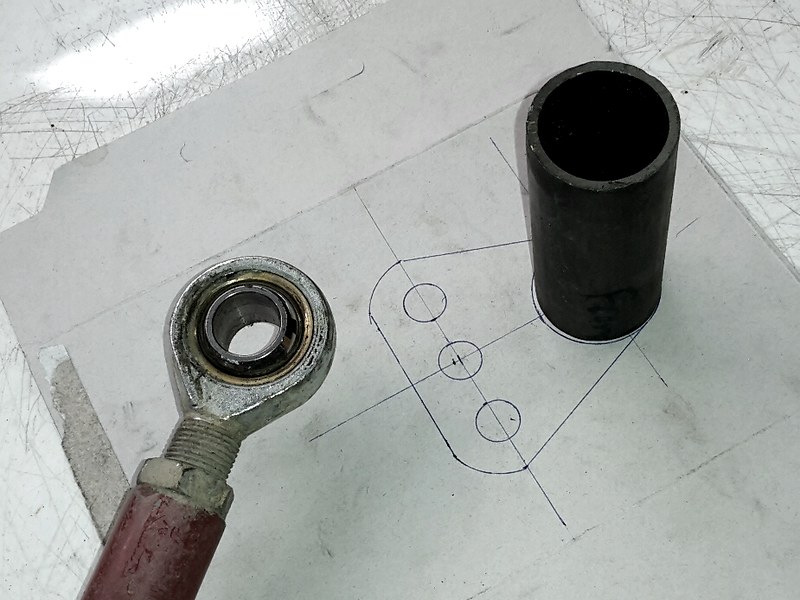
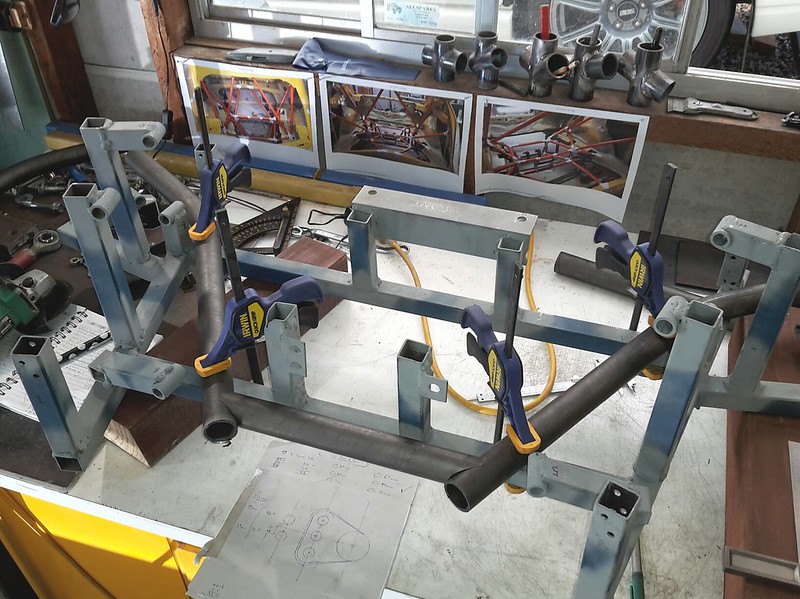
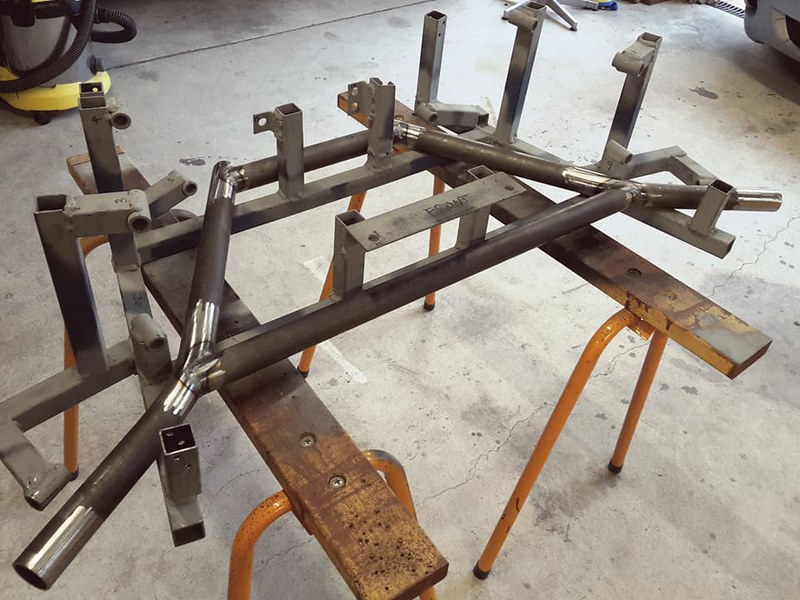
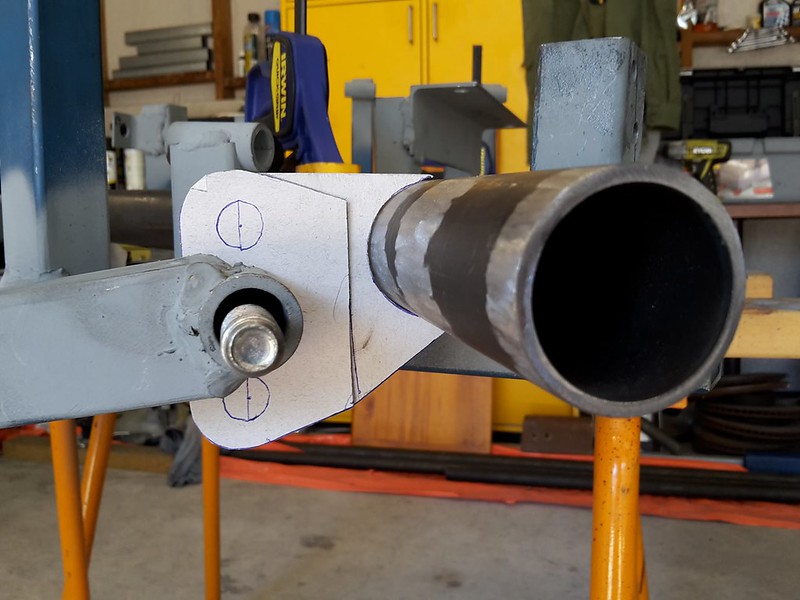
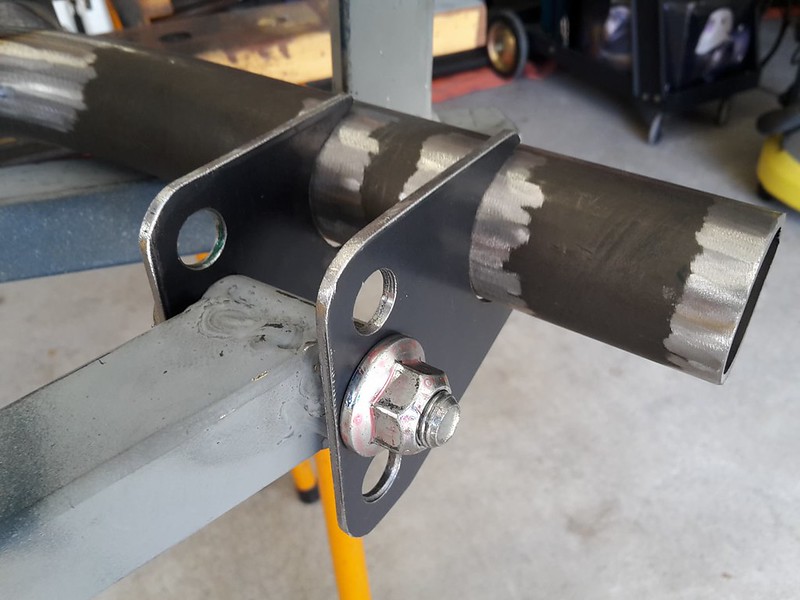
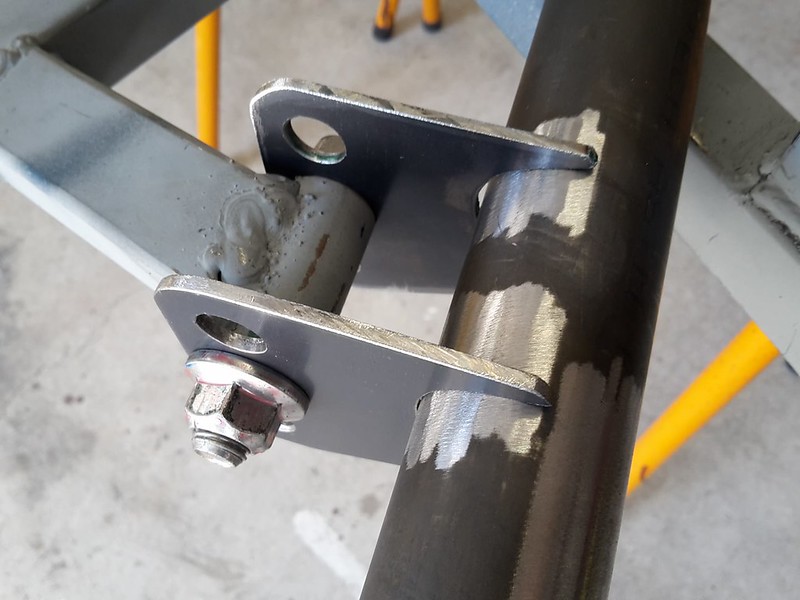
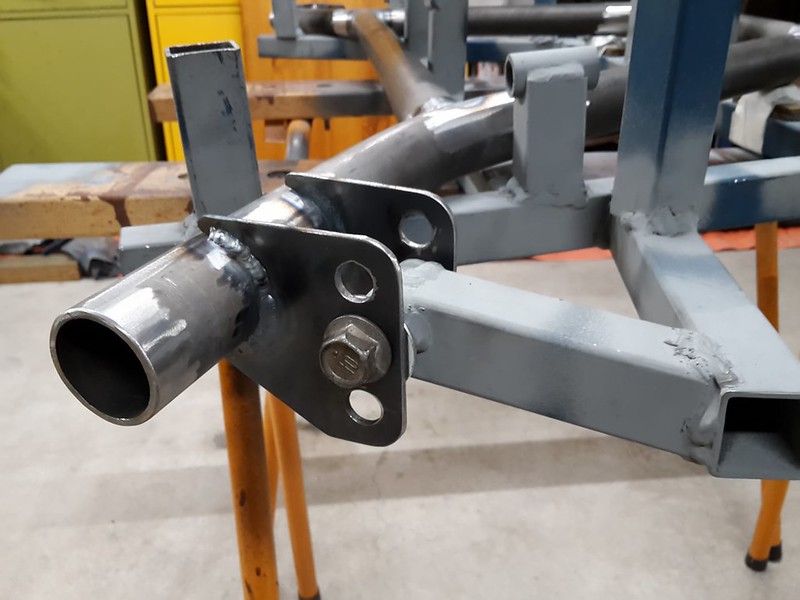
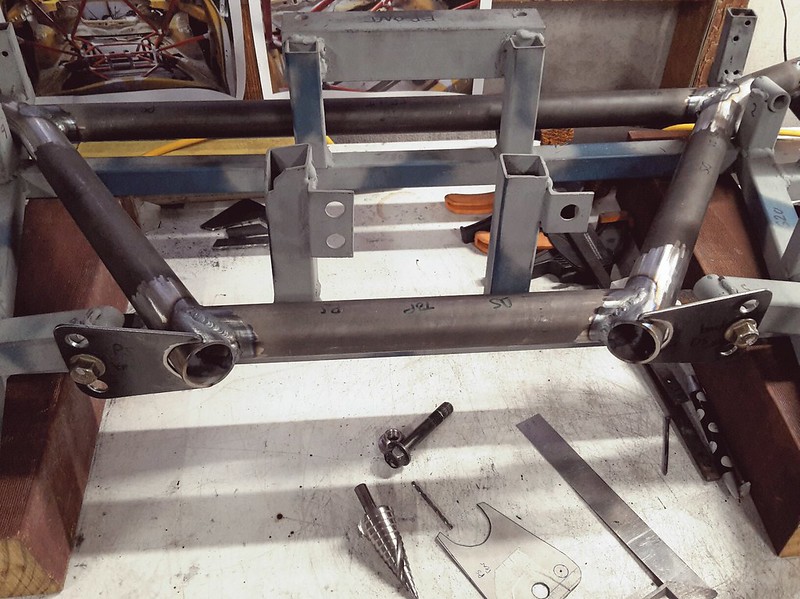
I started by designing the tabs from which all the control arms will attach. I have decided to go with 3 different heights which will change the geometry depending on the ride height I choose.
 
40337245694_142f152b68_c.jpg
 
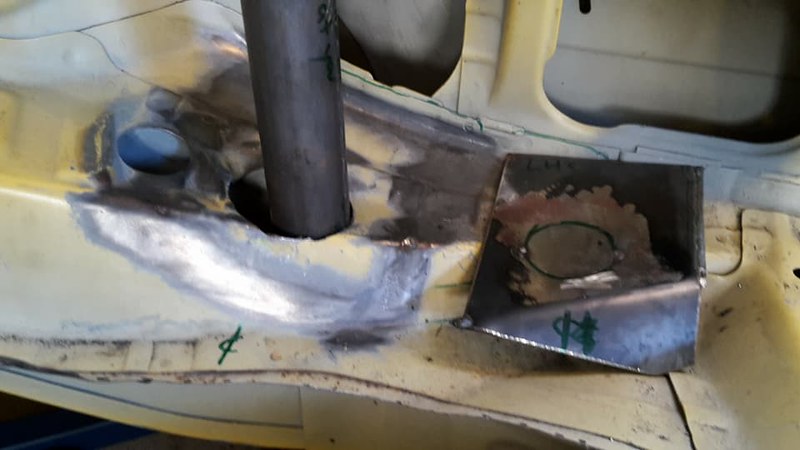
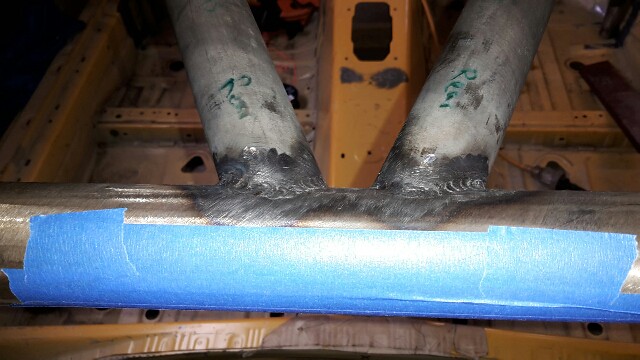
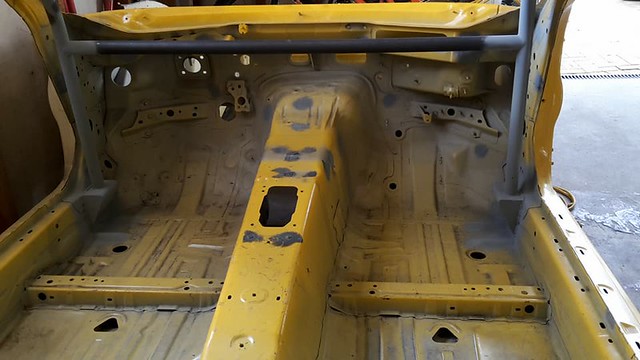
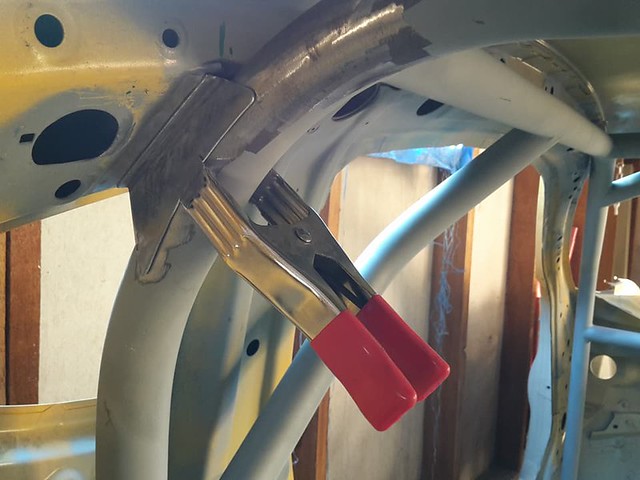
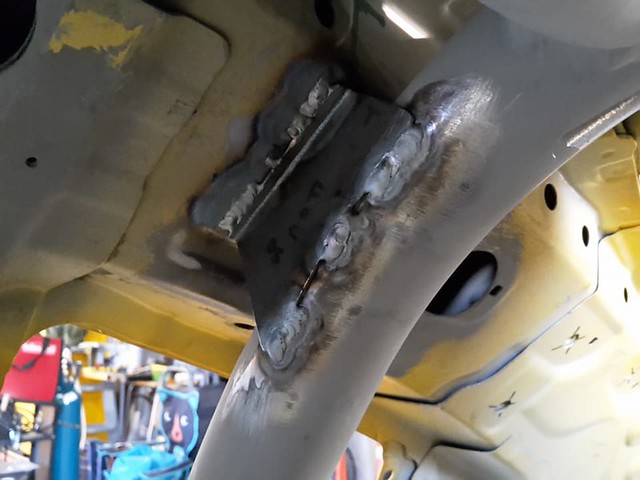
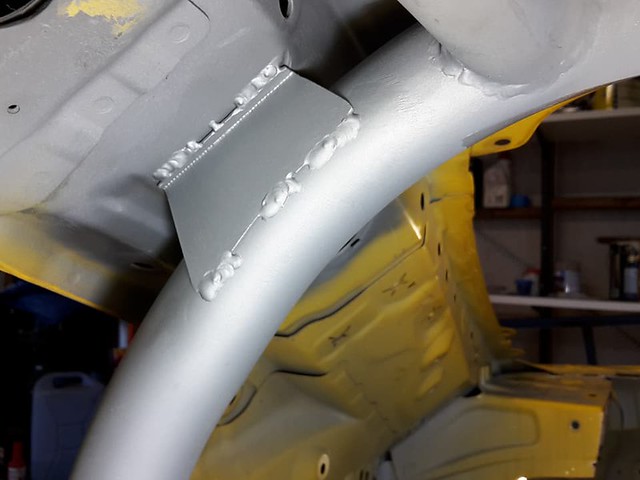
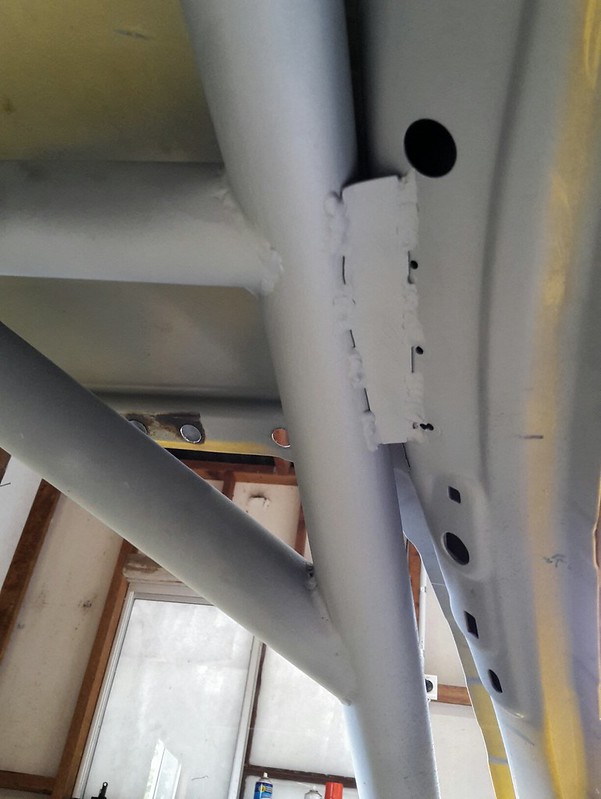
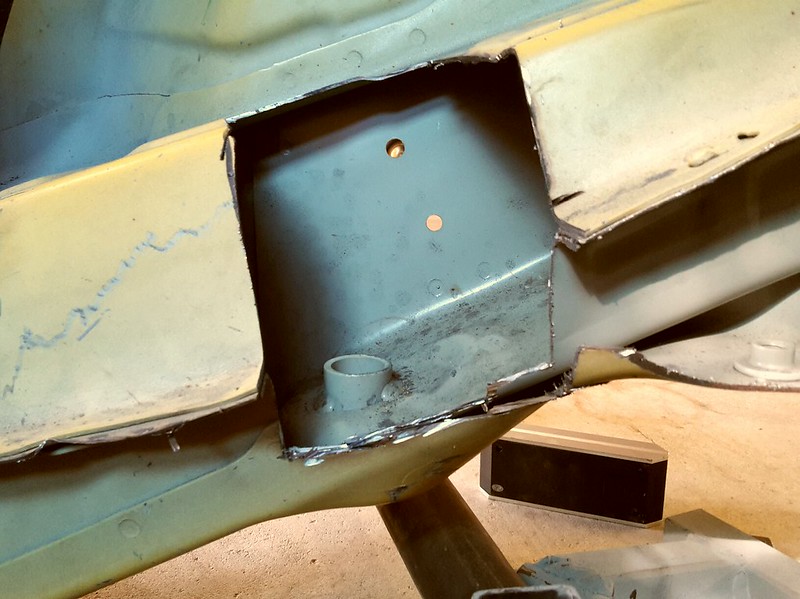
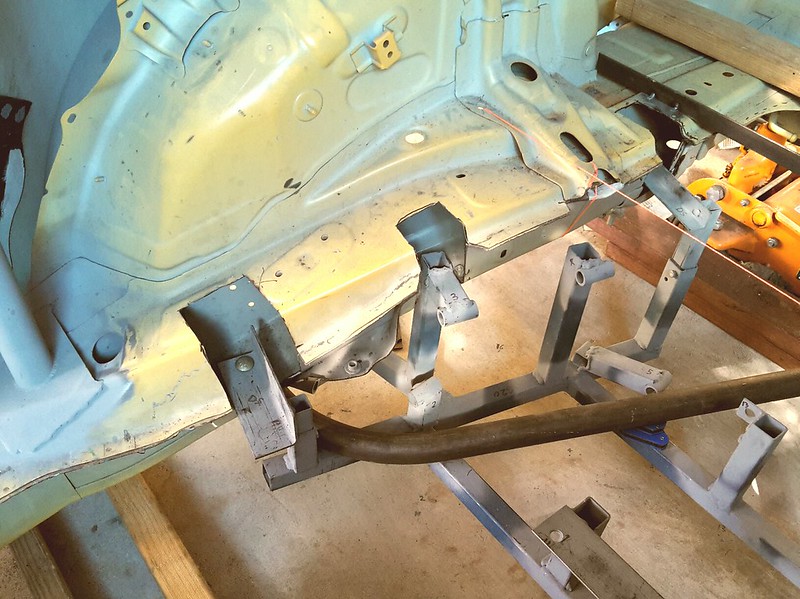
Looking at the chassis rail where the stock rear cradle usually mounts I have cut away the metal so I can mount my welding jig on top of the mounting point. Every millimeter I mount above this point is how much the chassis will drop by. The crush tube with captive nut in the rail is 44mm thick so my baseline chassis drop is 44mm, this will be the ride height correction of the middle hole in my tabs.
 
39236893320_b979acf600_c.jpg
 
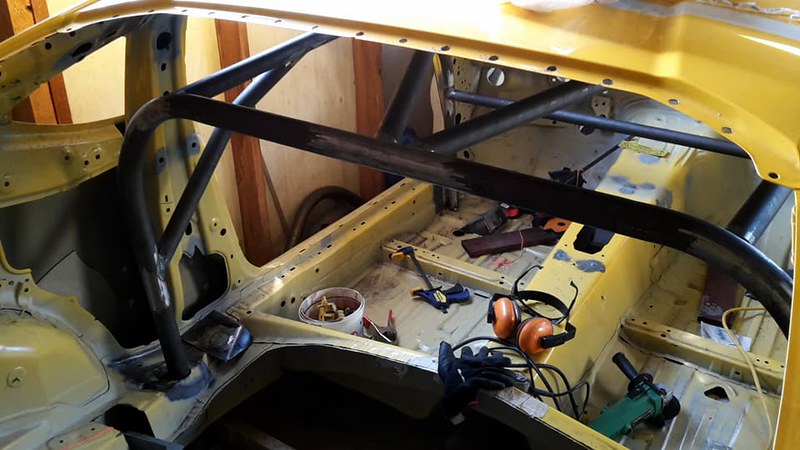
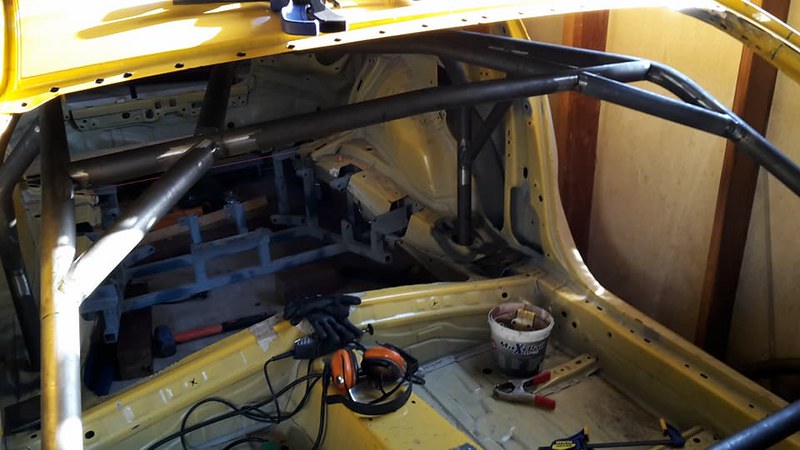
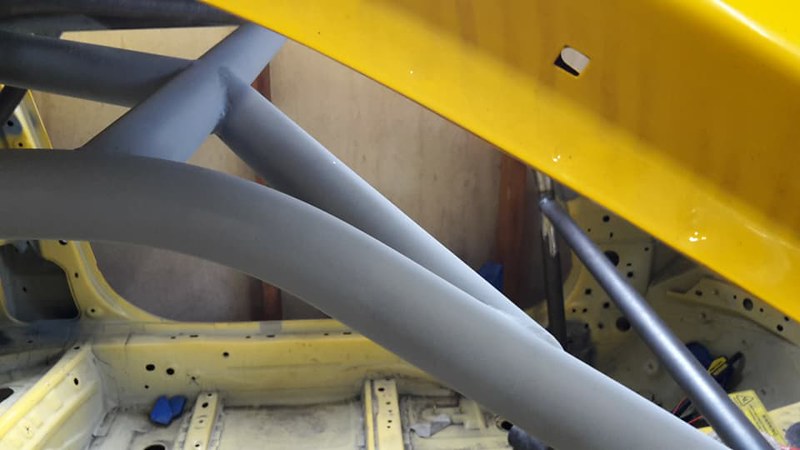
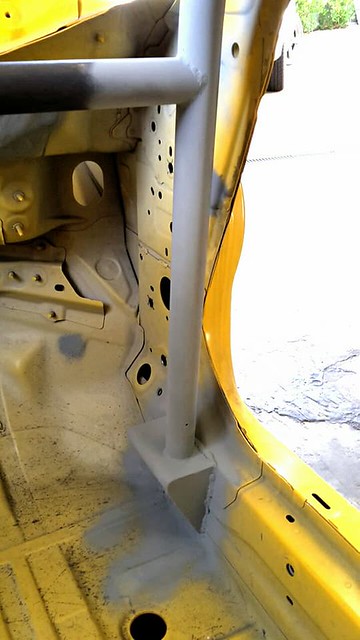
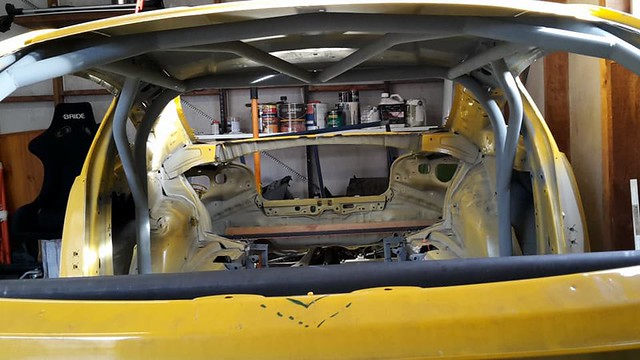
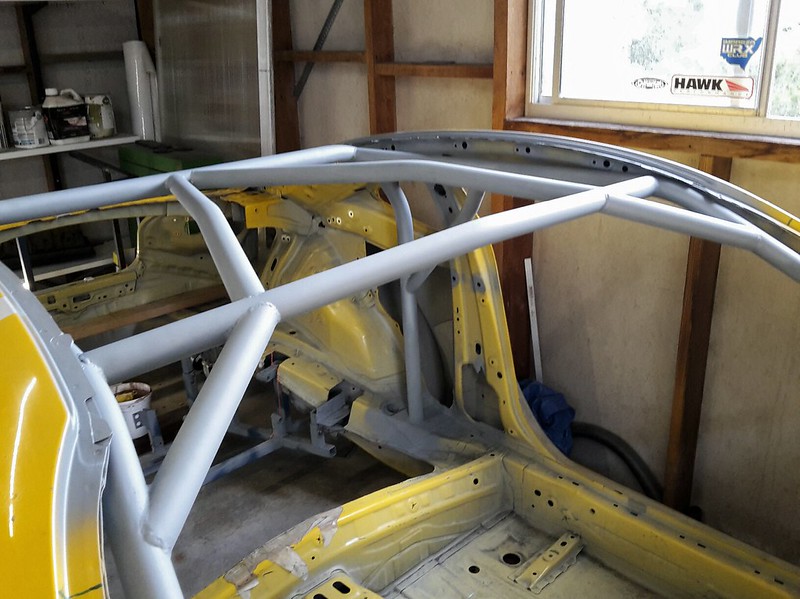
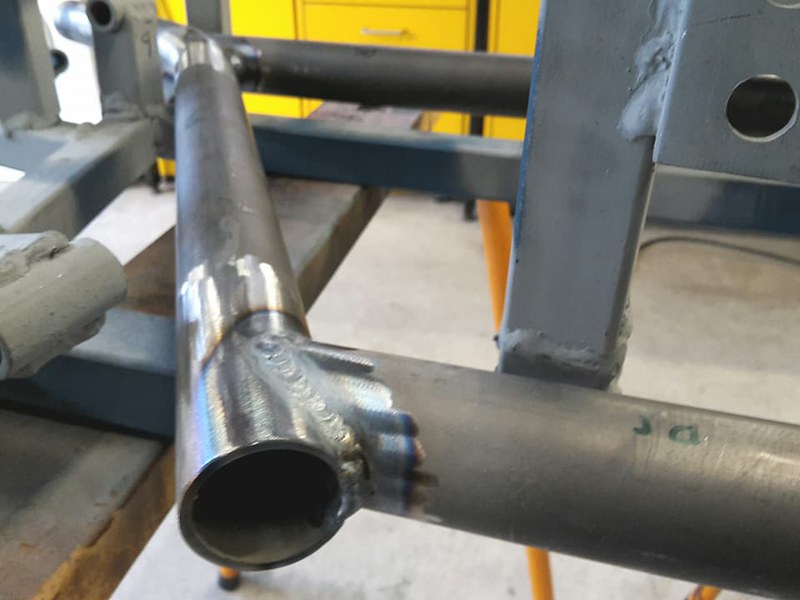
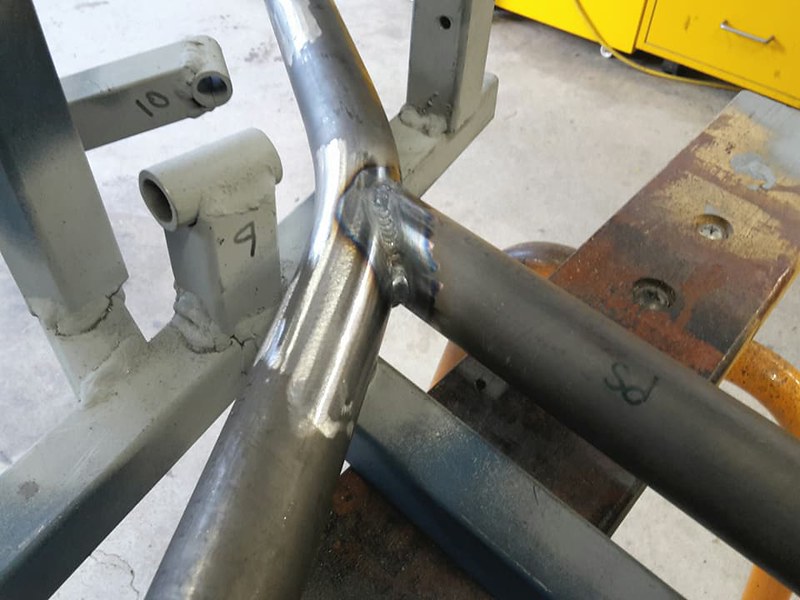
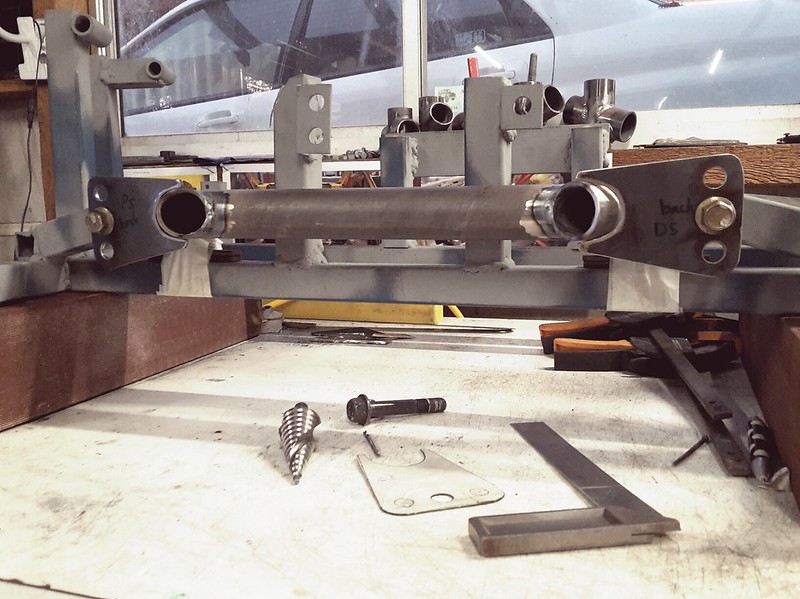
So I then put the jig back in the car to try and work out how the lower tube will pick up the trailing arm that attaches just forward of the wheel well.
 
40337252874_316f85b16c_c.jpg
 
40337251814_f905a67e59_c.jpg
 
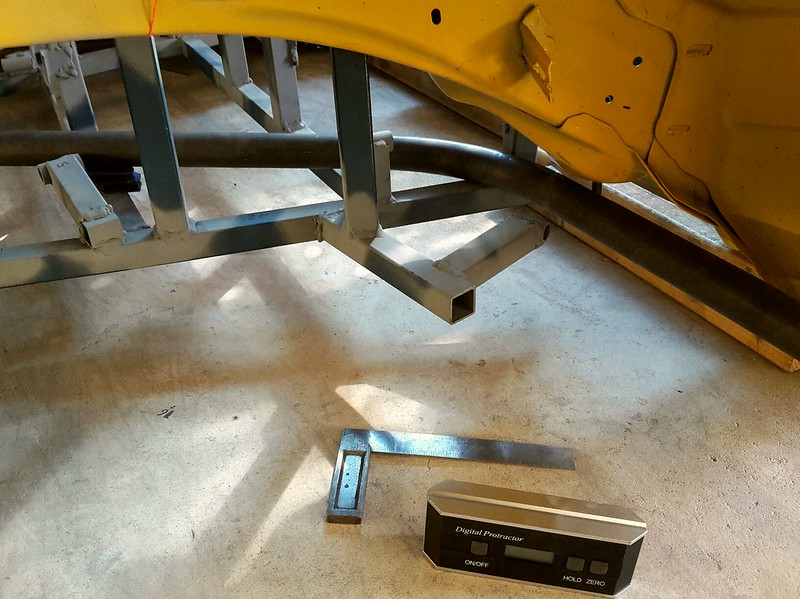
The bent tube in photo was just part of the roll cage I bent incorrectly but it gave me an idea of how a bend in the tube would work really well to pick up that trailing arm attachment point.
 
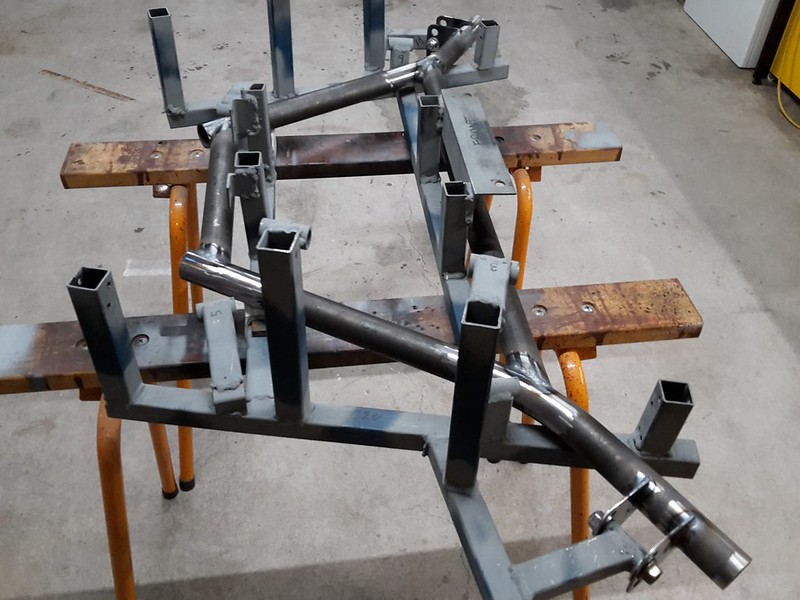
I think once I actually start joining tubes this structure will come together very quickly but right now I need to do a lot of thinking, measuring etc. before I start cutting up materials.

Follow me on Insta: @brzdiy


#94 JDWhiteWRX

JDWhiteWRX

    Regular Member

  • Members
  • PipPipPip
  • 590 posts
  • Gender:Male
  • Location:Royal National Park, NSW

Posted 30 March 2018 - 06:34 PM

I got a little work done this afternoon, I'm working on the bottom level of tubes in the rear suspension cradle as a foundation to build upward on.
 
39301023670_7806fe13de_c.jpg
 
I used a 29 degree bend to bring the tube around and parallel to the trailing arm pivot point.
 
39301023690_80c8368c39_c.jpg
 
I'm hoping to get a bit more done this long weekend but that's all for today.

Follow me on Insta: @brzdiy


#95 bigBADbenny

bigBADbenny

    New Member

  • Members
  • Pip
  • 89 posts
  • Gender:Male
  • Location:Hollywood, Melbourne
  • Interests:Family Photography Cars Bicycling

Posted 31 March 2018 - 11:09 AM

So good, thanks for the explanations ;)
MY07 GT-B 6MT OBP WAG

#96 JDWhiteWRX

JDWhiteWRX

    Regular Member

  • Members
  • PipPipPip
  • 590 posts
  • Gender:Male
  • Location:Royal National Park, NSW

Posted 31 March 2018 - 05:47 PM

Got a little more time on the car after lunch today. The base layer is complete and welded up. I'm very happy with how its going and I'm really enjoying welding comfortably on a bench again rather than cramped up inside a car.
 
41086984002_730aebfbb4_c.jpg
 
40235198765_4e1299ba6c_c.jpg
 
40235198985_336ddf9941_c.jpg

Follow me on Insta: @brzdiy


#97 JDWhiteWRX

JDWhiteWRX

    Regular Member

  • Members
  • PipPipPip
  • 590 posts
  • Gender:Male
  • Location:Royal National Park, NSW

Posted 01 April 2018 - 06:48 PM

Back on it today, things are going well.
 
Started by aligning the base layer in the perfect position in the jig so everything is where I want it. Then got some clamps on it to lock it down whilst I got to work making some tabs for the trailing arm attachment points.
 
Using some CAD to make the tabs.
 
41110027622_f7730c1d9c_c.jpg
 
Transfer the CAD to 3mm steel then drill and cut to size four times.
 
41153498471_7f46fbcbbf_c.jpg
 
41110028372_aa5d5d1669_c.jpg
 
Then weld all four of them onto the base layer.
 
41153498701_e6d4c45278_c.jpg
 
Now with these tabs on the base layer is locked in position giving a solid foundation for the rest of the suspension cradle.
 
41110026272_755f4f522e_c.jpg
 
Sounds easy but it took me all day to get that done.

Follow me on Insta: @brzdiy


#98 El_Freddo

El_Freddo

    Rock'n the old Skool

  • Members
  • PipPipPip
  • 2,245 posts
  • Gender:Male
  • Location:Bridgewater/Central Vic/semi-retired nomad
  • Interests:Subarus, 4wd'n Subarus, travelling Subarus, Tinkering... I could go on!

Posted 01 April 2018 - 07:36 PM

Mate epic work!

I bet you were nervous about lining the mount points up correctly to weld them right the first (and only) time. If you weren't nervous, I was for you! Looks tops as always and the to welding - well, I want a tig welder now!

Keep up the good work. I'd love to have half the skills with bending and welding that you have so I could easily make up some front and rear bar work on my L series - and some bash plates to help protect the driveline ;)

Looking forward to future updates. I wish it was Easter every weekend!!

Cheers

Bennie
"The lounge room is not a workshop..."
https://www.imageshack.us/i/po1BKrxbj
1BKrxb.jpg
El Freddo's Pics    -    El_Freddo's youtube

#99 JDWhiteWRX

JDWhiteWRX

    Regular Member

  • Members
  • PipPipPip
  • 590 posts
  • Gender:Male
  • Location:Royal National Park, NSW

Posted 01 April 2018 - 08:11 PM

Mate epic work!

I bet you were nervous about lining the mount points up correctly to weld them right the first (and only) time. If you weren't nervous, I was for you! Looks tops as always and the to welding - well, I want a tig welder now!

Keep up the good work. I'd love to have half the skills with bending and welding that you have so I could easily make up some front and rear bar work on my L series - and some bash plates to help protect the driveline ;)

Looking forward to future updates. I wish it was Easter every weekend!!

Cheers

Bennie


Thanks for the kind words mate,


Lots of measuring and double checking then go for it. I think bending and notching tube is the most difficult part. I have not been welding very long but I find it rather enjoyable. It's all practice really, the concept is not that difficult, its the practice that makes you better.


cheers


Joel.


Follow me on Insta: @brzdiy


#100 JDWhiteWRX

JDWhiteWRX

    Regular Member

  • Members
  • PipPipPip
  • 590 posts
  • Gender:Male
  • Location:Royal National Park, NSW

Posted 02 April 2018 - 06:05 PM

Last day of the long weekend and I managed to get a couple of hours in the garage.
 
I only had time to make two more tabs, these are for the rear lower control arm attachment points.
 
26305468847_8ea3f60e07_c.jpg
 
26305469867_ac5c8e7419_c.jpg
 
They will need a small corner gusset sitting horizontal on the inside just because the distance between the tube and bolt is pretty long.

Follow me on Insta: @brzdiy


0 user(s) are reading this topic

0 members, 0 guests, 0 anonymous users