
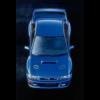
painted, colour came out pretty good, smashed on a 2k clear coat over the top (aerosol) aswell. its not gonna win summer nats but it should hold out against brake fluid and batter acid now
 painted3.jpg 360.6KB
2 downloads
painted3.jpg 360.6KB
2 downloads
painted2.jpg 164.26KB
2 downloads
painted.jpg 151.14KB
2 downloads
MY98 track/rally build
Started by Nizza, Jul 04 2011 08:59 PM
148 replies to this topic
#141

Nizza
-
- Members
-

- 120 posts
Trusted Member
Posted 23 December 2017 - 11:16 AM
#142
Nizza
-
- Members
-
- 120 posts
Trusted Member
Posted 27 December 2017 - 08:59 PM
started pulling some things out of the half cut in order to be able to crane the engine out hopefully tomorrow, so while i was removing from one i was seeing what would fit straight into the GC8.
the following things seem to fit pretty well:
- brake booster
- clutch fluid reservoir (which works really well in order to fit the new larger intercooler)
- clutch hydraulic lines (they fit but unsure if they will be in the way later)
- air box (the GD and GC are identical in foot print except the way the box interlocks with the lid has reversed)
- ABS module (the lines are different in the GD but i reused the GC lines which match up exactly with the pump)
- fuel filter and hoses
things that didnt fit well
- resenator for air box (altho you can make it work)
- wiper water bottle (looks similar but wont fit)
- brake booster pipe that travels along fire wall (i ended up using the GC one and re routed some new tubing)
heres whats in so far, im not sure if anything ive just put in will end up in the way just yet.
20171227_184846.jpg 133.82KB
1 downloads
20171227_185152.jpg 114.11KB
1 downloads
#143
Nizza
-
- Members
-
- 120 posts
Trusted Member
Posted 13 January 2018 - 05:41 PM
just waiting on some twin scroll parts so i thought i might aswell install the rear sway bar and mounts.
20180113_160013.jpg 82.74KB
2 downloads
here are the instructions from white line
20180113_173357.jpg 102.1KB
2 downloads
20180113_173335.jpg 107.26KB
2 downloads
old vs new
20180113_165515.jpg 89.91KB
2 downloads
supports actually mount like this, half hanging of the chassis rail
20180113_171119.jpg 79.73KB
2 downloads
and in
20180113_173157.jpg 89.82KB
2 downloads
#144
El_Freddo
-

- Members
-
- 2322 posts
Rock'n the old Skool
- Gender:Male
- Location:Bridgewater/Central Vic/semi-retired nomad
- Interests:Subarus, 4wd'n Subarus, travelling Subarus, Tinkering... I could go on!
Posted 15 January 2018 - 09:37 AM
painted, colour came out pretty good, smashed on a 2k clear coat over the top (aerosol) aswell. its not gonna win summer nats but it should hold out against brake fluid and batter acid now
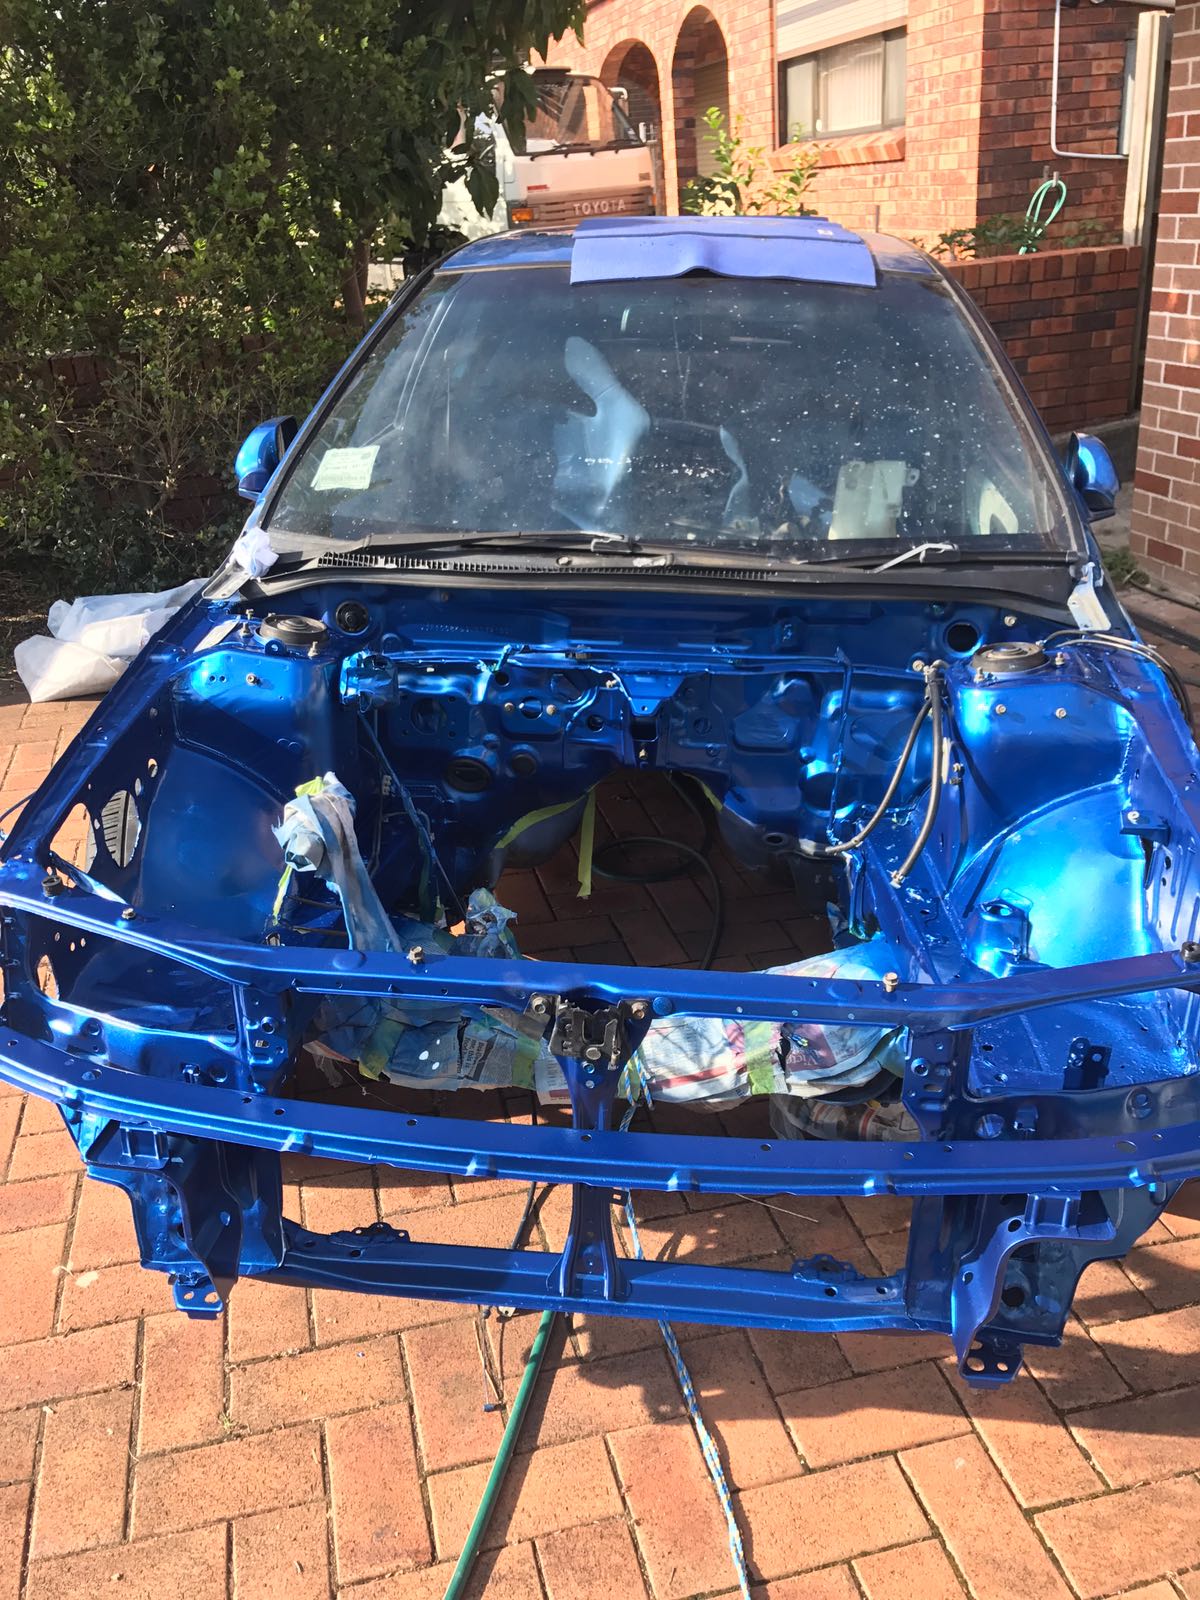
Good work mate. It must be a good feeling once it's all done and you're pulling that masking off. I'd like to do something like this one day...
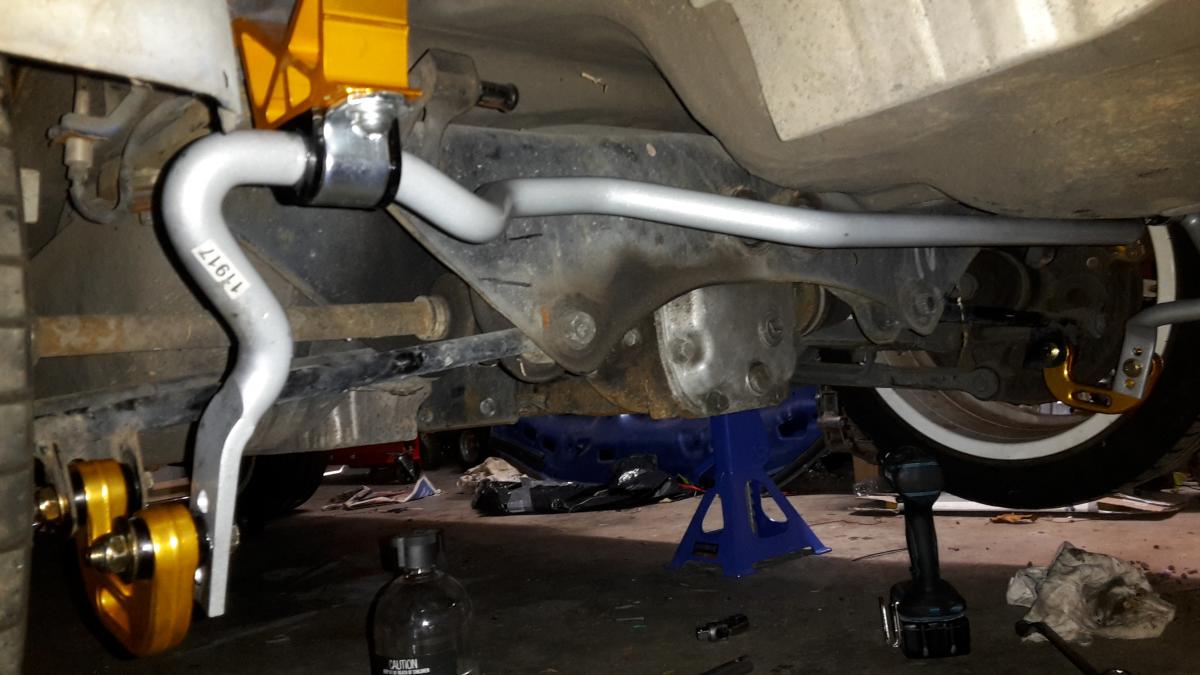
Nice swaybar! You need to remove the C brackets, twist the swaybar so the ends are horizontal then refit the C brackets - unless you've done a dummy fit

Keep up the good work!
Cheers
Bennie
"The lounge room is not a workshop..."
https://www.imageshack.us/i/po1BKrxbj

El Freddo's Pics - El_Freddo's youtube
https://www.imageshack.us/i/po1BKrxbj
El Freddo's Pics - El_Freddo's youtube
#145
Nizza
-
- Members
-
- 120 posts
Trusted Member
Posted 19 January 2018 - 06:52 PM
Good work mate. It must be a good feeling once it's all done and you're pulling that masking off. I'd like to do something like this one day...
Nice swaybar! You need to remove the C brackets, twist the swaybar so the ends are horizontal then refit the C brackets - unless you've done a dummy fit
Keep up the good work!
Cheers
Bennie
if by dummy fit you mean f*&k it right up...then yes, thanks mate
20180118_123204.jpg 92KB
1 downloads
#146
Nizza
-
- Members
-
- 120 posts
Trusted Member
Posted 19 January 2018 - 06:58 PM
Good work mate. It must be a good feeling once it's all done and you're pulling that masking off. I'd like to do something like this one day...
if i had to do it again ide definitely take it to a panel beater to apply the paint. by the time i bought the primer, paint, full face respirator, made a make shift spray booth, borrowing spray guns and compressors + the time it was hardly worth it (plus the quality came out rubbish). However i would definitely do ALL the prep work, rub downs rust buzz etc, then give it to them. spraying that 2k shit is stressful
#147
Nizza
-
- Members
-
- 120 posts
Trusted Member
Posted 19 January 2018 - 07:40 PM
After 6 or 7 loooooooooong days of wiring loom splicing im about 90% of the way there.
heres both looms
20171230_110145.jpg 123.2KB
1 downloads
ripped apart most of the looms
20171230_234935.jpg 134.29KB
1 downloads
all the engine bay/fuse box/cabin fuse box/behind dash/ecu wiring is all from the GD. things kept from the GC were only the DCCD module and thumbwheel, the illumination module (which i fried by accident) and the blower/heater core assembly and controls ie fan control/hazards button/demister/fog lights. so the majority of the work was concentrated to the loom plugs by the drivers footwell that travel to the rear of the car and the passenger foot well plugs that travel into the passenger door
ill spare you all the nitty gritty of the wiring and say some key points
- use these links for wiring diagrams http://ken-gilbert.com/impreza-manuals saved my life
- the GDB's ecu if far far more interlinked with the general wiring than the GC8. the GDB's ecu monitors everything. especially things you wouldnt expect like cruise control, climate control, fuel guage, speedo etc etc. the GC is basically a bunch of stand alone units working together (In my opinion a far far better way for cars to be wired)
- hazards button plug is the same in the GC and GD (straight swap)
- door mirror control plug is also a straight swap
- 2 wire speed sensors will not work with with the GDB ecu. 2 wire systems in the GC uses AC voltage (not sure on AC or DC) which directly drives the speedo needle. the 3 wire system in the GDBs sends its signal to the ecu which inturn sends another signal to the cluster and it will determine the speed. the only way to keep the 2 wire system would be to "flash" the GD ecu so it doesnt pick up the fact it has no sensor, other wise it will go into limp mode. I bit the bullet and bought a GD cluster (with dccd llights!!!) and will fit that into a GC dash (yes it can be done with slight mods which ill post when it happens)
- Version 4 DCCD module seems to work with with the GD cluster (colour code on the cables are the same) altho i have to wait till the gear box goes back in to confirm as its just flashing atm indicating a 'limp mode'
- there are many differences between LHD, RHD, STI, and Aus spec STis in the wiring manual, so be careful. i found out the hard way as the front half of the wiring loom is an AUS sti but the cluster is a non aus sti so the pin out and computers within are different. for example Aus STis have an inbuilt illumination control in the cluster to control brightness where as non aus have an independent illumination module like the GCs
- apart from that, alot of the colours remain the same, so its not the end of the world
heres a photo of some cluster testing, dunno how this one is green does anyone know what version this is from? all the ones ive seen are organge illumination. I LOVE the green colour, something about that 90's shitty weak green is nostalgic for me
20180119_152813.jpg 81.36KB
1 downloads
#148
Barbbachello
-

- SubyClub Area Rep
-
- 6487 posts
Touring Bruce
- Gender:Male
- Location:Mehico
- Interests:Docking
Posted 19 January 2018 - 10:19 PM
Thats probably blob eye dash. Hawkeye got the orange defi esque one and bug didnt have dccd apart from maybe the Spec C which id think would go higher than 180

#149
sub813
-

- Members
-
- 14 posts
New Member
Posted 20 January 2018 - 10:06 AM
also just pointing out if you decide to go and get adjustable arms try to source a gd sub frame. the reason you do this is that it gives you higher pick up points aloowing for better suspension geometry when lowering the car


0 user(s) are reading this topic
0 members, 0 guests, 0 anonymous users

