
After installing my tab and running Torque, I found the standard themes weren’t to my taste and all the other free ones you can get are over the top.
I thought I'd start up a thread for everyone that is running the Torque App in their cars on how to create your own.
For those that don’t have it yet https://play.google....wl.torque&hl=en and get yourself either a WIFI or Bluetooth OBD-II connector.
Most info is on the Torque website
http://torque-bhp.com/wiki/Main_Page
These links are what you will mostly need - So please read them thoroughly before starting.
Once you have done so either keep those pages open or copy the hieroglyphic coding from both links
to somewhere on your desktop. You will need these for the properties.txt file to make your gauges work properly.
http://torque-bhp.com/wiki/Themes
Properties.txt file format
The properties file is a simply key=value file that can be edited in a text editor. It allows you to control various things like colours, and positioning of dial elements.
- dialTickInnerRadius=<value>
- dialTickOuterRadius=<value>
- dialStartAngle_<pid>=<value>
- dialStopAngle_<pid>=<value>
- dialNeedleLength=<value>
- globalDialStartAngle=<value>
- globalDialStopAngle=<value>
- displayTickColour=<colour - can be HTML notation #rrggbb, #aarrggbb or 'green'>
- displayTextTitleColour=<colour, as described above>
- displayTextValueColour=<colour, as described above>
- displayIndicatorColour=<colour, as described above> (dial needle colour, and/or other 'indicator' colour)
- font=<string font, as known in android, eg: 'sans-serif'> (you can also use a .ttf file - see above)
- globalFontScale=<number> (available in version 1.5.36)
- hideTicks_<pid>=<true | false> - Hide the tick marks on dials
- globalHideTicks=<true | false> - Global option for hiding tick marks on all dials
- textRadius_<pid>=<multipler - eg: 1.5> - controls the dial text distance from centre of dial.
- globalTextRadius=<multipler - eg: 1.5> - global option for all dials to control text placement
http://torque-bhp.co...inDocumentation
Identifier | Description
03 Fuel system status
04 Calculated engine load value
05 Engine coolant temperature
06 Short term fuel trim (bank 1)
07 Long term fuel trim (bank 1)
08 Short term fuel trim (bank 2)
09 Long term fuel trim (bank 2)
0a Fuel pressure
0b Intake manifold absolute pressure (MAP)
0c Engine RPM
0d Vehicle speed
0e Timing advance
0f Intake air temperature (IAT)
10 Mass air flow rate (MAF)
11 Throttle position (at manifold), this is not the accelerator pedal, and this is a relative reading.
ff1005 GPS Longitude
ff1006 GPS Latitude
ff1001 GPS Speed
ff1010 GPS Height
ff1007 GPS Bearing
ff1201 MPG
ff1202 Turbo Boost
ff1203 Kilometers Per Litre
ff1205 Trip MPG
ff1206 Trip KPL
ff1207 Litres per Kilometre
ff1208 Trip LPK
ff120A Manifold Vacuum
ff120B GPS Trip distance
ff120C Vehicle distance (Odometer) saved with profile
ff1220 Accelerometer (X)
ff1221 Accelerometer (Y)
ff1222 Accelerometer (Z)
ff1223 Accelerometer (Total)
ff1225 Torque
ff1226 Horsepower
ff122d 0-60 mph time
ff122e 0-100 kph time
ff122f Quarter mile time
ff1230 eighth mile time
ff1237 GPS vs OBD speed diff
ff1238 Voltage
ff1239 GPS Accuracy
ff123A GPS Satellites locked
ff123B GPS bearing
ff1249 AFR
ff1214->ff121B O2 Sensors 1x1->1x4, 2x1->2x4
ff1240->ff1247 O2 Eqv Ratio 1->8
ff1257 CO2 in G/KM
ff1258 CO2 in G/KM average
ff125a Fuel rate
ff125b Fuel cost (trip)
ff125c Fuel used (trip)
ff1255 Torque RPM component
ff1256 HorsePower RPM component
ff124d Commanded AFR
ff1249 Measured AFR
Once you have done so either keep those pages open or copy the hieroglyphic coding from both links to somewhere on your desktop. You will need these for the properties.txt file to make your gauges work properly.
Now down to the nitty gritty. (Note: basic Photoshop (PS) skills will help A LOT, paint will be a PITA so if you have no PS skills, good luck)
First start off by downloading the test files http://ian-hawkins.c...hemes/testc.zip these are what you will base your gauges on. You will get 4 gauges, 2 round and 2 square
Open dial_background.png in PS and go for gold. Customize the colours/patterns to your liking keeping within the dimensions already set. Once you are happy save it as dial_background.png this is your generic gauge Torque will use.
This optional
For other gauges add the Identifier code after background. eg If you want Engine RPM save it as dial_background_0c.png
Here is a few I have done already.
Generic
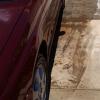
RPM (0c) – I have put red box a to accentuate the digital read out (still needs fine tuning)
Coolant Temp (05)
Next is to create the properties.txt file
This is where that hieroglyphic coding I was talking about earlier comes into play…
Depending on what you want to customise you just add the Identifier code after each line.
eg. For coolant I only have a half gauge, so I need to start the gauge dial at a horizontal level so going off the dial start/end angle http://torque-bhp.com/wiki/Themes, I need 90 degrees from vertical so my codes will be as follows
dialStartAngle_05=90
dialStopAngle_05=90
Just an example of something I done up.
This is what I made up for my gauges
globalFontScale=1
dialTickInnerRadius=1.25
dialTickOuterRadius=1.40
dialNeedleLength=1.40
displayTickColour=#6ad133
dialNeedleColour=#c80000
displayIndicatorColour=#c80000
displayTextTitleColour=#ffffff
displayTextValueColour=#6ad133
#Coolant
dialStartAngle_05=90
dialStopAngle_05=90
#Voltmeter
dialStartAngle_ff1238=135
dialStopAngle_ff1238=135
After you are done, save all your gauges and properties.txt file or SD card or tablet/phone drive)
The next step you can only access on your phone/tablet. Copy your files to the .torque/themeDir/ folder (wherever Torque is installed) If you can’t find it, problem means your file manager/explorer isn’t showing hidden files. The standard one sucks, I use ES File explorer
*Still in testing stage