
Cool.
What rotors will you be running DBA's?
I'm keen to see how this works for you. As it's something I'm definitely considering.

Fatcat's Track Hack
Started by fatcat67, Sep 04 2008 04:37 PM
197 replies to this topic
#41

Soop
-
- Members
-

- 3,483 posts
Suck, squeeze, bang, blow.
- Gender:Male
- Location:Shepparton, Vic.
Posted 25 September 2008 - 05:12 PM
TSM
#42
CRUISN
-
- Members
-
- 6,970 posts
Doin it my way.
- Gender:Male
- Location:Melbourne
- Interests:Family, Surfing, Cars.
Posted 25 September 2008 - 05:47 PM
They look so pretty.  Got to be happy with that purchase.
Got to be happy with that purchase.
OEM+
#43
buddylove
-

- Members
-
- 550 posts
Regular Member
- Gender:Male
- Location:Brisbane
Posted 27 September 2009 - 12:58 AM
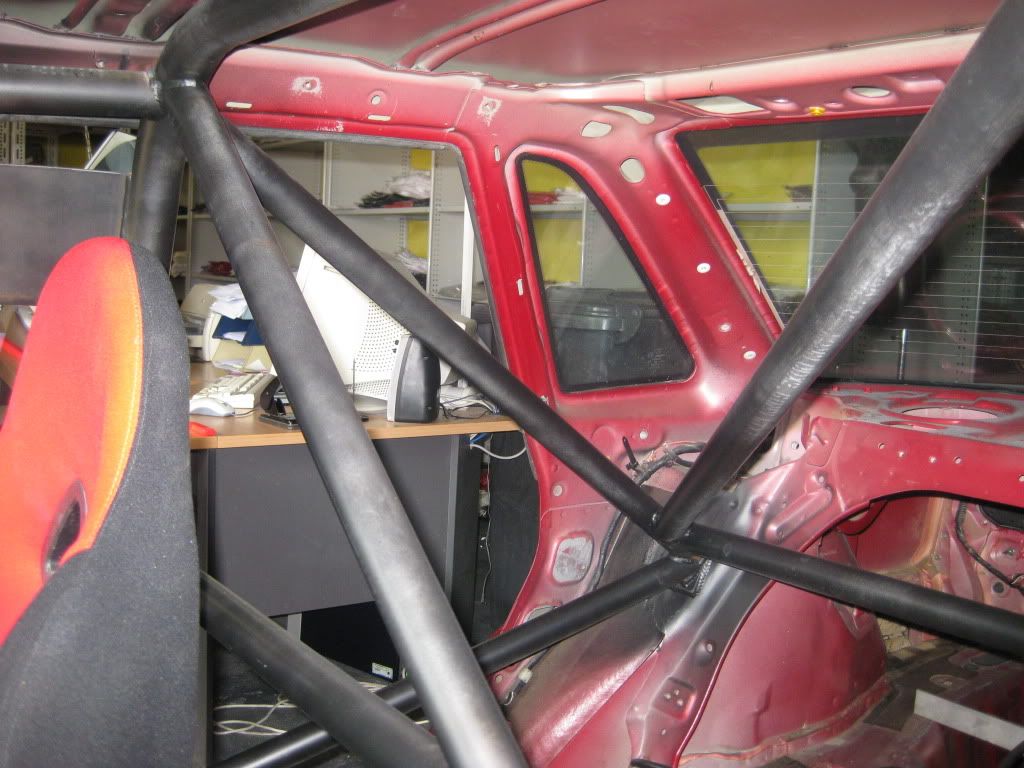
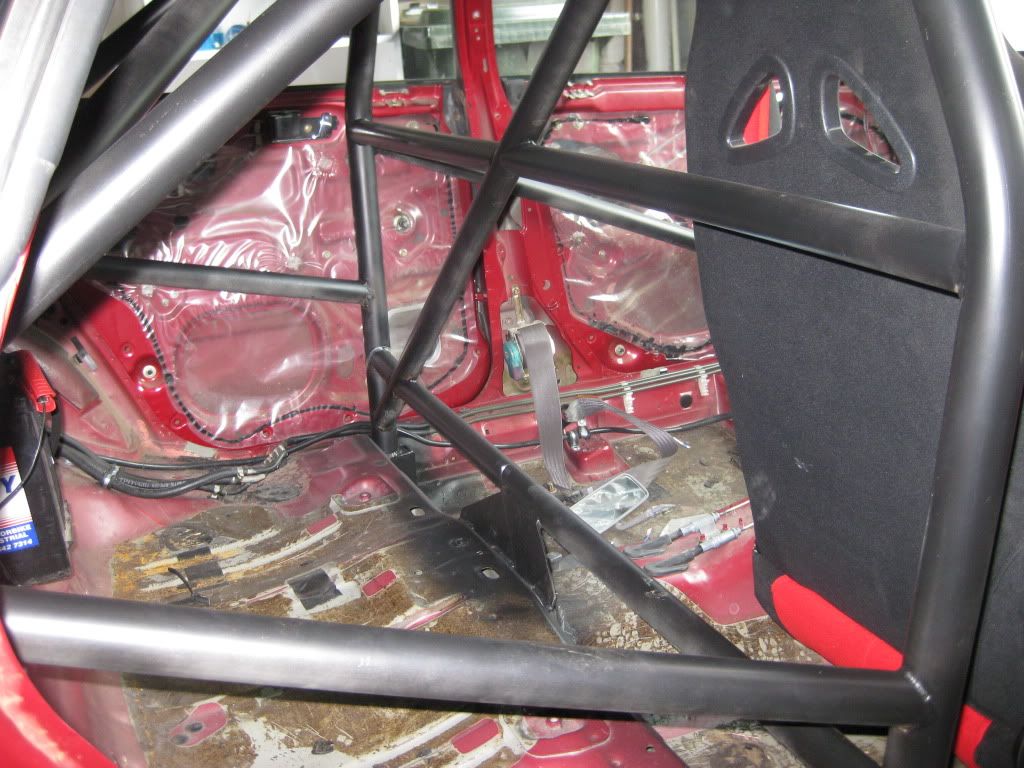
Hurry up and put a roll cage in it frank.. ill have a new gearbox and booking morgan park before you have even considered it!!!
MY07 GT-B 6MT Sedan
#44
fatcat67
-
- Members
-
- 1,206 posts
Regular Member
- Gender:Male
- Location:Brizzy
- Interests:I'm too old to remember.
Posted 21 February 2011 - 10:20 PM
You mean like this?
Nothing really to update except:
EJ255 block
V3 STI heads
APS SR50 turbo
ARP L19 headstuds
Manley forged pistons
PAR forged rods
12mm oil pump
Hyperflow stage 2 sump
Subaru MLS head gaskets 1.4mm
Gates timing kit
Boomba billet fuel rails
Carl Davey top feed injector adaptors
Motec M4
That's the engine.
Driveline is:
PPG 1-4 straight cut syncro
1.5 way plated front diff
2.0 way plated R160 diff
Standard viscous centre (but have a 20kg STI centre I might try for laughs)
Brembo's with DS2500 Ferrodo's
RDA Front rotors DBA rears
Tein coilovers
Just about have everything I need to finish the build.
This has been such a long time coming...........kids slow **** down.
Once I face the block deck and heads I'll just need a weekend or two to slowly put the engine together. I just need to be carefull with the tollerances but I have all my micrometers, verniers and patience to do the job. Hopefully it works!!!!!!!!
As Tony Montana would say:
In this country, you gotta make the money first.
Then when you get the money, you get the power.
Then when you get the power, then you get the women.
In this country, you gotta make the money first.
Then when you get the money, you get the power.
Then when you get the power, then you get the women.
#45
Soop
-
- Members
-
- 3,483 posts
Suck, squeeze, bang, blow.
- Gender:Male
- Location:Shepparton, Vic.
Posted 22 February 2011 - 12:11 AM
****. Nice effort man.
TSM
#46
aekOne
-

- Administrators
-
- 10,349 posts
Boss Pelican
- Gender:Male
- Location:Brisbane - Sunshine State
- Interests:Regulating


#47
bobbyjimmy
-

- Members
-
- 1,287 posts
Regular Member
- Gender:Male
- Location:Canberra
Posted 22 February 2011 - 10:40 AM
If you don't use that STi 20g Centre Diff, you want to sell it?
2002 Outback - it's gone...
#48
Richo
-

- Members
-
- 7,765 posts
Regular Member
- Gender:Male
- Interests:Not the internet
Posted 22 February 2011 - 11:14 AM
Dang son, nice
Stuff goes here
#49
fatcat67
-
- Members
-
- 1,206 posts
Regular Member
- Gender:Male
- Location:Brizzy
- Interests:I'm too old to remember.
Posted 22 February 2011 - 12:53 PM
Thanks guys.
Paul's comment goes hand in hand with his avatar. Classic.
Just waiting on a few small o-rings and waterpump and it'll start coming together.
Paul's comment goes hand in hand with his avatar. Classic.
Just waiting on a few small o-rings and waterpump and it'll start coming together.
As Tony Montana would say:
In this country, you gotta make the money first.
Then when you get the money, you get the power.
Then when you get the power, then you get the women.
In this country, you gotta make the money first.
Then when you get the money, you get the power.
Then when you get the power, then you get the women.
#50
Soop
-
- Members
-
- 3,483 posts
Suck, squeeze, bang, blow.
- Gender:Male
- Location:Shepparton, Vic.
Posted 22 February 2011 - 01:00 PM
Anymore photo's?
TSM
#51
fatcat67
-
- Members
-
- 1,206 posts
Regular Member
- Gender:Male
- Location:Brizzy
- Interests:I'm too old to remember.
Posted 22 February 2011 - 02:28 PM
Not right here.
But I do need someone to give me a hand with some painting. Coming to QLD anytime soon mate?
I've got heaps of bits here at the office, but you don't want to see my mess.
I'll try and get some pictures happening while I do the build. It's hard though when you get a rhythm going and your concentrating on the job.
But I do need someone to give me a hand with some painting.
Coming to QLD anytime soon mate?I've got heaps of bits here at the office, but you don't want to see my mess.
I'll try and get some pictures happening while I do the build. It's hard though when you get a rhythm going and your concentrating on the job.
As Tony Montana would say:
In this country, you gotta make the money first.
Then when you get the money, you get the power.
Then when you get the power, then you get the women.
In this country, you gotta make the money first.
Then when you get the money, you get the power.
Then when you get the power, then you get the women.
#52
fatcat67
-
- Members
-
- 1,206 posts
Regular Member
- Gender:Male
- Location:Brizzy
- Interests:I'm too old to remember.
Posted 22 February 2011 - 02:45 PM
I have this picture but it's pretty bad quality.

Just shows what I've done with the dash. I might change it yet.
Just shows what I've done with the dash. I might change it yet.
As Tony Montana would say:
In this country, you gotta make the money first.
Then when you get the money, you get the power.
Then when you get the power, then you get the women.
In this country, you gotta make the money first.
Then when you get the money, you get the power.
Then when you get the power, then you get the women.
#53
Soop
-
- Members
-
- 3,483 posts
Suck, squeeze, bang, blow.
- Gender:Male
- Location:Shepparton, Vic.
Posted 22 February 2011 - 03:49 PM
Nice dash setup man.
PM me re-paint job.
PM me re-paint job.
TSM
#54
fatcat67
-
- Members
-
- 1,206 posts
Regular Member
- Gender:Male
- Location:Brizzy
- Interests:I'm too old to remember.
Posted 27 February 2011 - 11:26 AM
This is the $100 EJ255 block I picked up. Fricken shmick.
I've started getting ready for my engine build so I thought I might share how I went about splitting my block for prepping. Judging by the state of the block's appearence it will only need a very light deck facing.
First thing was to remove the wrist pin covers.
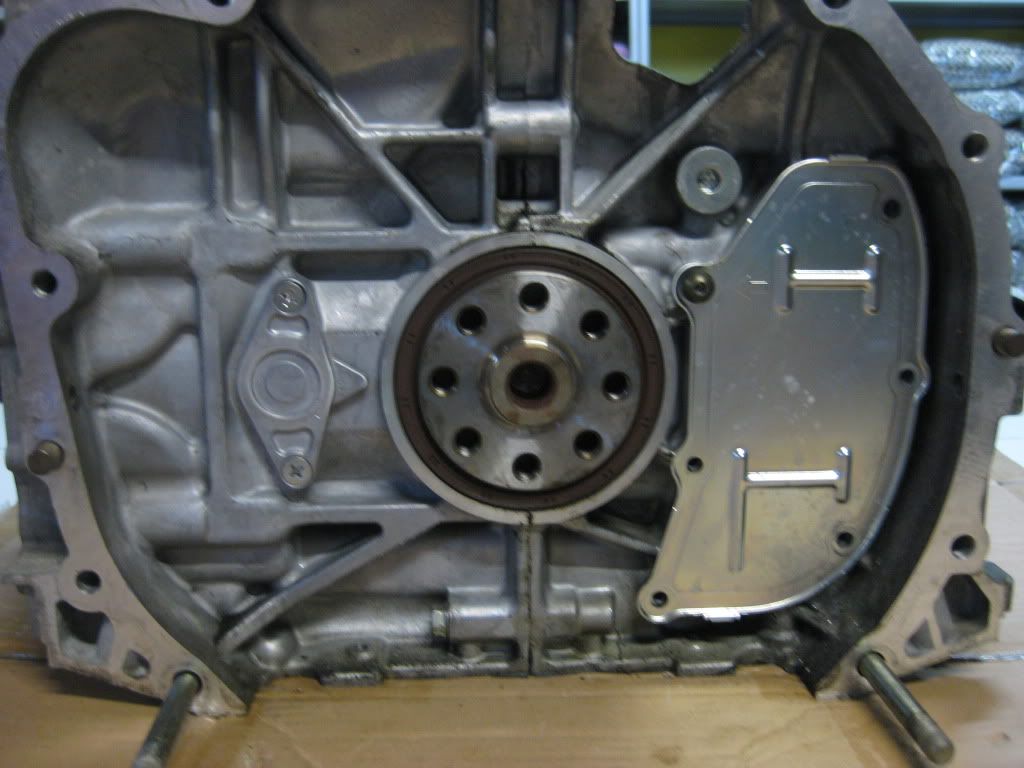
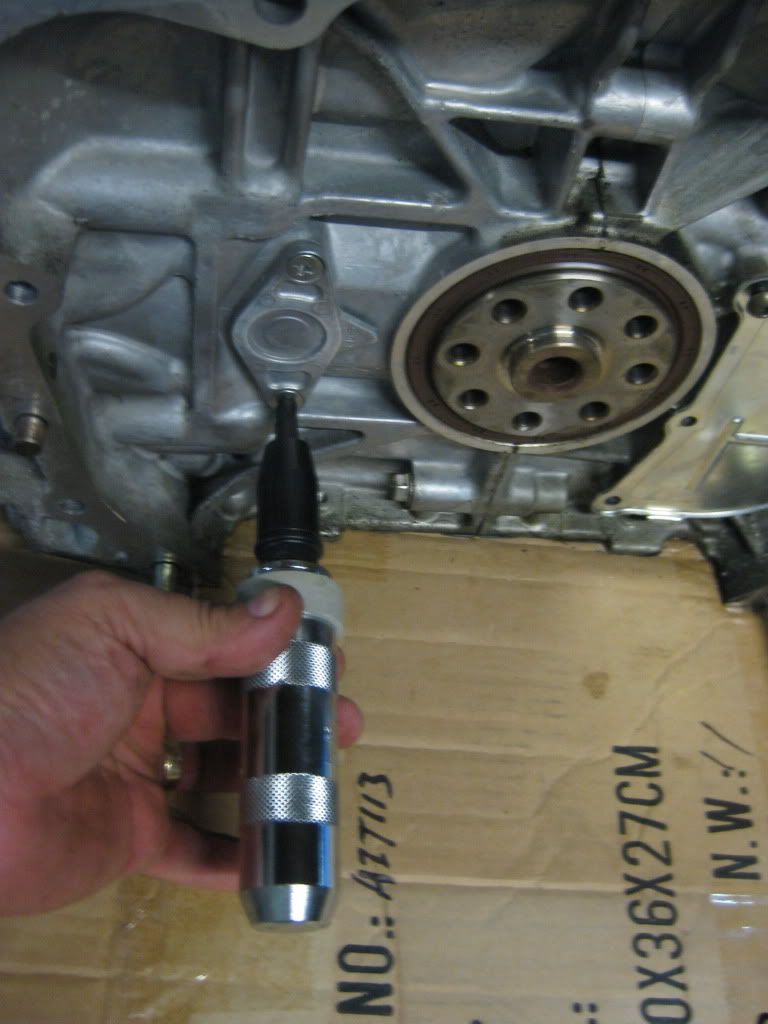
Once the covers have been removed rotate the crank until you can see the wrist pins.
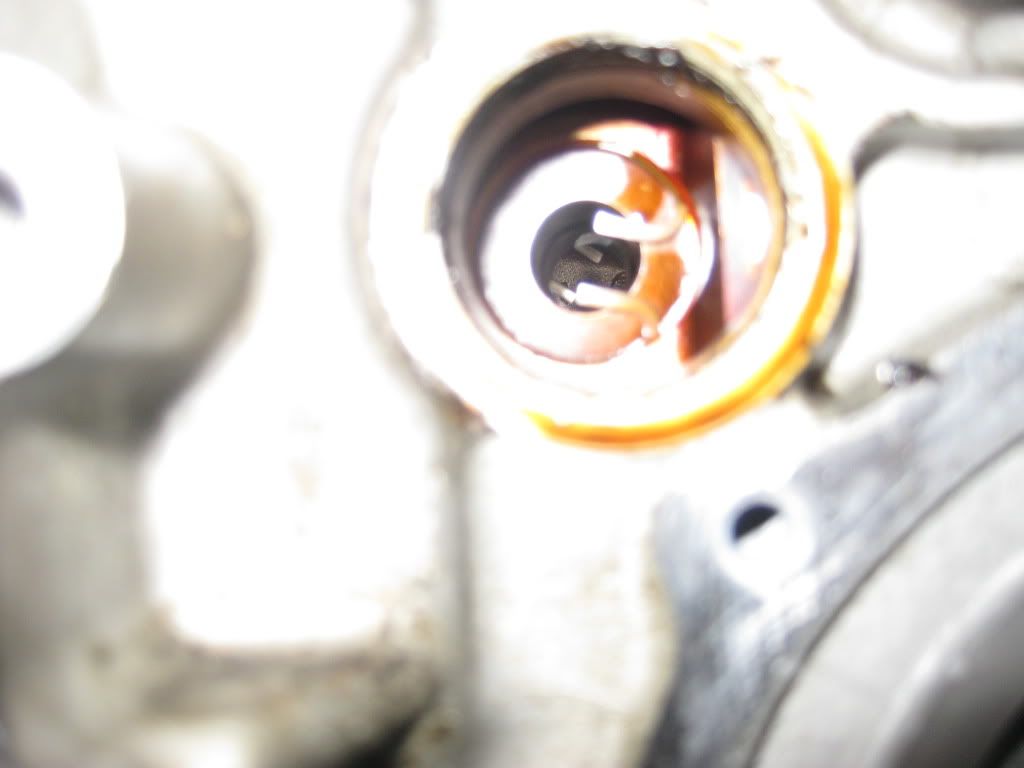
Then, using a pair of long nose pliers remove the wrist pin circlips.
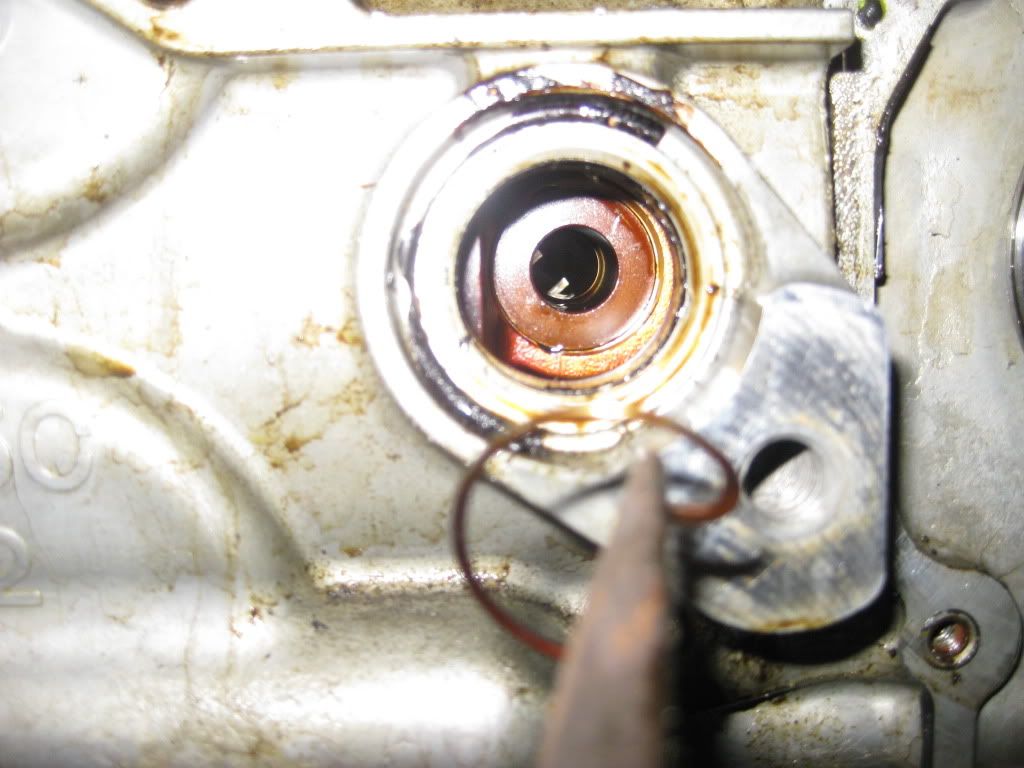
"Usually", the wrist pins come out fairly easilly by just pulling it out. But the older the engine the harder hat is to do. There is a solution to this, but no need to go through that now.

To remove the pistons rotate the crank and the rod should push the pistons out the past deck. If not, rotate the piston by approximately 45deg and then push out with the crank. Make sure you leave the crankshaft sprocket on to make it easier to rotate.
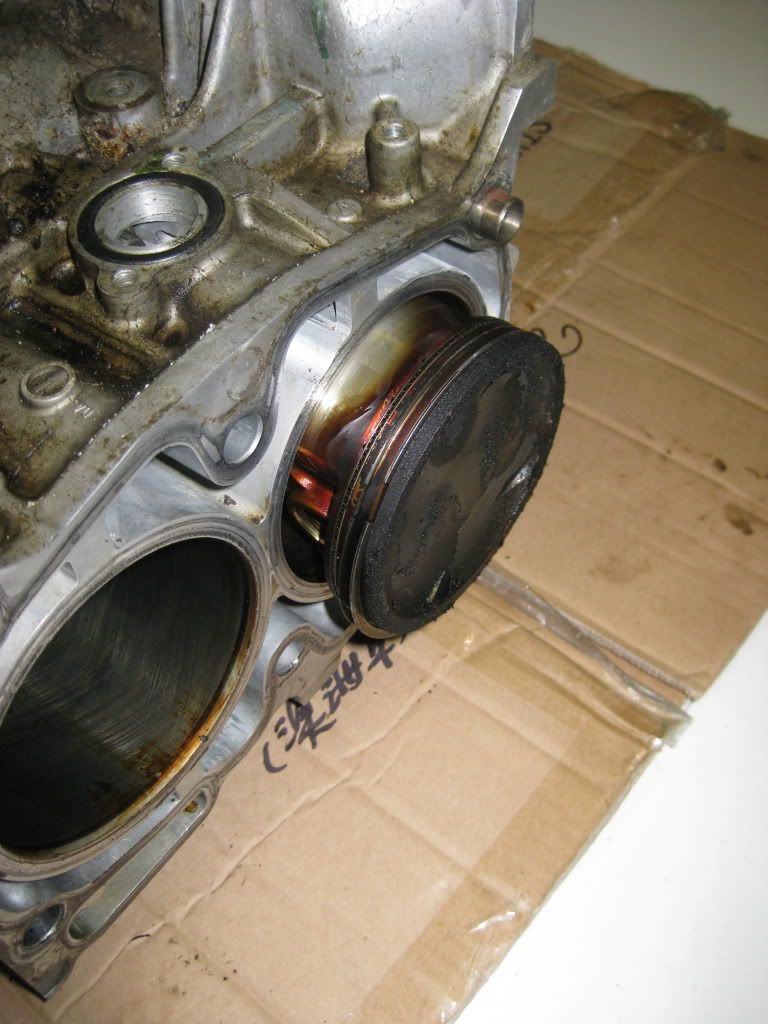
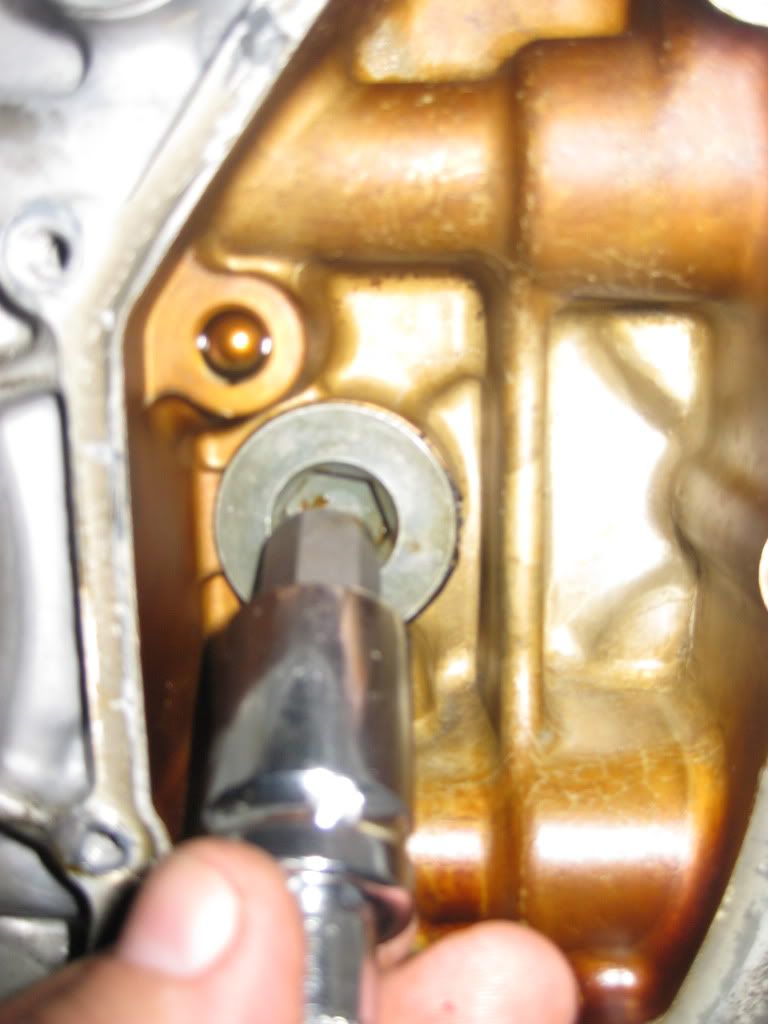
Using a 12 point 12mm socket undo all of the bolts holding the block halves together.


Don't forget the little 10mm bolt in the sump area of the block.

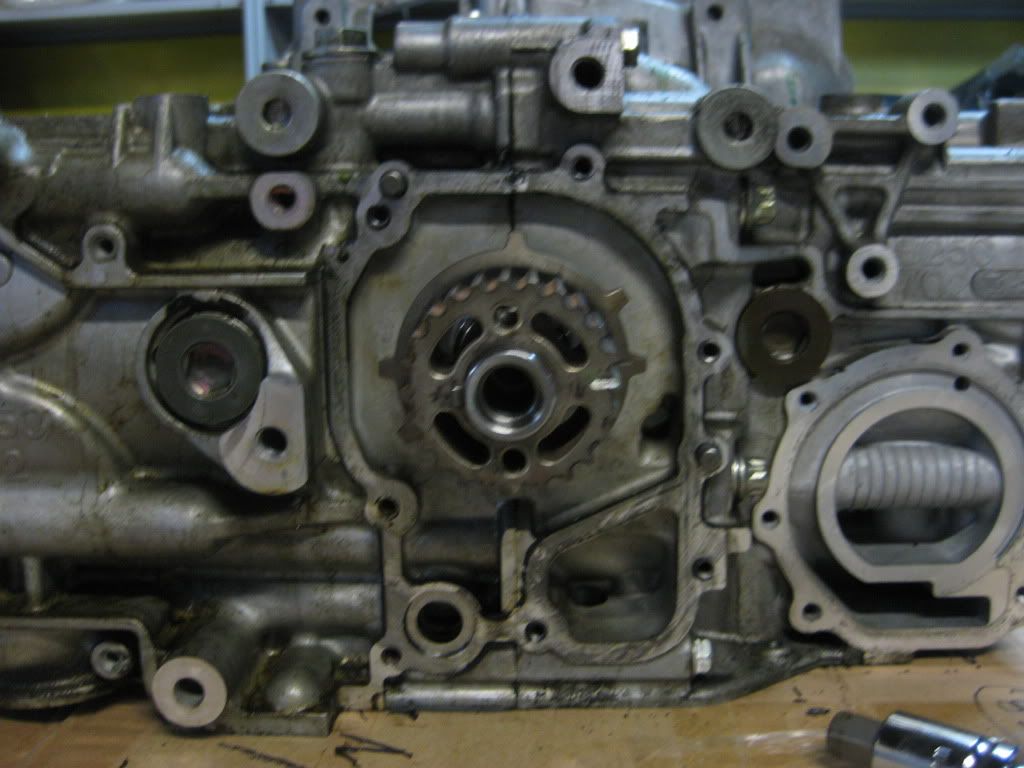
Once this is done, and assuming the dowels aren't too rusted in place, a few taps on the block with a plastic/wooden mallet should break the bond and the block should come appart.

Carefully remove the crank and rods.

Remove the rods from the crank and check the condition of the journals. Then measure the journal diameters against standard specifications. In my case they are within 0.01mm and in great condition.
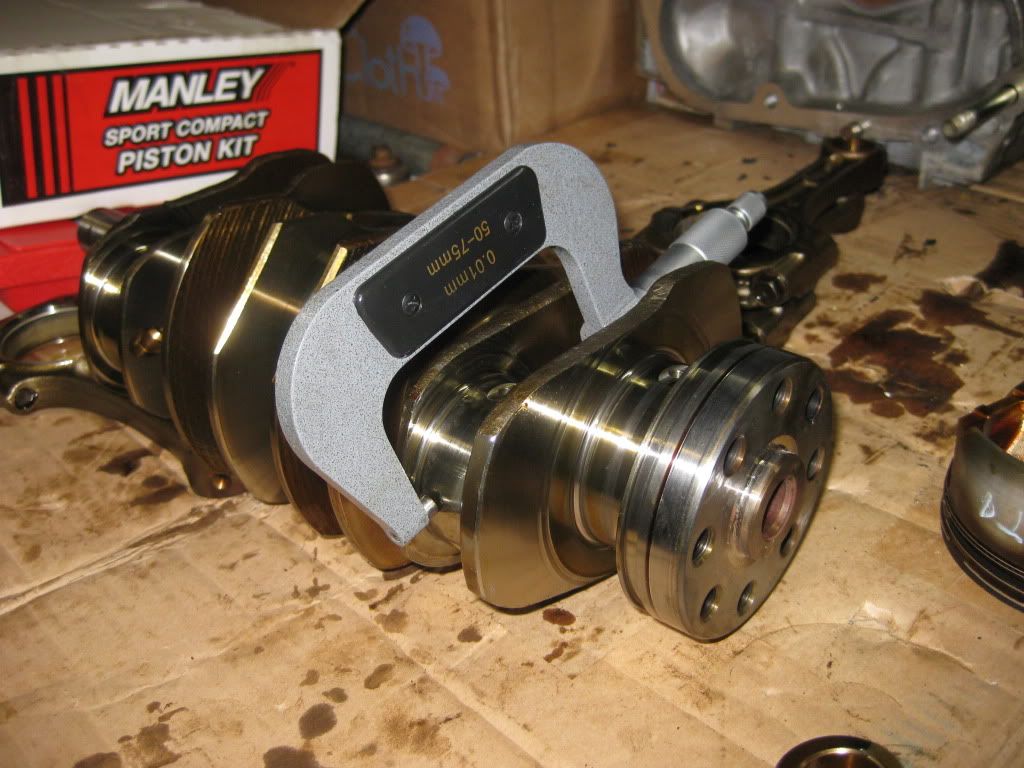
So far that is all I have done, and I'll keep up to date my progress on the rebuild.
I've started getting ready for my engine build so I thought I might share how I went about splitting my block for prepping. Judging by the state of the block's appearence it will only need a very light deck facing.
First thing was to remove the wrist pin covers.
Once the covers have been removed rotate the crank until you can see the wrist pins.
Then, using a pair of long nose pliers remove the wrist pin circlips.
"Usually", the wrist pins come out fairly easilly by just pulling it out. But the older the engine the harder hat is to do. There is a solution to this, but no need to go through that now.
To remove the pistons rotate the crank and the rod should push the pistons out the past deck. If not, rotate the piston by approximately 45deg and then push out with the crank. Make sure you leave the crankshaft sprocket on to make it easier to rotate.
Using a 12 point 12mm socket undo all of the bolts holding the block halves together.
Don't forget the little 10mm bolt in the sump area of the block.
Once this is done, and assuming the dowels aren't too rusted in place, a few taps on the block with a plastic/wooden mallet should break the bond and the block should come appart.
Carefully remove the crank and rods.
Remove the rods from the crank and check the condition of the journals. Then measure the journal diameters against standard specifications. In my case they are within 0.01mm and in great condition.
So far that is all I have done, and I'll keep up to date my progress on the rebuild.
As Tony Montana would say:
In this country, you gotta make the money first.
Then when you get the money, you get the power.
Then when you get the power, then you get the women.
In this country, you gotta make the money first.
Then when you get the money, you get the power.
Then when you get the power, then you get the women.
#55
RX25SE
-

- Members
-
- 12,757 posts
...............Car nerd................ now a H6 pilot
- Gender:Male
- Location:Melbourne eastern 'burbs
- Interests:Cars with chrome bumpers!
Posted 27 February 2011 - 11:43 AM
Are you facing the deck to increase compression or just to restore the surface?
If I told you I was a compulsive liar, would you believe me?
#56
fatcat67
-
- Members
-
- 1,206 posts
Regular Member
- Gender:Male
- Location:Brizzy
- Interests:I'm too old to remember.
Posted 27 February 2011 - 11:57 AM
I've been advised to face both the block and head faces to as close to mirror finish because I'm using MLS Subaru head gaskets. They are already in great nick so I don't think much will need to come off the faces.Are you facing the deck to increase compression or just to restore the surface?
As Tony Montana would say:
In this country, you gotta make the money first.
Then when you get the money, you get the power.
Then when you get the power, then you get the women.
In this country, you gotta make the money first.
Then when you get the money, you get the power.
Then when you get the power, then you get the women.
#57
acres
-
- Members
-
- 572 posts
Regular Member
- Gender:Male
- Location:Gold Coast
Posted 27 February 2011 - 12:08 PM
NIce pics. If the journals on the crank were out of spec can that be repaired or accounted for somehow or do you just bin it and get another one?
Ta
Aaron
Ta
Aaron
#58
fatcat67
-
- Members
-
- 1,206 posts
Regular Member
- Gender:Male
- Location:Brizzy
- Interests:I'm too old to remember.
Posted 27 February 2011 - 06:34 PM
You can get the crank ground or linished and use oversize bearings.NIce pics. If the journals on the crank were out of spec can that be repaired or accounted for somehow or do you just bin it and get another one?
Ta
Aaron
Don't throw away a crank until you find out if it's really rooted.
As Tony Montana would say:
In this country, you gotta make the money first.
Then when you get the money, you get the power.
Then when you get the power, then you get the women.
In this country, you gotta make the money first.
Then when you get the money, you get the power.
Then when you get the power, then you get the women.
#59
acres
-
- Members
-
- 572 posts
Regular Member
- Gender:Male
- Location:Gold Coast
Posted 28 February 2011 - 11:09 AM
You can get the crank ground or linished and use oversize bearings.
Don't throw away a crank until you find out if it's really rooted.
Ah, I see. Always good to learn something new. Thankyou
#60
fatcat67
-
- Members
-
- 1,206 posts
Regular Member
- Gender:Male
- Location:Brizzy
- Interests:I'm too old to remember.
Posted 29 March 2011 - 05:12 PM
Build has been going on for a week or so.
Sorry for the lack of info, it's really hard to post and build an engine at the same time because of gooey fingers.
Here are a couple of quick progress pictures.
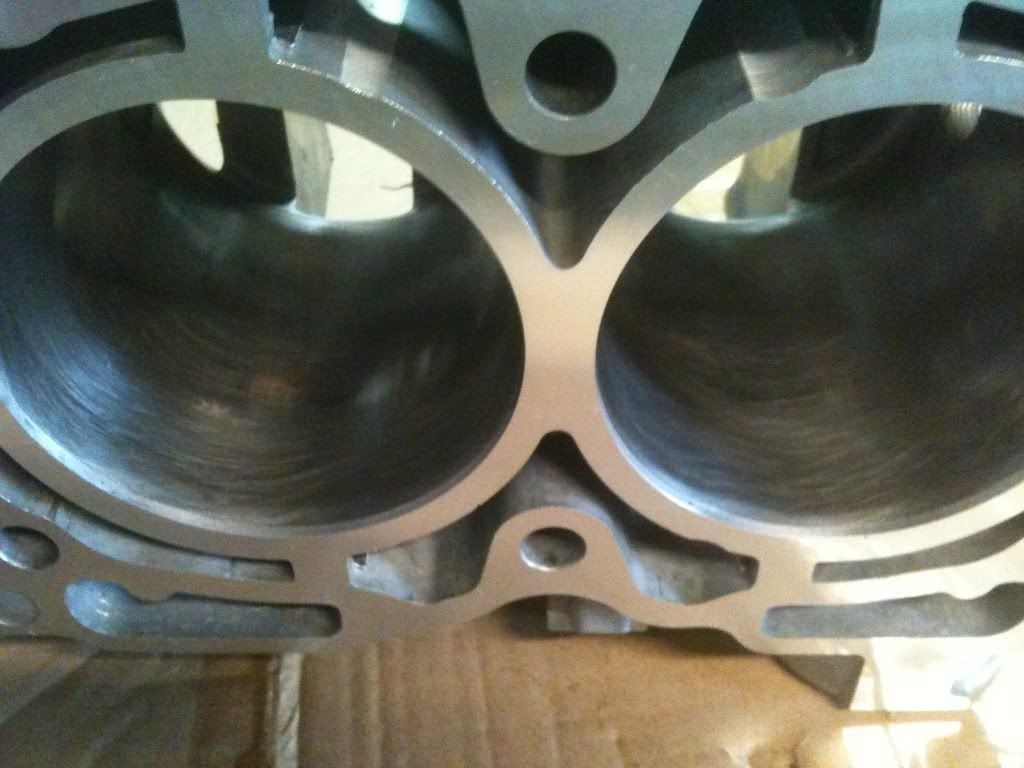
Block halves faced and honed.
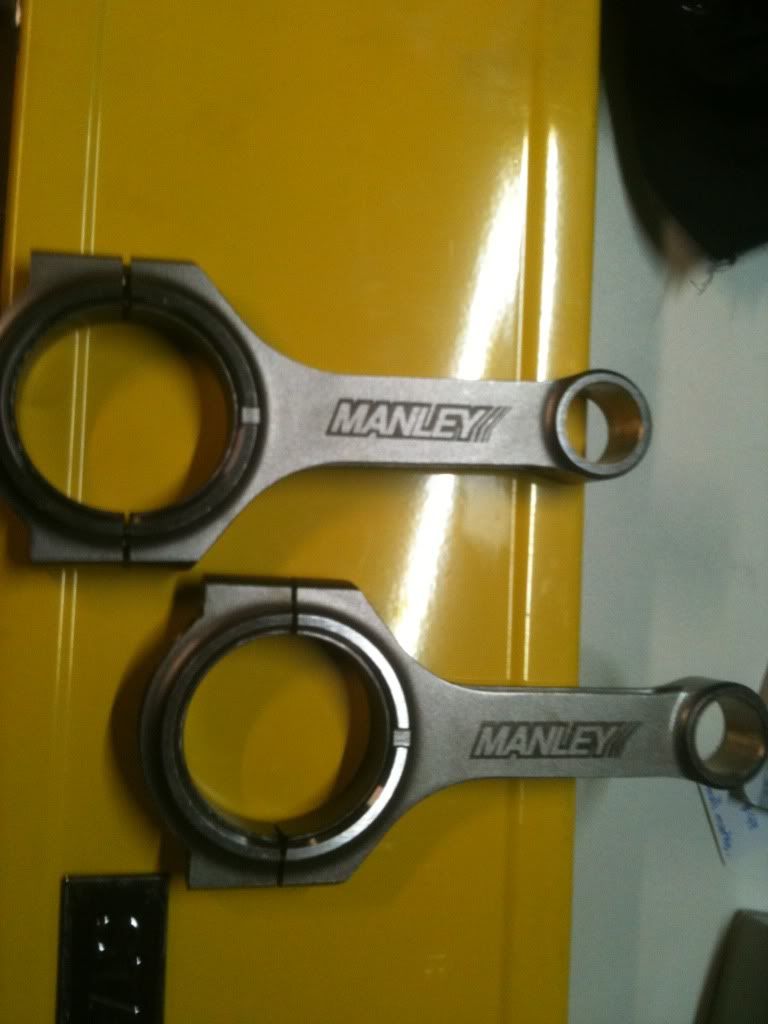
New rods.
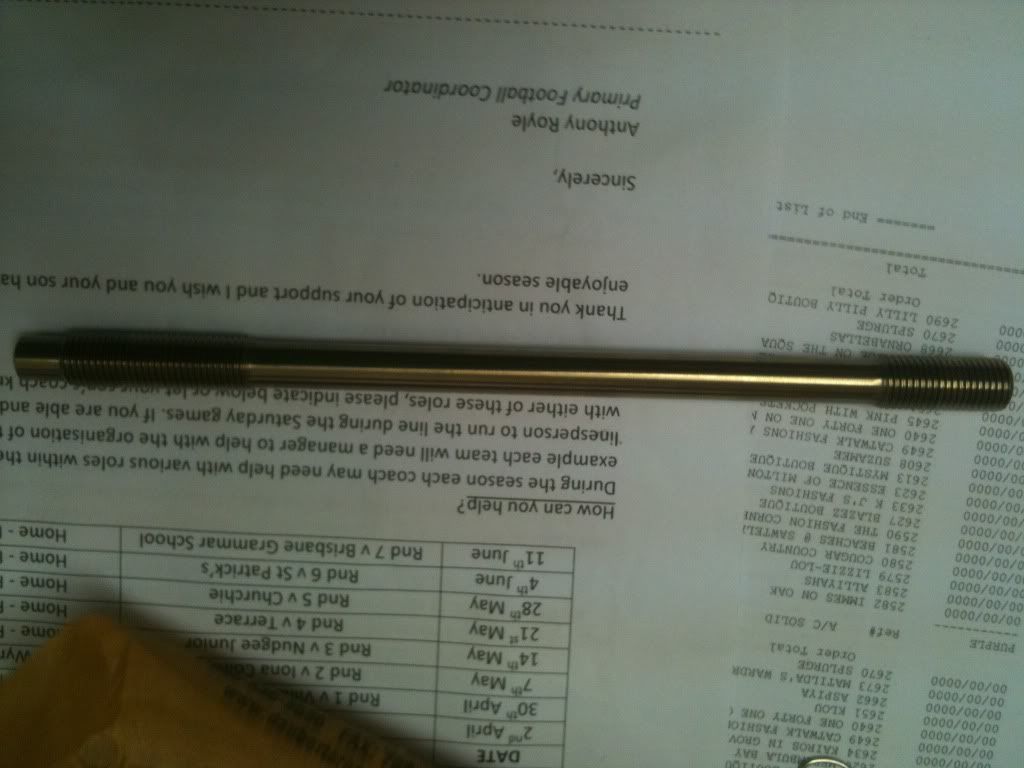
ARP L19 head studs.
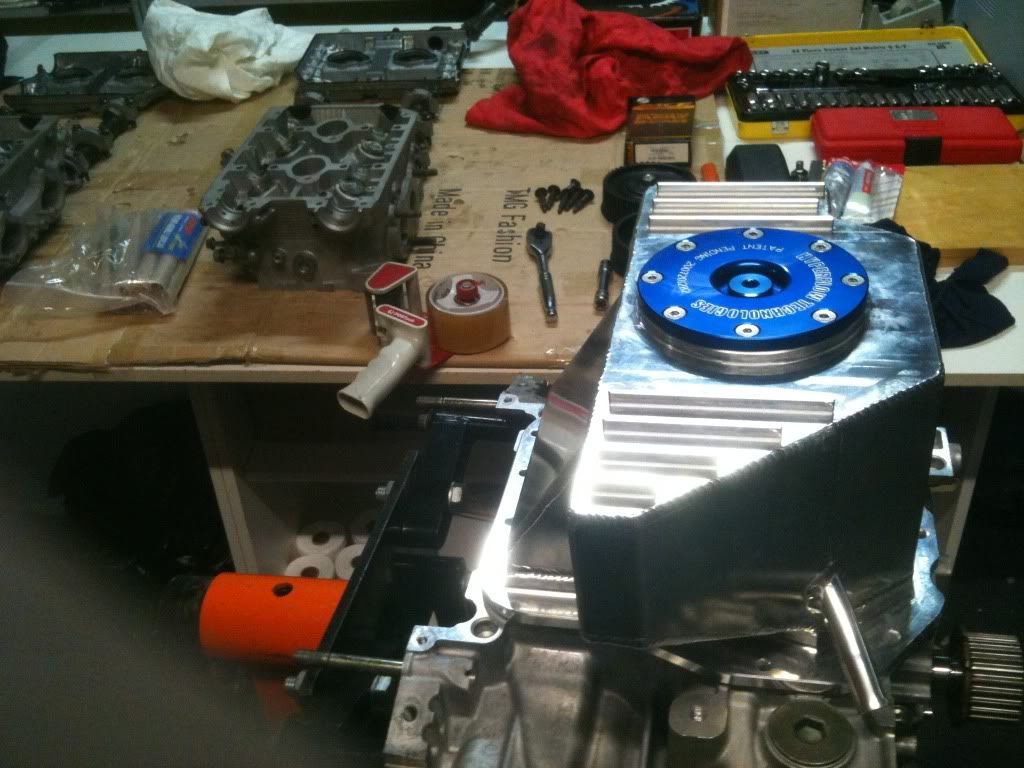
Pistons and crank in. And bling on top(bottom really)
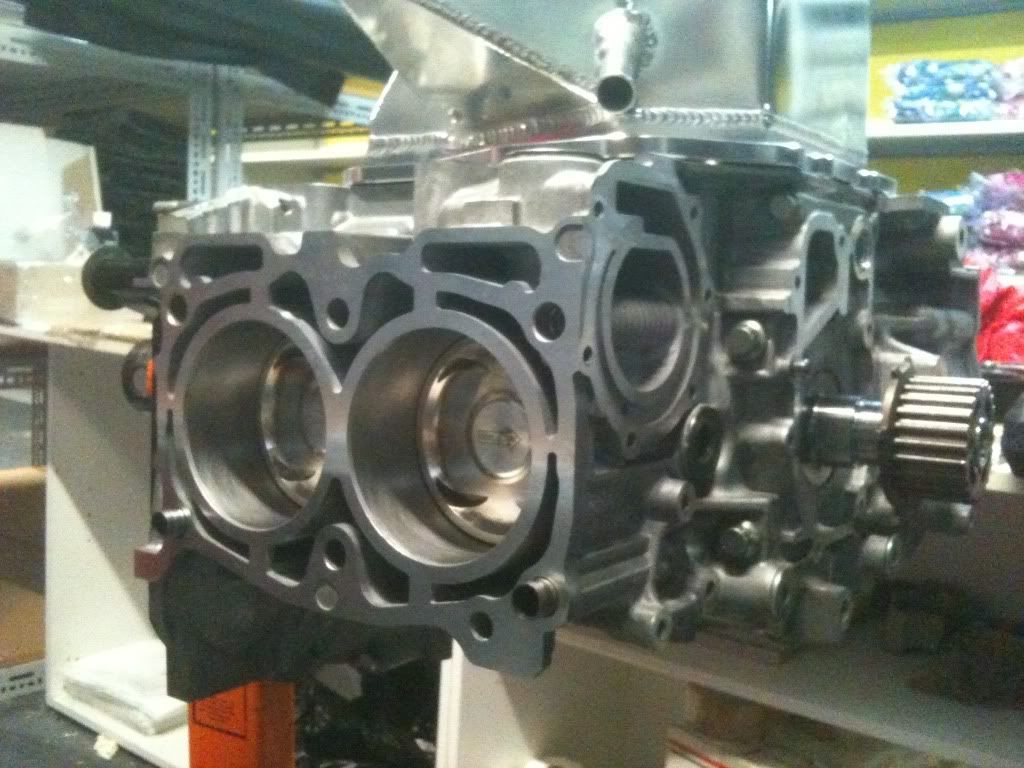
More bling.
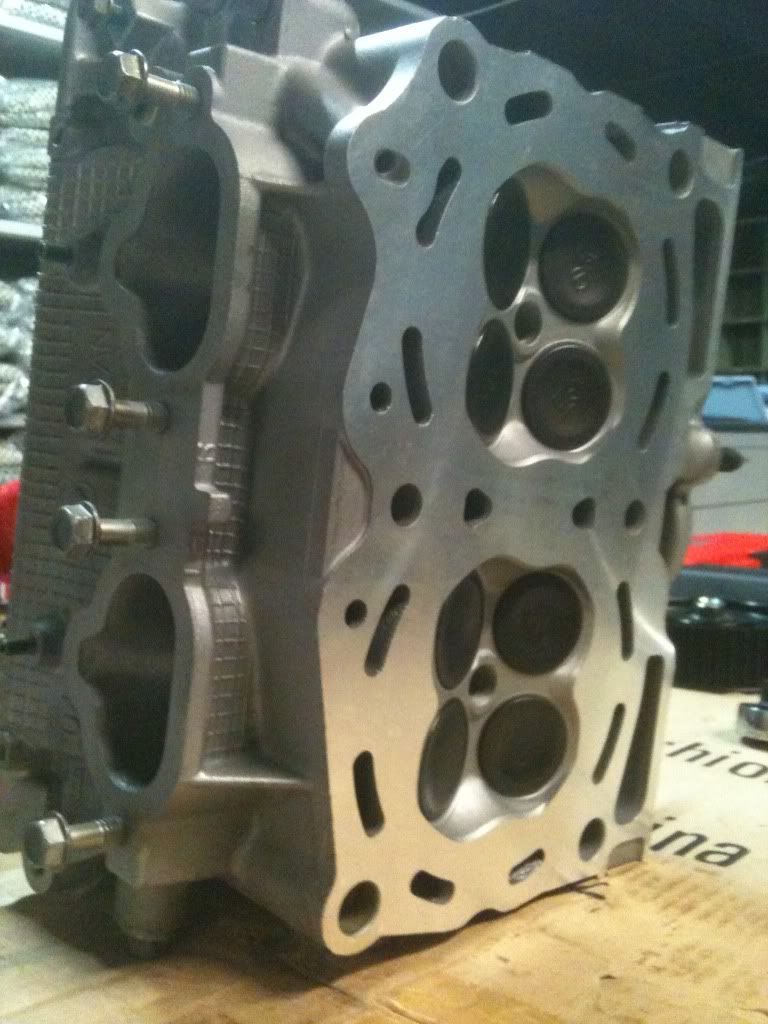
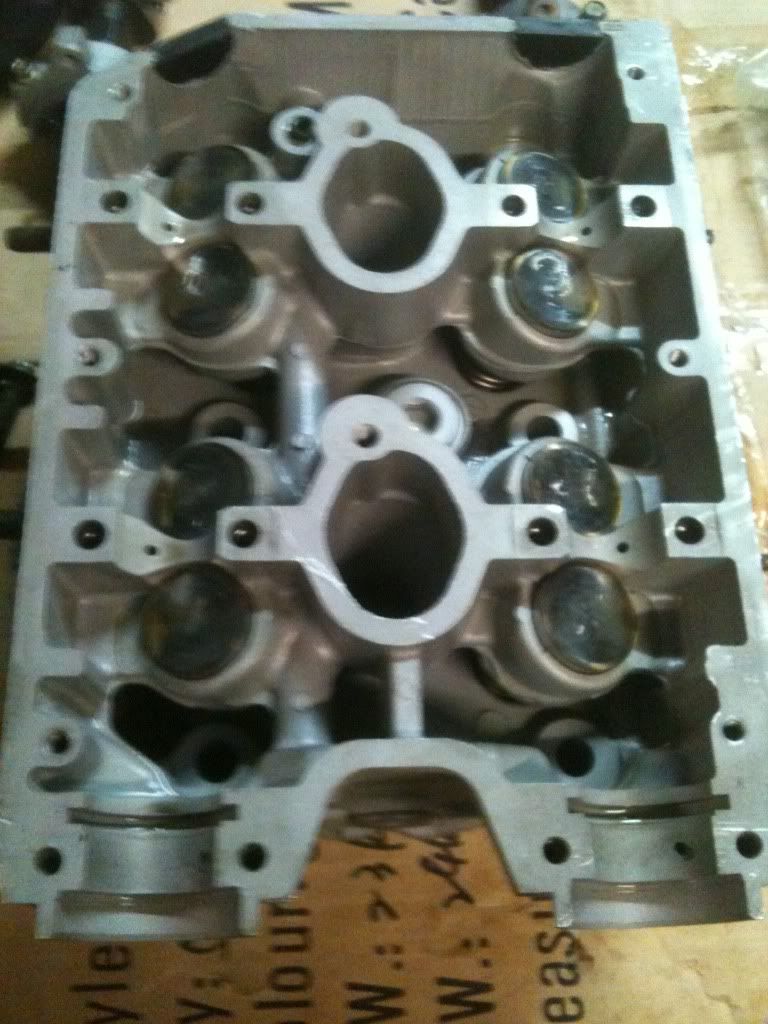
V3 STI Heads. Cleaned and reconditioned. No headwork as I'm not going for big power.
Cams out ready for attachment to block, which I'll get to tonight. Hopefully.
Sorry for the lack of info, it's really hard to post and build an engine at the same time because of gooey fingers.
Here are a couple of quick progress pictures.
Block halves faced and honed.
New rods.
ARP L19 head studs.
Pistons and crank in. And bling on top(bottom really)
More bling.
V3 STI Heads. Cleaned and reconditioned. No headwork as I'm not going for big power.
Cams out ready for attachment to block, which I'll get to tonight. Hopefully.
As Tony Montana would say:
In this country, you gotta make the money first.
Then when you get the money, you get the power.
Then when you get the power, then you get the women.
In this country, you gotta make the money first.
Then when you get the money, you get the power.
Then when you get the power, then you get the women.


1 user(s) are reading this topic
0 members, 1 guests, 0 anonymous users

