Jump to content


Photo

MY98 track/rally build


  • Please log in to reply
148 replies to this topic

#61 Nizza

Nizza

    Trusted Member

  • Members
  • PipPip
  • 120 posts

Posted 11 December 2011 - 09:24 PM

nice little set up so far mate all seems very similar in my garage at the moment, there is always something that will go in twice or if ur really lucky three times thats when u know ur an unqualified genius looking at the bolts u just did up thinking hmmm better get those little fellas off again.

u probably all know this but just in case.....especially with exhaust or brake lines you should give the nut a little crack in the clockwise direction ensuring the tool ur using is secured on the nut properly first of course, in most cases that will save u many a nut or bolt rounding.

marv....i am impressed with the look of the parra coloured weapons. what are they? are they irwin item?

good luck with the loom on the dccd and the rest of the build. well done on those braids.


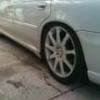
thanks mate, i like the braids too UNFORTUNATELY they might have to go because they wont clear these dam brembos (stopping power better be bloody good). unless i sell them it looks like the liberty may have some new shoes :P

$2300 if anyones interested, i bout them for $2600 (inc P7 rubbers) virtually unused PS: they dont clear brembos!

#62 fatdon

fatdon

    Trusted Member

  • Members
  • PipPip
  • 179 posts
  • Gender:Male
  • Location:mv2103
  • Interests:cars, music, cars, snow, cars, wake cars, and goodtimes. mainly goodtimes in cars.

Posted 11 December 2011 - 09:27 PM

http://www.ebay.com....9#ht_500wt_1039

here u go.

#63 Nizza

Nizza

    Trusted Member

  • Members
  • PipPip
  • 120 posts

Posted 15 December 2011 - 03:05 PM

you saved my bacon fatdon,

a few weeks ago i asked these blokes if they had a complete RA loom and they said yes, went to pay for it and it went 'missing' most likely been sold.

when u posted that ecu i rang em up again to ask for the next shipment and the loom 'reappeared!'. so now im gettin the loom + ecu... happy (and poor) days!!!!

#64 Nizza

Nizza

    Trusted Member

  • Members
  • PipPip
  • 120 posts

Posted 17 December 2011 - 03:01 PM

while im waiting for money i decided to write a DIY ABS change over (this is just a guide,obviously i take no responsibilty for anyones damage or injury due to stupidity. Take YOUR car to a specialist!)

This is handy for people upgrading their GC brakes and hubs using Brembos and R180 hubs froma GD

Apon inspection of my new hubs and brakes i noticed that the ABS sensors in the front are actually smaller than the GC ones so seeing as the ABS sensors were included i thought i might as well put them on.

Its a very simples process and all youll need is a 12mm ring spanner and a flat head screw driver.


In the centre of this photo you can see the rubber gromet that goes into the engine bay:

Posted Image


simply pry it open with a flatty:

Posted Image


The connection is in the engine bay close to the brake booster near some brake lines, undo the connection:

Posted Image


Next undo the mounting brackets with your 12mm ring spanner. cracking the bolt that holds the abs cable onto the strut is alot easier if its still attached to strut (mine wasnt so i put it back on):

Posted Image


Here are the two ABS cables in comparison with eachother. the one on the right is from the GC and the left is from the GD. note the physical size of the sensor:

Posted Image


I used the the clips and brackets from the GC to make life easier, i dont think the holes line up from the GD brackets anyways. to open the clips simply pry them open with a flatty and swap the cables. closing them back up on the new cable is done by pushing the clips back down:

Posted Image


Thats pretty much it, reassemble in reverse:

Posted Image


As for the rear sensors, they appear to be the exact same unit so i havent swapped them. please note i havent driven the car or tested the ABS yet.

the connections and gromets are identical. my advice would be to do them one at a time so you have something to refference to. good luck!

#65 Nizza

Nizza

    Trusted Member

  • Members
  • PipPip
  • 120 posts

Posted 22 December 2011 - 04:35 PM

My Billies came this morning, so i was pretty excited to chuck em in:

Posted Image


pretty easy task, this is what i did:

dissasemble hub, brakes and all that crap and you should have this:

Posted Image


brake clip being removed, i had to undo the brake line at the brake caliper to get the hose out of the way. i reconnected it sofluid wouldnt piss everywhere:

Posted Image


i removed rear seats to get access to mounting bolts. remove the three little bolts and the strut assembly should fall out:

Posted Image


the front:

Posted Image

old vs new (rears):

Posted Image

Posted Image


now theres an allen key hole to stop the gas cyclinder from rotating, use this and some 'proper' ring spanners ( i had to macgyver it up) use spring clamps too! altho there no under that much preloaded pressure, but then again teeth are expensive:

Posted Image


this is the rear layout. strut,hat, washer, bolt:

Posted Image


this is what the new layout looked like:

Posted Image


assembled:

Posted Image

the above was for the rears. basically the only difference to do the fronts was that theres a conical washer 'UNDER' the top hat aswell as the washer bolt that comes with the new strut that go above the hat.


they look teh sex:

Posted Image


Posted Image

Posted Image

#66 Nizza

Nizza

    Trusted Member

  • Members
  • PipPip
  • 120 posts

Posted 22 December 2011 - 04:55 PM

order/part number was GM5-8603, Bilstein PSS9 strut

#67 fatcat67

fatcat67

    Regular Member

  • Members
  • PipPipPip
  • 1,206 posts
  • Gender:Male
  • Location:Brizzy
  • Interests:I'm too old to remember.

Posted 22 December 2011 - 08:18 PM

They are the sex. NICE!!!!!!!!!
You must have an awsome budget.
Any reason you didn't opt for adjustable strut tops???????
You wouldn't know the spring rates off hand would you?
As Tony Montana would say:
In this country, you gotta make the money first.
Then when you get the money, you get the power.
Then when you get the power, then you get the women.

#68 Adam

Adam

    Snack down!

  • Members
  • PipPipPip
  • 46,970 posts
  • Gender:Male
  • Location:Bargo
  • Interests:Not knowing things about stuff

Posted 22 December 2011 - 09:46 PM

Lol I did the socket and vice grips too! Magyver FTW

Nice work!

Posted Image


#69 Nizza

Nizza

    Trusted Member

  • Members
  • PipPip
  • 120 posts

Posted 22 December 2011 - 09:59 PM

thanks boys

i didnt know there were adjustable strut tops in the pss9 range? these adjust from the bottom (i guess so it easier to do the rear)
i can look into the sping rates tomorow if i can find them fatcat

budget realy isnt big aye just taking it slowly and getting the most out of my buck with abit of research, also the fact that everything has been done personally upto this point and intend to do so till it finshed help keep the budget in order, altho i have no money atm lol. they cost me 2K + $370 gay ass tax which i thought was better that 'bilstein aus' price was (4K!).

and adam where the fcuk are u sposed to buy a dam ring spanner with that much angle to get in the strut top?!!?! id say ALOT of ppl hav macgyver'd it up.

My brembos are geting retapped with helicoils atm seeing as the inevitable stripping happened as i was taking them apart for a respray + rebuild. which brings me to my next question, does anyone know someone in Sydney that proffesionally sprays high temp paint for my brembos?! and please dont say spray it your self because there is no way in hell i could ever get a finish (a) that good (B) that quality in a can and © that factory colour

#70 Morgan

Morgan

    ...jus waitin' 4 a m8

  • Members
  • PipPipPip
  • 25,485 posts
  • Gender:Male
  • Location:Central Coast
  • Interests:Taking a poo

Posted 22 December 2011 - 10:18 PM

I'm sure any spray painter would be able to do it? They'd have all the right gear...

Worth a phone call

IM47Gcv.jpg


#71 Nizza

Nizza

    Trusted Member

  • Members
  • PipPip
  • 120 posts

Posted 22 December 2011 - 10:21 PM

ive tryed a few they rekon they dont have the Hi-Temp stuff. but i guess i just hav to call around somemore

#72 Morgan

Morgan

    ...jus waitin' 4 a m8

  • Members
  • PipPipPip
  • 25,485 posts
  • Gender:Male
  • Location:Central Coast
  • Interests:Taking a poo

Posted 22 December 2011 - 10:29 PM

I'd look into getting the hi-temp paint made up specially and then give it to your sprayer to professionally apply it...

If it's the actual paint they are missing, provide it for them and win :)

IM47Gcv.jpg


#73 Scuba-Roo

Scuba-Roo

    The local

  • Members
  • PipPipPip
  • 6,960 posts
  • Gender:Male
  • Location:Newcastle

Posted 22 December 2011 - 10:55 PM

Brembo's are easy to paint yourself :) if it's only for track and rally the paint won't matter anyway!

When are you looking at putting this in a rally or track day?

Subyclub, The place where random internet weirdos become good mates


#74 Nizza

Nizza

    Trusted Member

  • Members
  • PipPip
  • 120 posts

Posted 22 December 2011 - 11:21 PM

Brembo's are easy to paint yourself :) if it's only for track and rally the paint won't matter anyway!

When are you looking at putting this in a rally or track day?


i hope to have it near completion by the end of the new year, but a track day will be in order once i have the new engine sitting in the garage as the current engine will become expendable. but maybe a track day within a few months for some fun. but ill always be scouting for open paddocks and tracks for the fun gravel stuff.

but yeh moneys a big factor, so ill just take it as it comes. theres no real deadline or timeframe to stress me out with anyways ^_^

#75 Nizza

Nizza

    Trusted Member

  • Members
  • PipPip
  • 120 posts

Posted 24 December 2011 - 06:15 PM

Just completed the dccd wiring. BIGGEST PAIN IN THE ARSE. this is how i did it (feel free to tell me what ive done wrong in the connections so i can fix them now before i cook the electrics!)


Heres the loom after a bit of dicing:

Posted Image


Heres what i actually needed from it:

Posted Image


I used this grommet to get into the car, i just used my trusty metal bucket handle. u'll see poke out above the foot pedals:

Posted Image


came out here, now tie the dccd connection cables (2:red/white and yellow/red):


Posted Image

Ta-dah!:

Posted Image


I cut the cables one at a time so i couldnt stuff it up, stripped them, added heat shrink, soldered, the shrank them:

Posted Image

Posted Image


i put my relay on the far passenger side, there was a hole there for the relay holder so that was a win. i just used my yellow tounge from work to get the relay cables to the other side:

Posted Image


I ran the yellow/red cable into the engine fusebox via the fuel line grommets, just used abit of steel wire to manuver it in there. sorry didnt get the pic but u get the idea.

Now i took the fuse box apart (bitch to put back together) and looked for the 6th terminal of the B144 plug (this one). if youlook into that plug u can see tiny little numbers, i used the 6th one as said on the wiring diagram.

Posted Image


Now for the cabin fuse box i found that there was already a cable where the new relay power cable had to go, it was the same colour too. now i dont no if this is right but i just branched off it, hope it doesnt smash the fuse up. this is plug B159 (grey) its the very bottom plug that goes into the back of the cabin fuse box (terminal 9):

Posted Image


This is where i mounted the ecu and connected it up. again not sure if it the right place but it fits so ill leave it there:

Posted Image


I then ran the the pink park brake cable and the 3 cables that run the thumb wheel. cut,stripped, soldered, and wraped:

Posted Image

Location of park brake cable and where the connection was made:

Posted Image


mmmmm thumb wheel....

Posted Image

#76 Alex

Alex

    NO AIDS

  • Members
  • PipPipPip
  • 8,230 posts
  • Gender:Male

Posted 24 December 2011 - 10:38 PM

Very nice.

I really like the way you're building this up.

#77 Nizza

Nizza

    Trusted Member

  • Members
  • PipPip
  • 120 posts

Posted 25 December 2011 - 07:34 PM

thanks alex much appreciated. im liking the DP is that a 70's leone?


pretty bored at the moment seeing as everyones closed during the christmas break and im still waiting on my front brembos to be returned to me after thier helicoiling. i ended up buying some VHT caliper to test out the match....turns out it looks like absolute shit,nothing alike

Posted Image


so after much annoing research ive found 2 posible paint codes.

ones from Honda : Honda inca pearl Y61P (aka touch up paint BUT i dont no if its hi-temp paint so pretty much pointless)
the others apparently from US subaru : 2000M gold pour roues (which as a paint code makes no sense)

so once everyones back to work ill just hav to go down to the auto paint shop and get them to match the stupid thing...its a shame too coz its the only thing stopping me from putting the car together so's i can drive it. im realy realy stinging to drive it...im having boost withdrawals :blink:

#78 Nizza

Nizza

    Trusted Member

  • Members
  • PipPip
  • 120 posts

Posted 31 December 2011 - 02:45 PM

took a caliper to a place called VG auto paints in Giraween, the bloke there said he'll match the colour pretty much exactly prep and spray em for $300 minus sand blasting, which i thought was pretty good for a pro job.

so while im still waiting for the front calipers to be finshed so i can blast them i put in all the hubs and cvs, hand brake assys in and fixed a few issues that arose from the front ABS ring location.

so i head down to suzukisuper in Auburn for a new hub end cv seeing as the one that i recieved had a bit of mushrooming going on and the hubnut wouldnt fit on. i get home install it after way too many minutes and noticed that where the ABS sensor sits on the hub (r180 hubs from the GD) it reads the tone ring thats meant to be on the CV. the GC's have thier sensor within the hub like the rears.

so after i wasted time and money on that i had to head back to buy 2 new hub end cv's with the abs ring. heres what i did:

heres the old GC R180 vs the new GD R180 w/abs ring:

Posted Image

simply cut thru the boot ties with a set of snips and pull back the boot:

Posted Image


the only thing holding those splines in is a little lock in ring, a few mild taps with the hammer should pop it out. clean ALL the old grease out :

Posted Image

Pack the new joint with grease supplied, really pack it in there, rotate it, pack more in...

Posted Image


insert the spline shaft into the new joint. now with a flat head screw driver work 360 degrees 'around' the clip pushing it into the its groove while maintaining pressure on the joint to lock them together.once the clip is in the right place the shaft will further slide down untill no splines are seen:

Posted Image


once thats done stack on a tad more grease:

Posted Image

slide the boot back up and tighten up new ties with this stupid tie tool (like $6 from robbos):

Posted Image

i reused the OE boot simply beacuse it was in real good nick and the quility of these boots are far better than any crap that came with the replacment cv.


also :
  • reused old speed sensor
  • fixed that bolt that came out of my turbo
  • re attached exhaust
  • reassembled handbrake assy/hubs front and rear
  • reattached steering arms
  • replaced steering rack boots
the cars virtually ready to crank apart from a tiny tiny list of things:
  • paint brembos and install braided lines
  • new rotors and pads
  • 4 additional gearbox bolts
  • one handbrake clip that i lost somewere but hopefully turns up


#79 Nizza

Nizza

    Trusted Member

  • Members
  • PipPip
  • 120 posts

Posted 31 December 2011 - 03:04 PM

fronts done:

Posted Image

and rears done (looking a whole lot cleaner than when i first got them):

Posted Image

#80 Nizza

Nizza

    Trusted Member

  • Members
  • PipPip
  • 120 posts

Posted 20 January 2012 - 05:14 PM

finally got the car to a stage were i can start the motor, cranked it over the other day,and again today but decided to engage the gears to see how the gearbox was.

everything works fine, no bad noises or grinding, but noticed different wheel speeds when comparing the fronts and rears, im guessing this is normal altho the speeds remained the same even when i adjusted the dccd to full lock and when i used the handbrake the rears kept spinning.

from what i can gather the dccd controls torque delivered to the wheels not nesessarily the wheel speed, so can someone enlighten me on if the car is opperating normally or isnt the dccd working?

fyi the car is still on stands with no brakes.

any info is much appreciated

cheers
Nick


0 user(s) are reading this topic

0 members, 0 guests, 0 anonymous users