Noice! Sucky job but I'm sure the lack of leak makes you happy to have done it :-) Where'd you buy the turbo studs? Are they just regular exhaust bolts?
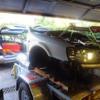
Gen3 outback - TT conversion
#381

Posted 22 March 2017 - 06:35 PM
"Installation is the reverse of the removal procedure."
BH9 02-05 / BD9 07-14 / BE5 14-> / GGA 18->
2001 Legacy B4-RSK / 1999 ZX-9R C2
#382

Posted 22 March 2017 - 07:35 PM
studs were generic ones off fleabay from Taiwan - for VF turbos. They're a little longer, but no matter.
Certainly good not getting whiffs of exhaust in the cabin any more - but it took a while to burn off the stink of the heat wrap.
#383

Posted 13 August 2017 - 10:10 PM
Holy crapoley!
just spend the better part of a day and half replacing all the rear suspension bushings on one side of the car.
Difficult to get to most of the bolts -- and they all needed a heave on the old breaker bar to undo, or the old jack under a spanner. Busted my old imperial 3/4" ring spanner (the ring just snapped and flew off). I gave up on the lower shock bolt, as I couldn't undo it, so had to do the front arm bush in place -- what a shitfight.
They're pretty hard to remove -- I had a good technique of heating up around the bush till the rubber lost its grip, then pulling the core out with locking pliers; the steel bush shells were a prick to cut and knock out.
Pressing in worked 'ok' with a long bolt, steel bar with a hole in it, and various sockets/washers/bolts - but I need to get a better tool or bodged bolt and plate setup before I start on the other side.
Fortunately, I cheated and bought replacement front lateral links so didn't need to re-bush them.
I can see why people go for poly bushes -- just for ease of installation.
#384

Posted 14 August 2017 - 01:53 PM
Glorious non multi link rear suspension master race

#385

Posted 14 August 2017 - 06:07 PM
Glorious non multi link rear suspension master race
Multi link is the way of the future.
#386

Posted 15 August 2017 - 05:30 PM
Multi link is the way of the future.
Maybe if you have 3 chromosomes
Anyway, torqued to spec is just the manuals way of saying 'we couldn't get it any tighter, see if you can'.
#387

Posted 15 August 2017 - 08:14 PM
I found the air wrench most useful for removing bolts/nuts during disassembly after cracking them by hand. This tool was also good for doing them up then hand tightening.
I was impressed with how well ours came apart and went back together again. Yes we used three piece bushes but after setting up a makeshift press I don't think this would've been too difficult to pull off with steel cased bushes.
How's it all going anyway, got that second side done yet?
Cheers
Bennie
https://www.imageshack.us/i/po1BKrxbj

El Freddo's Pics - El_Freddo's youtube
#388

Posted 27 August 2017 - 07:12 PM
Knocked off the second side today.
Ended up going with poly trailing arm bushes -- they just pop in by hand. All the others are OEM or Febest rubber.
Quite a few of them were shot with visible cracks.
I had the bush removal and installation down by the end of it (fat lot of good that is!).
Tricks for removal:
- heat the old arm with bush with a propane torch (or I used a $2 shop propane camping stove). Get it hot enough so it starts to smoke, then the centre steel bush can be twisted loose and knocked out of the rubber. The aim is to destroy the rubber/steel bond, not burn the rubber out.
- With a hacksaw - cut two slots about 5mm apart in the steel shell (careful not to cut too far). Peel that back with a hammer and old screwdriver, then knock out the bush
- make sure you clean the arm up with a dremel &/or wet and dry
Tricks for installation:
- put all the new bushes in the freezer overnight
- heat up the end of the arm again
- have your mini press (long high tensile bolts, suitably sized washers and sockets etc) for pressing the new one in.
- work quick before the heat equalises -- it'll get harder.
My only struggle today was with the lower arm inner bush -- I had a long threaded piece of rod, but munted that when pressing in (it wasn't high tensile), and didn't have enough short fat sockets or long enough bolts. Ended up drilling a hole through one of the old lateral links and using that for one end of the press. Worked well.
The non-shelled poly bushes are a millionty time easier to put in.. the trailing arms ones just popped in.. so consider that.
Be very careful reinstalling the body bolts on the trailing arm mounts. They're easy to mis-thread. if they're not spinning in with your fingers, stop! I misthreaded one a little way in on the first side and had to clear it out with a tap (M14x1.5). Trick there is to have lots of leveraging devices (jack, ratchet straps to front wheel to pull hub forward, pry bar etc) to make sure the bracket is completely lined up before you go popping the bolt in.
Took it for a spin and she feels much tighter. Didn't get much of chance to fang it, as the rain had hit.
I rewarded myself this afternoon after all the re-bushing by installing new rear speakers. I now have a very nice sounding set of Morel maximo splits up front and same (but coax) in rear. I'm not a car audio nut, but its the best car audio I've heard. When I first put the fronts in, I was worried they sounded shit, as there seemed to be background noises I couldn't account for. When I listened carefully, I realised they were on the CD source.
Still running the stock HU and wiring, plan to hook up a suby Mcintosh amp I've got lying around and re-wire at some point in the future.
ps: with all the crawling around and hard to get-at, but seriously tight nuts, I reckon this job is worth dropping the rear subframe for.
#389

Posted 27 August 2017 - 07:33 PM
I thought you would've had this sorted by now! Did you do it all on your own? I had dad removing old bushes and replacing with the new ones where pressing in was required.
Cheers
Bennie
https://www.imageshack.us/i/po1BKrxbj

El Freddo's Pics - El_Freddo's youtube
#390

Posted 27 August 2017 - 08:19 PM
nah - knocked it all out myself in the driveway. Had to leave it a couple of weeks until I found a free day.
#391

Posted 28 August 2017 - 05:46 PM
Sent from my VTR-L09 using Tapatalk

#392

Posted 07 July 2018 - 05:40 PM
Scored the alloy front LCA's... rest has been pretty stripped, but all four struts, both turbos, TMIC, BBOD and a few other random TT bits are still there if anyone wants them.
They had a sale on -- $65 for all you can carry, so I picked up other random pieces like plastic clips, carpet mats and some random underbody brace bits.
I don't know what brainless numpty installed the superpro anti-lift/caster front LCA rear bushes, but here's how they're installed (looking from rear):
 IMG_20180707_170336.jpg 192.34KB
8 downloads
IMG_20180707_170336.jpg 192.34KB
8 downloadsThey're supposed to look like this:
 superpro_1388.png 74.72KB
8 downloads
superpro_1388.png 74.72KB
8 downloadsOne LCA had a set of 2mm metal spacers between LCA and the bolt-on pivot shaft... presumably to correct for this idiocy.
No matter -- my bushes (rubber febest) are fairly new.
#393

Posted 08 July 2018 - 09:00 PM
"Installation is the reverse of the removal procedure."
BH9 02-05 / BD9 07-14 / BE5 14-> / GGA 18->
2001 Legacy B4-RSK / 1999 ZX-9R C2
#394

Posted 09 July 2018 - 08:57 AM
Duncan was the steering wheel still there?
nope - long gone.. the whole dash has been ripped out.
#395

Posted 09 July 2018 - 02:45 PM
LCA's bolted up on Sunday -- finally bought myself a (cheap) rattle gun, what a time-saver!
Old swaybar links (dogbone-type) were seriously shot.
#396

Posted 10 July 2018 - 12:32 AM
Cheers
Bennie
https://www.imageshack.us/i/po1BKrxbj

El Freddo's Pics - El_Freddo's youtube
#397

Posted 10 July 2018 - 08:09 PM
LCA's bolted up on Sunday -- finally bought myself a (cheap) rattle gun, what a time-saver!
Old swaybar links (dogbone-type) were seriously shot.
Nice! Electric or pneumatic gun?
And thanks for the reply re steering wheel
"Installation is the reverse of the removal procedure."
BH9 02-05 / BD9 07-14 / BE5 14-> / GGA 18->
2001 Legacy B4-RSK / 1999 ZX-9R C2
#398

Posted 10 July 2018 - 09:06 PM
Nice! Electric or pneumatic gun?
And thanks for the reply re steering wheel
erectric.
It's only a bunnings-special Ozito brushless 1/2" -- but says it does 215Nm. Part of their new power-X range, which is supposedly designed by a better mob than their previous tools.
I've got the Li-Ion packs for a hedge trimmer already.. and Ozito has a 5 year no questions replacement warranty.
Not enough torque to crack the body bolts, but speeds up getting things on and off enormously. Even the wheel nuts are eleventy times easier.
#399

Posted 04 October 2018 - 03:12 PM
I had to do a mad dash down to Melbourne last week -- managed to get a tiny chip in the windscreen on the return trip which rapidly developed into a 1ft crack as I drove along the Hume.
New windscreen went in this arvo...
#400

Posted 03 January 2019 - 10:29 AM
Also tagged with one or more of these keywords: gen3, outback, twin turbo, swap, sleeper
Model Specific →
Liberty / Legacy / Outback →
Builds and Projects →
Tim's Liberty RS30+Started by timslib, 08 Jan 2021 |
|
|
||
Suby Club Community →
General Discussion →
09 Liberty vs 09 Outback - I need help picking a carStarted by RedRocket13, 27 Feb 2020 |
|
|
||
Outback
Model Specific →
Liberty / Legacy / Outback →
Electrical/Electronics →
H6 Dash Cluster Speedo install into a 2.5 OutbackStarted by Max English, 22 Jan 2018 |
|

|
||
Model Specific →
Liberty / Legacy / Outback →
Engine / Driveline →
Gen3 sedan and wagon rear end the same?Started by El_Freddo, 30 Apr 2017 |
|
|
||
Model Specific →
Liberty / Legacy / Outback →
General Discussion →
2005 Subaru Outback 3.0 R Exhaust Systems?Started by asb, 09 Jan 2017 |
|
|
0 user(s) are reading this topic
0 members, 0 guests, 0 anonymous users


